
LookAtMyHorse
Senior Member
- Thread starter
- #1
I did this this weekend, and it was a huge improvement. The rear of the car is now *much* quieter, and the low-end-bass and mid-bass are crisper and fuller than stock. This won't hit you like a 10" or 12" sub with a proper amp and enclosure, but it's definitely worth it for a $60 sub and some sound deadening. Honestly the sound deadening costs 3x as much as the sub and it's more than 3x the work... you can just do the sub for a cheap and easy upgrade.
Again, this sub is only $60 and doesn't require you to cut up the ELS-3D enclosure to mount it. Other folks have been using a $200 Rockford Fosgate sub, and you have to hack up the stock sub enclosure, and I wanted this to be cheaper and less desctructive. I'm going to provide Amazon links for the stuff I needed to buy, but just get whatever you need wherever you can, I don't work for them.
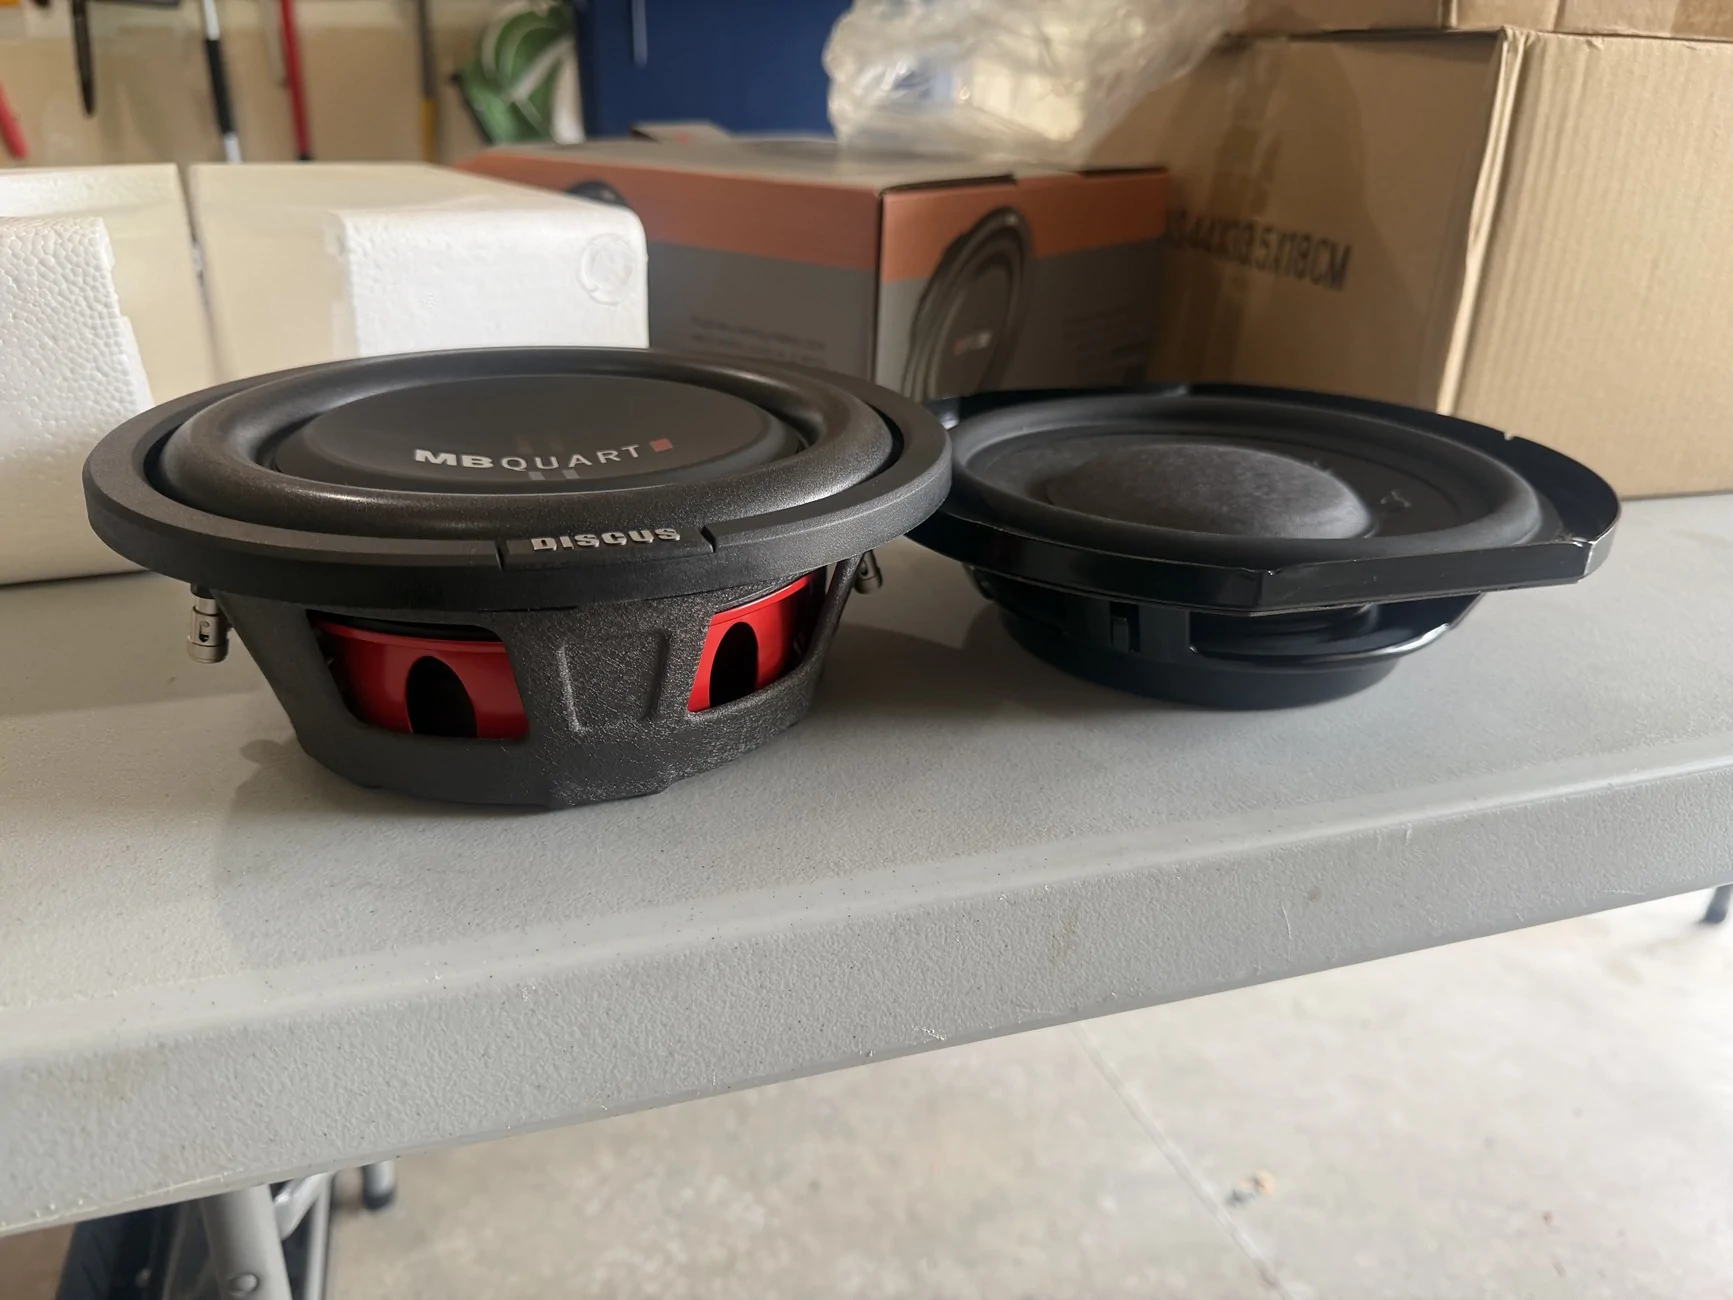
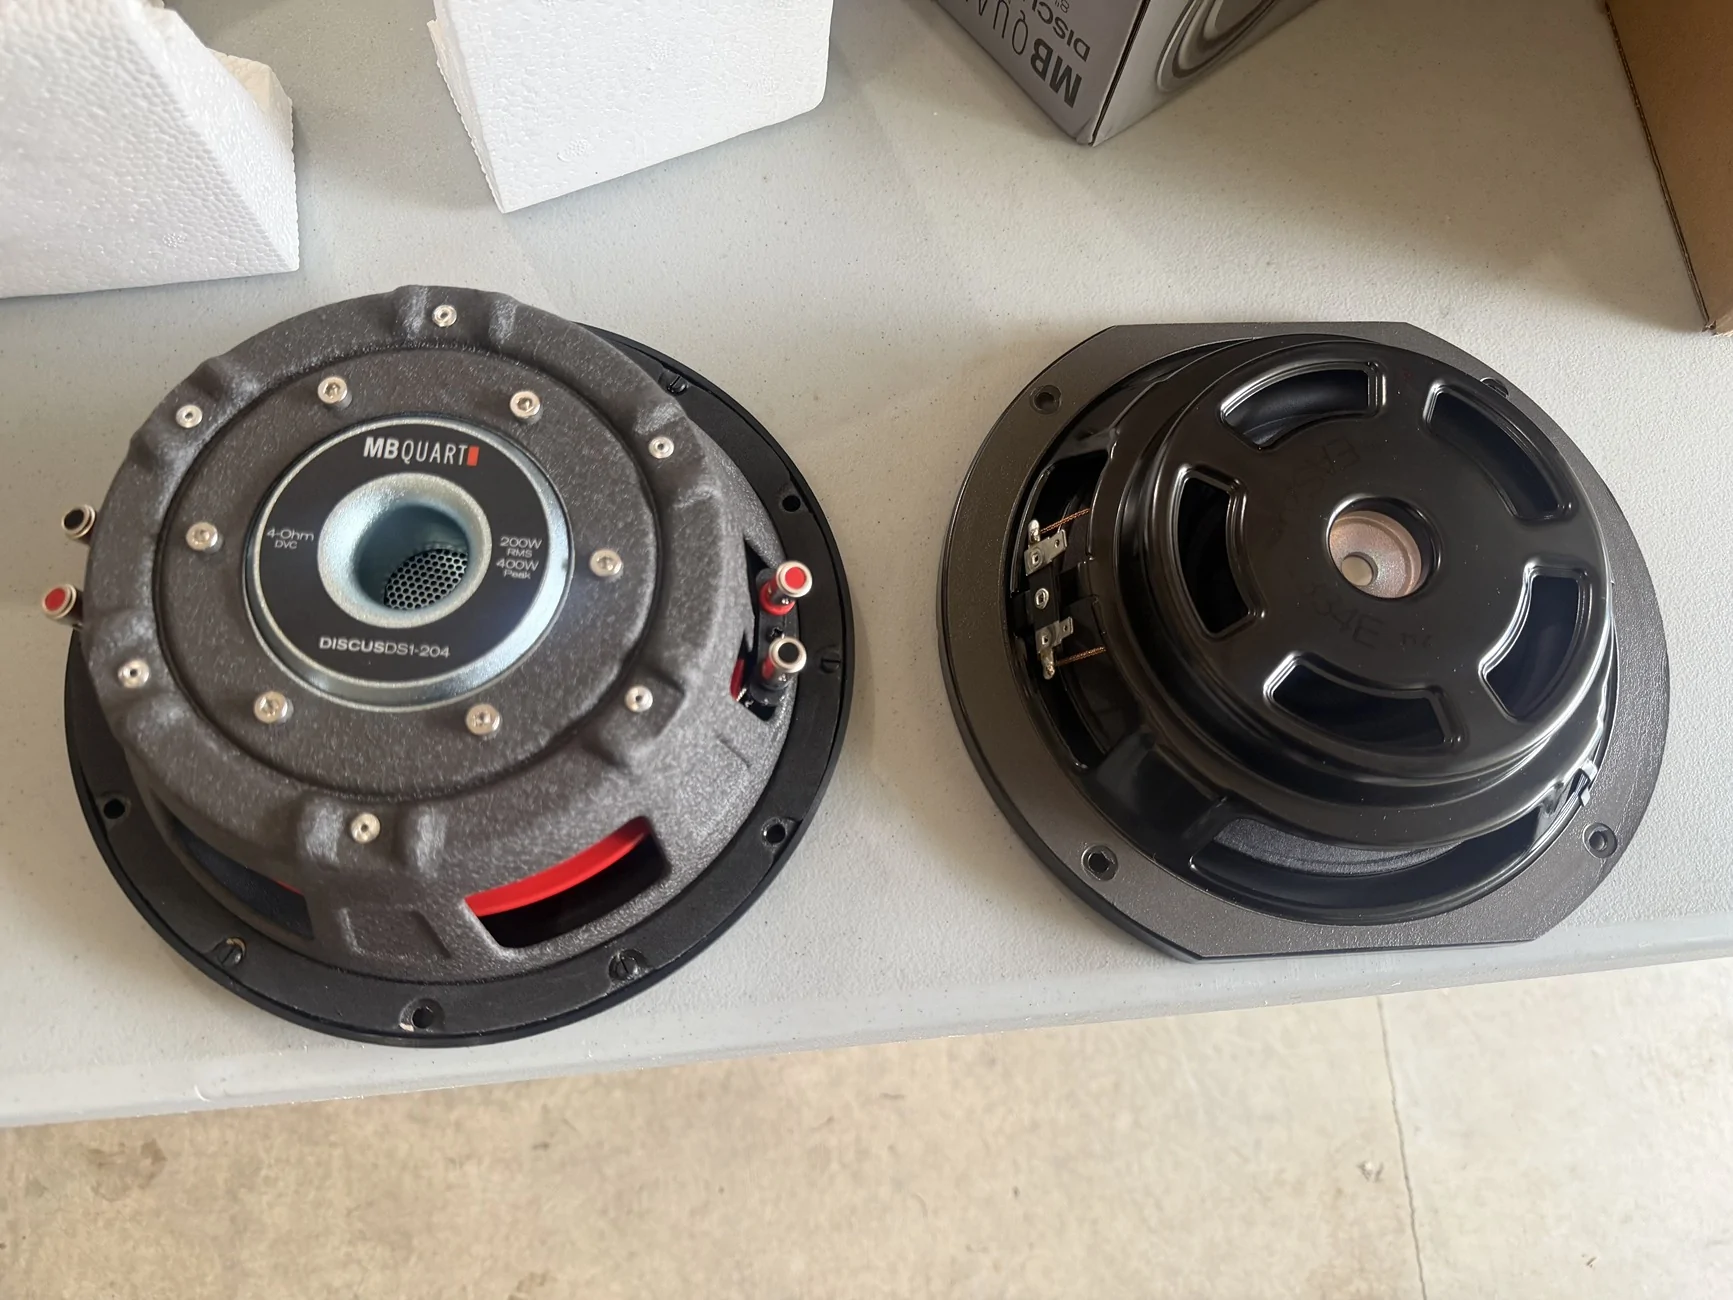
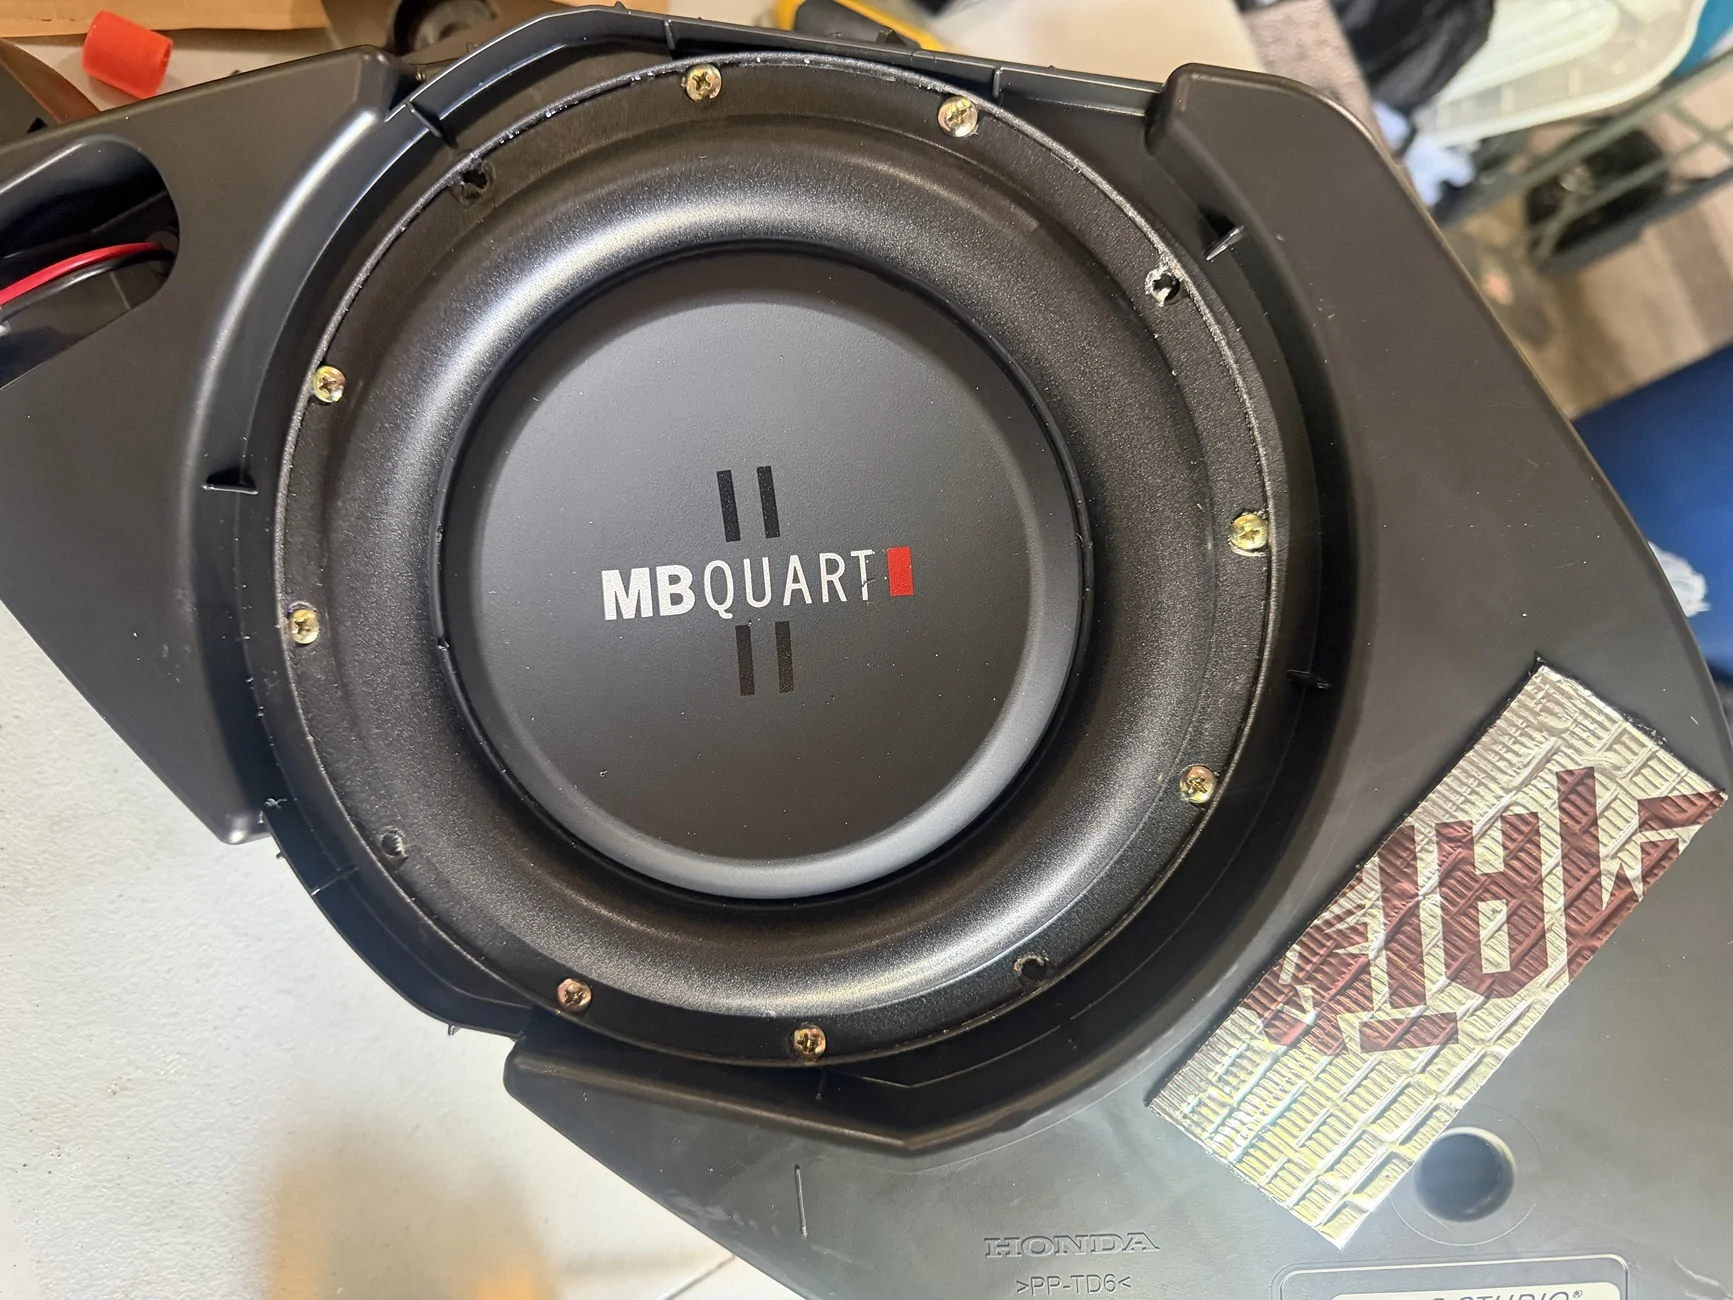
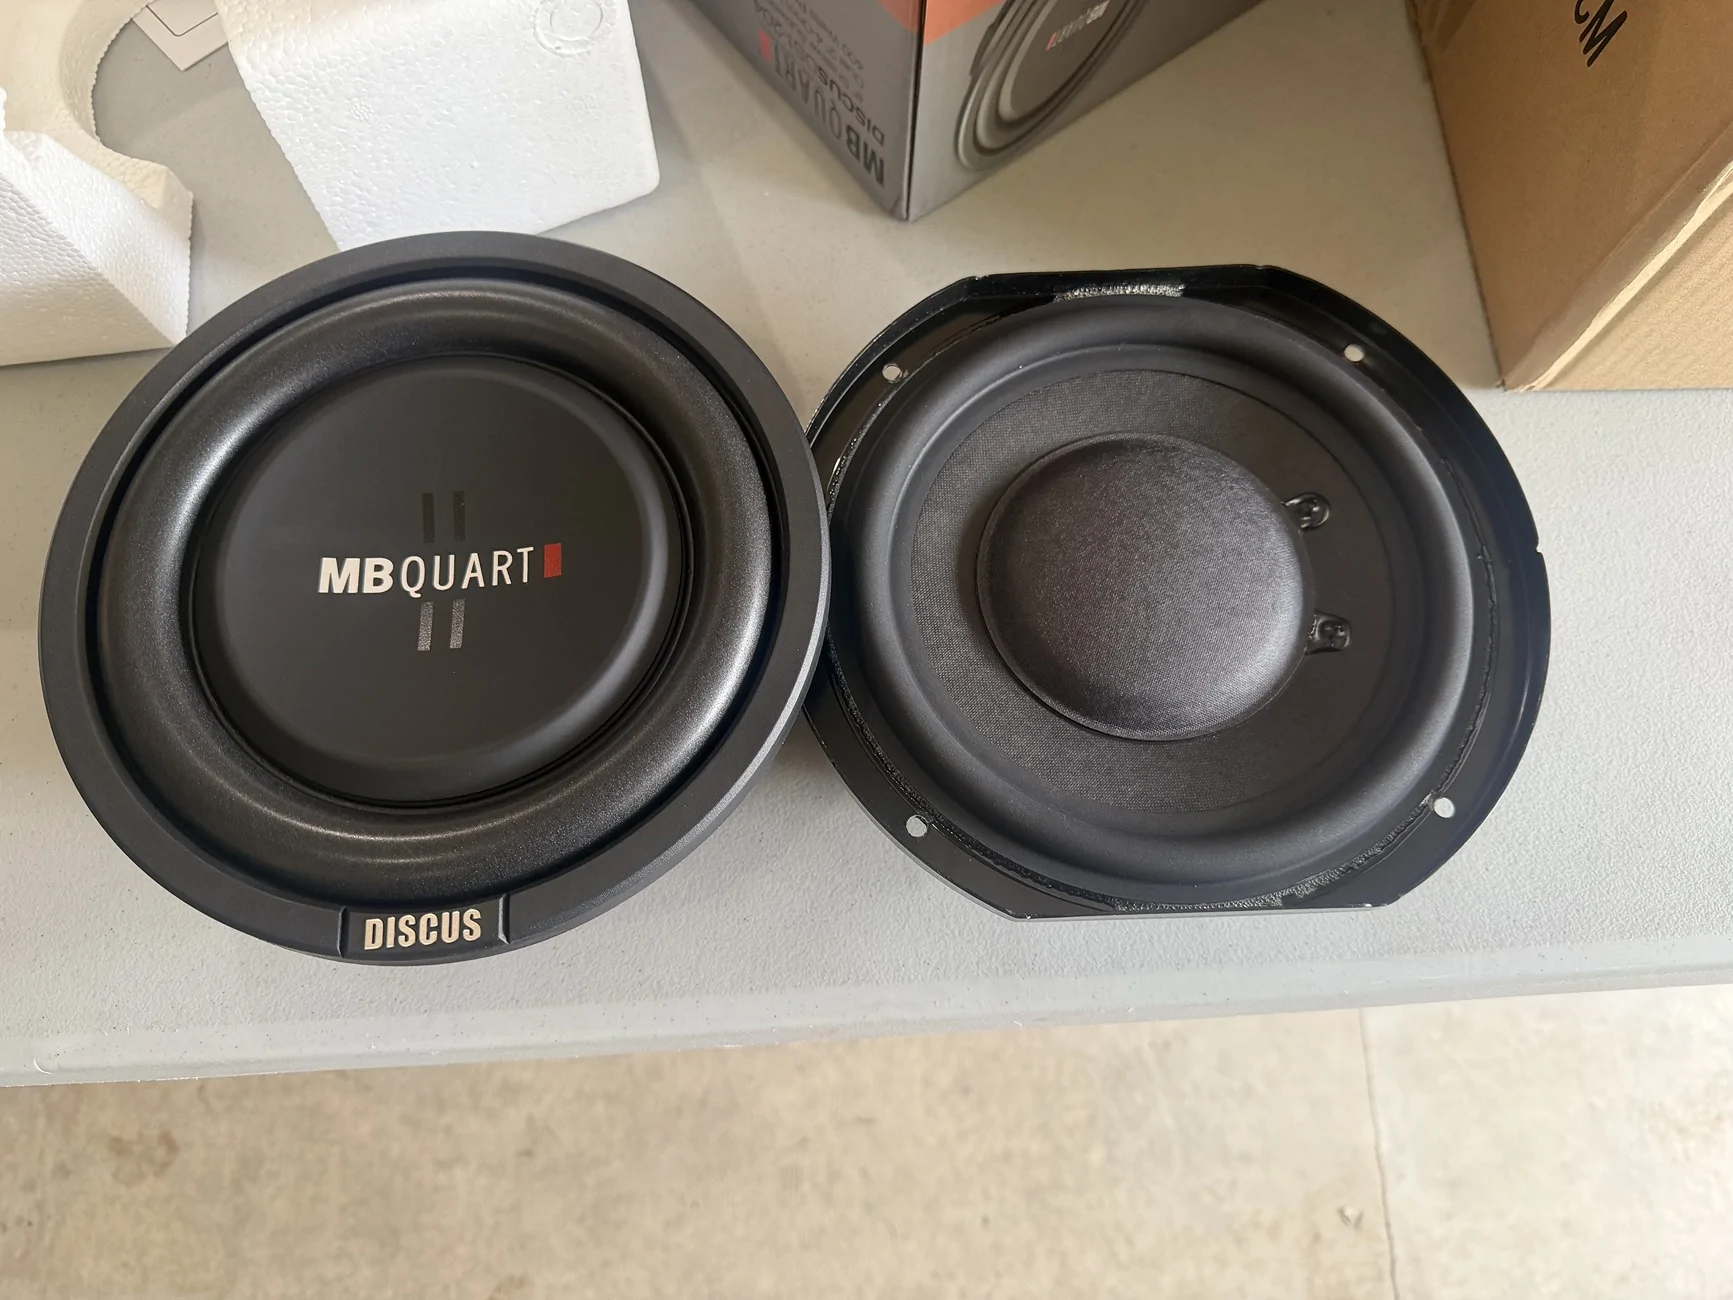
New vs Old.

Ingredients:
Here's the thing. These Kilmat alubutyl sheets aren't insulation, they're panel dampeners. They add spongy mass to an otherwise rigid plane of metal or plastic, which dampens how much NVH they transfer into the passenger cabin. You only need to get about 60% of a panel covered for this stuff to do its job, any more than that and you're just adding weight for diminishing returns. Long story short: you don't need to blanket every square inch of your panels.
You know where to put the sound deadener by knocking on a metal or plastic panel with your knuckle. If it's high pitched and loud then roll on a swatch of deadener and knock on it again. If the result is a much quieter and lower-frequency sound, then you've accomplished your goal. Honestly, I probably added a bit too much, but I'm happy with the results and it wasn't too much extra weight.
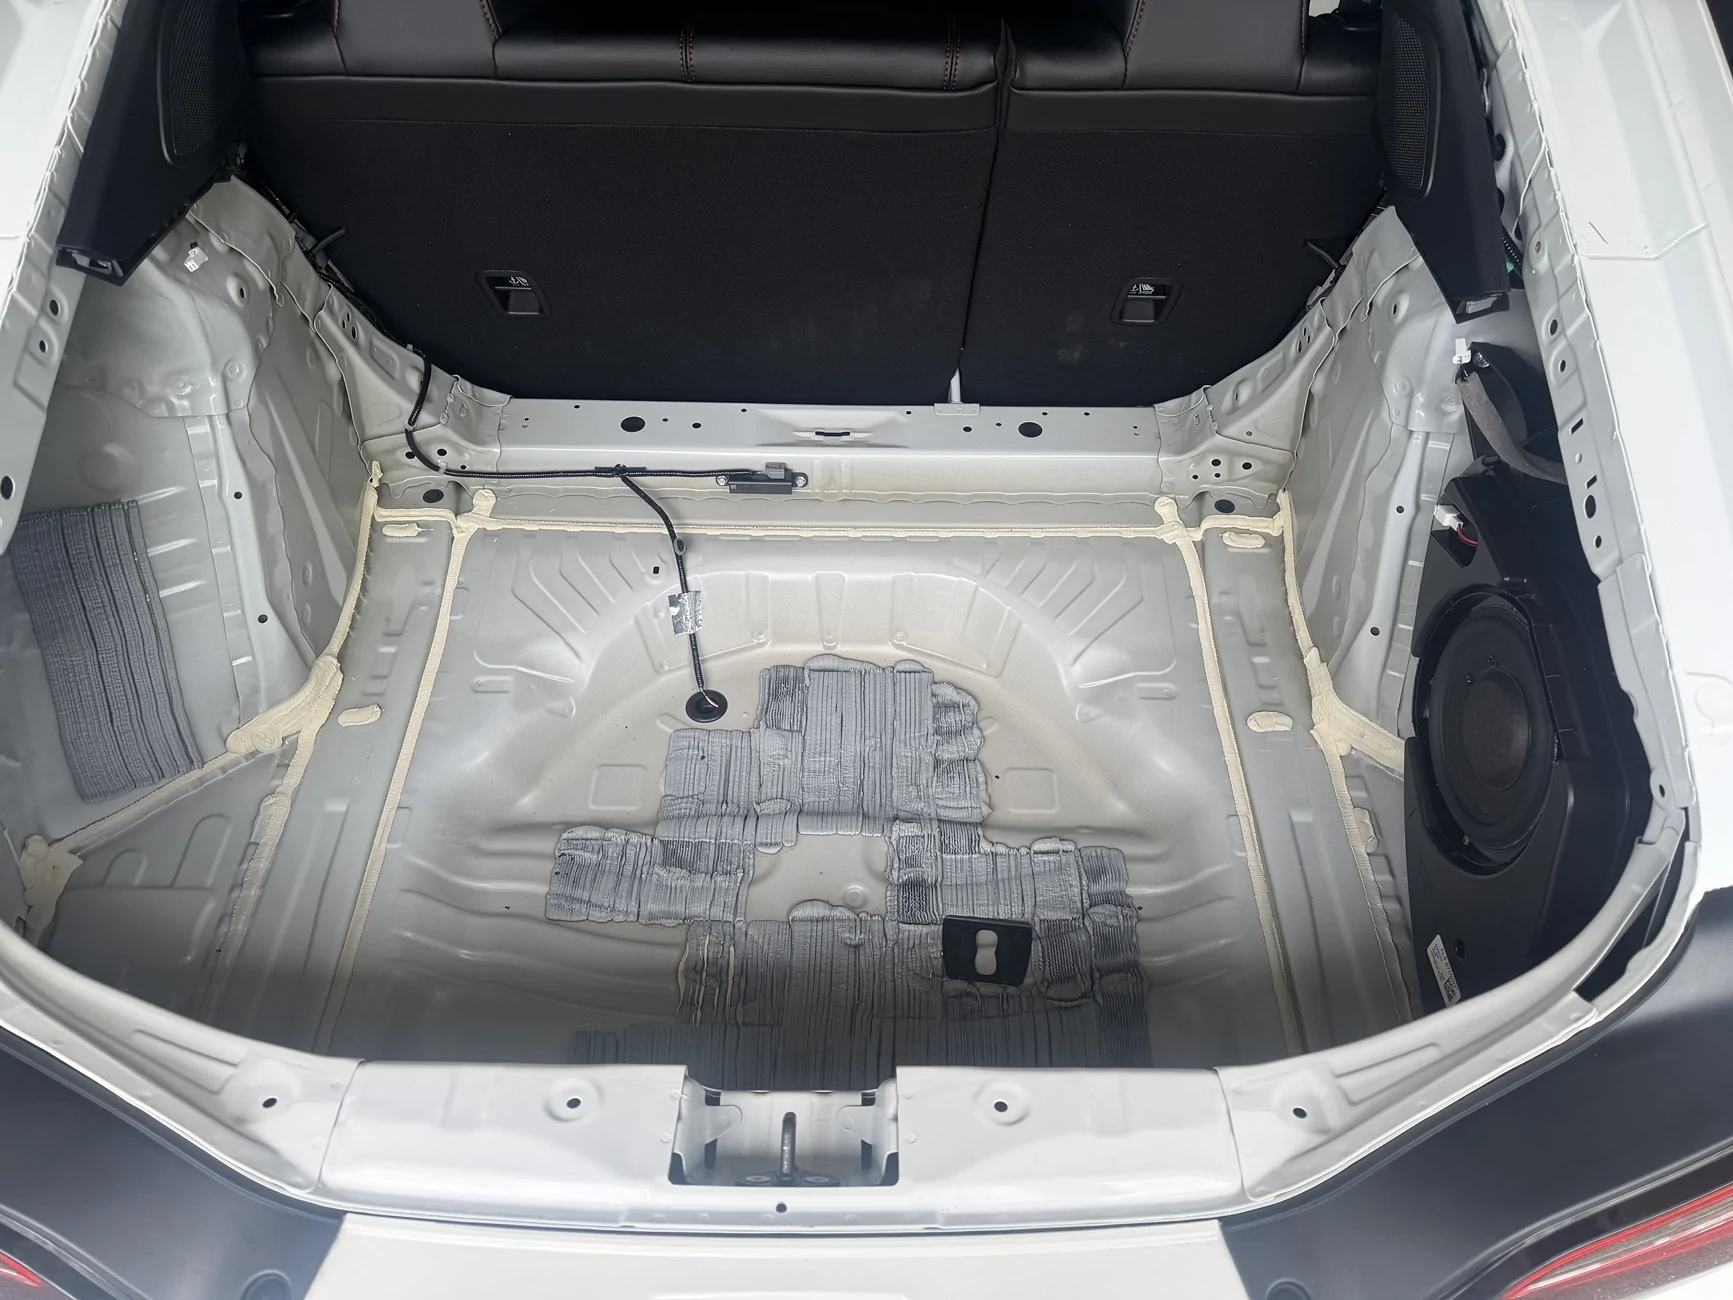
I did Killmat on the metal surfaces that sounded loudest with the knock test, and I did 3 pieces of the thick TroyStudio foam in the spare-tire well because it sounds like a tropical steel drum when you knock on it. I did the thin Aggsound insulation on the back of the plastic interior panels and the carpeted floorboard. I also added the TroySound under the rear seat, but it made putting the rear seat back in a pain in the ass, and the rear seat is mostly foam anyway. If I did it over again the rear seat would just be some Kilmat with a thin layer of Aggsound on top of it. Here's some pics (BTW, the factory gray foam sound deadening sucks ass and should be covered over with the good stuff):
Here's the back seat, and I marked where you SHOULDN'T put foam down because of clearance issue. I cut them out where I marked in the picture, just don't do the TroyStudio stuff there, do Kilmat and Aggsoun

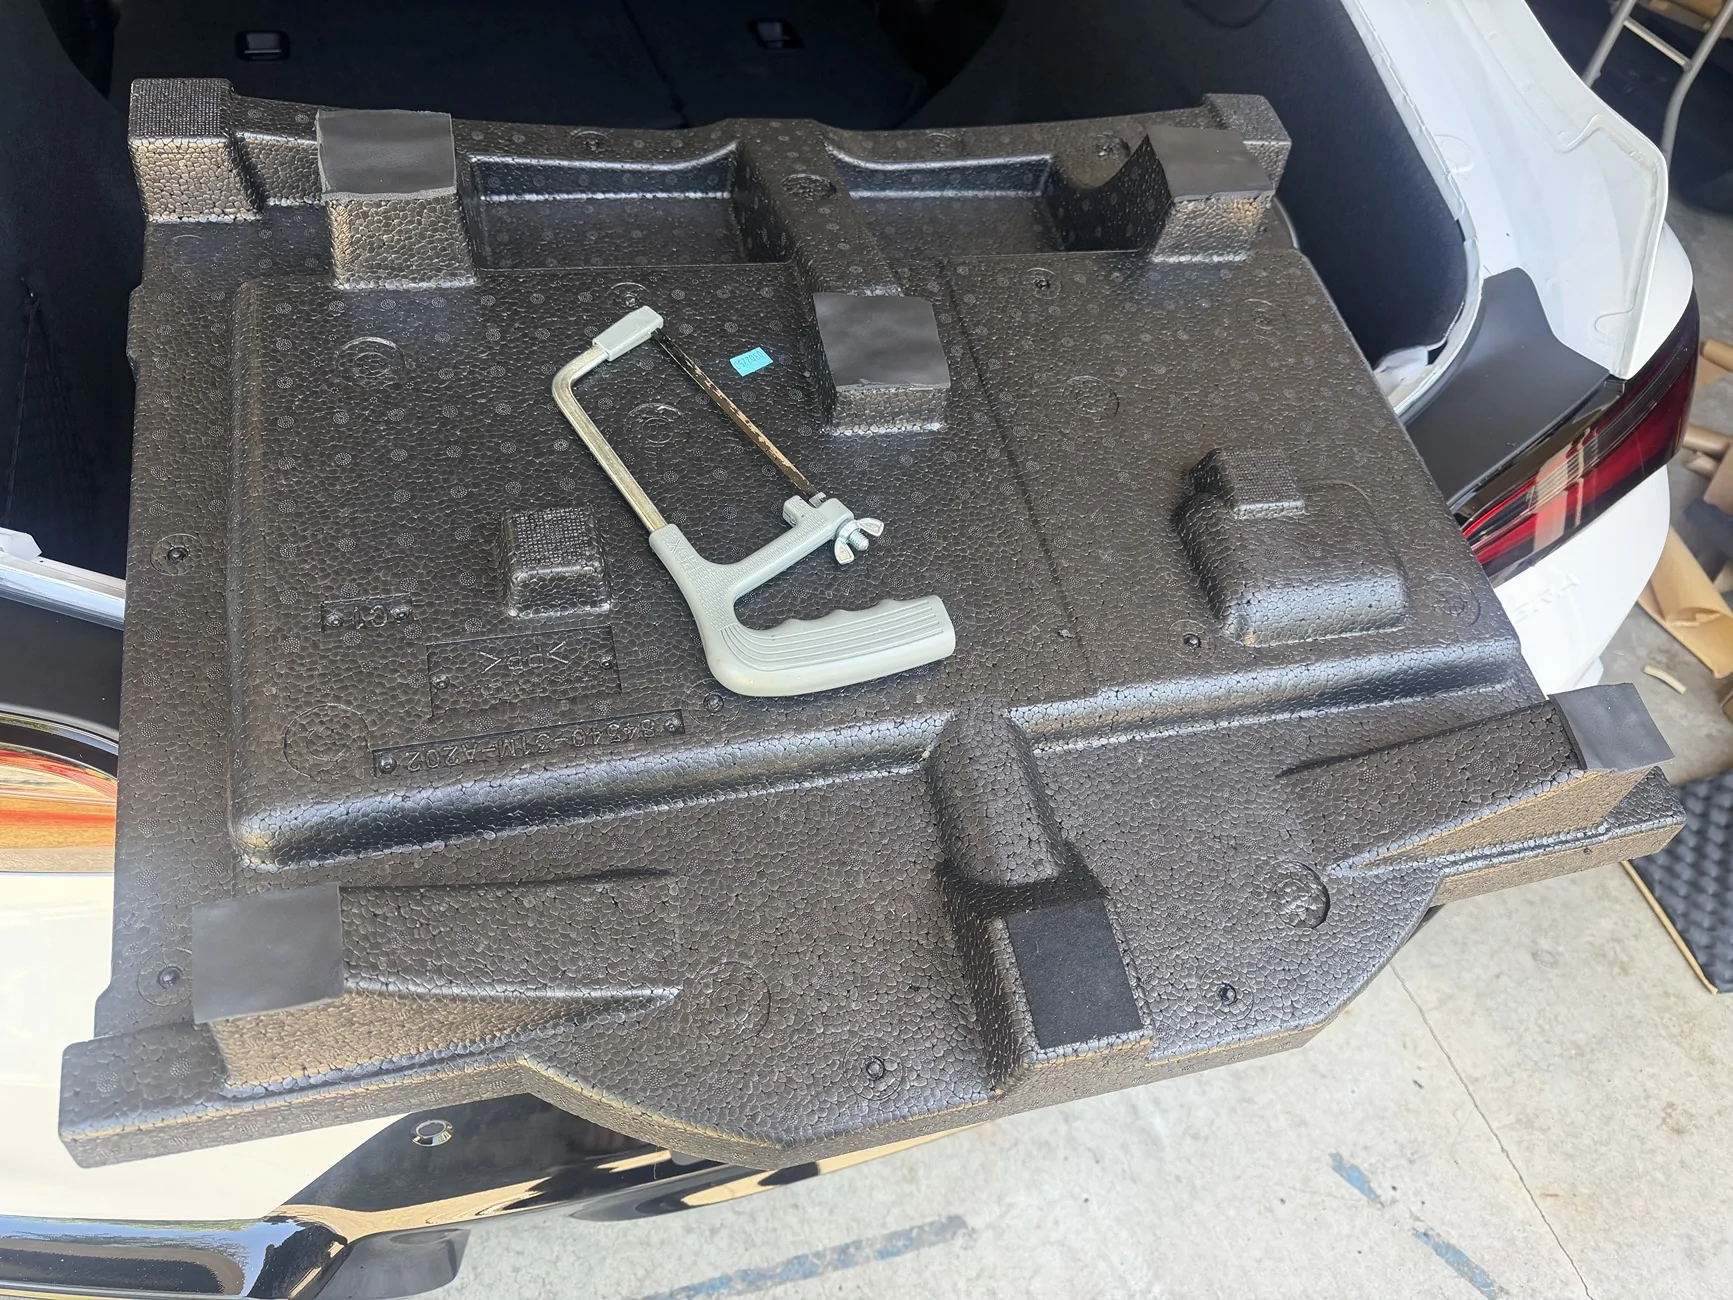
The last bit before putting everything back together it to alter the black styrofoam piece that goes into the spare tire well. I added about a 1/2" of foam padding in a few places, which made the styrofoam piece ride high and get wobbly. I used a little hacksaw (a bread knife would also work) to take some material off of the parts that were riding too high. I then stuck some Aggsound on the sawed-off parts to make them look nicer. This is just a trial-and-error process until the sytrofoam fits nice and snug again. EDIT: Do this step after you get the side panels back on so you know how high the styrofoam should be.
After that just reverse the removal process to get everything back in. You should have enough sound deadening left over to maybe do some doors or part of the main cabin floor.
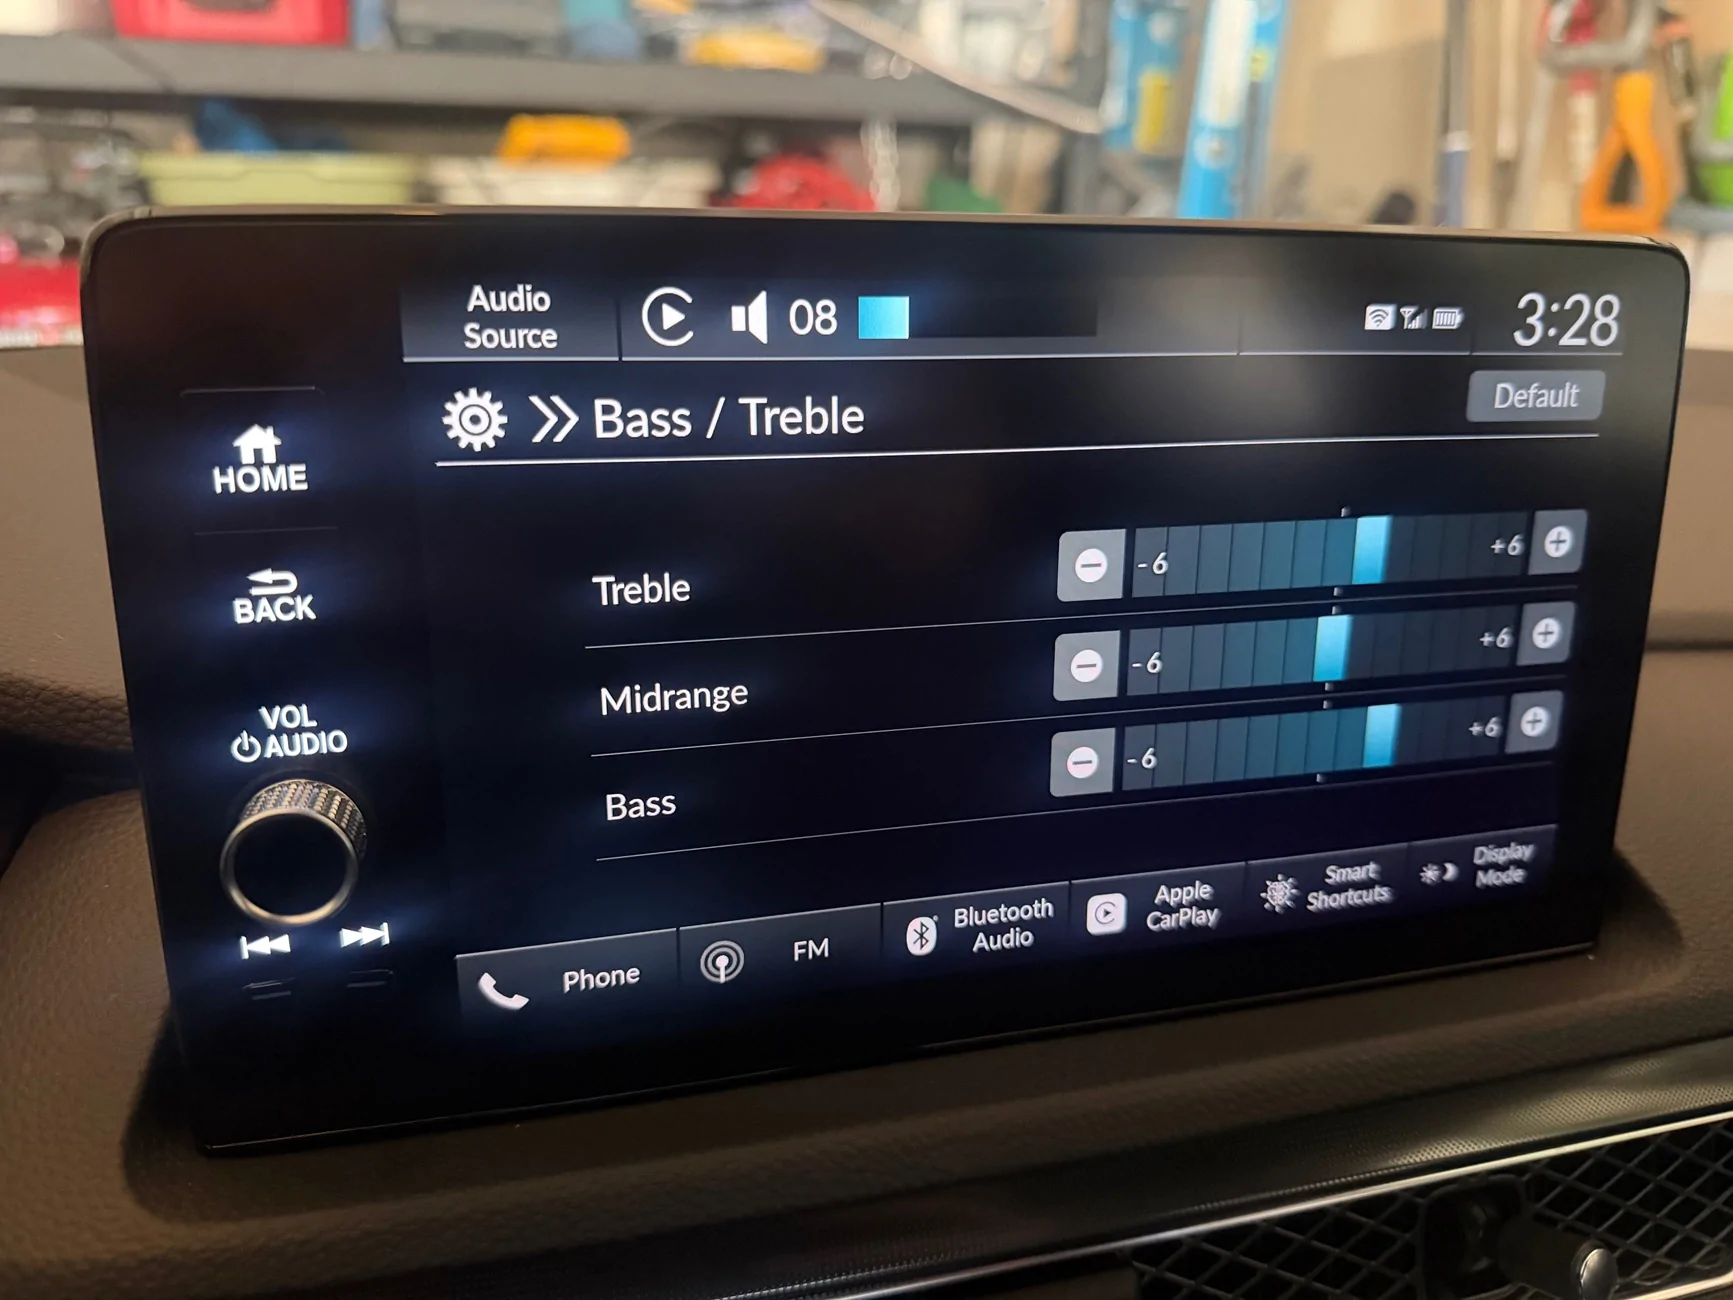
For sound settings I have DTS Neural Surround turned on, with Trebble and Mid-Bass flat, and Bass at +2 gain (to send a bit more power to the beefier subwoofer). This seems like a pleasant balance but YMMV.
Here's a video of the sub bumping to Redbone. (Edit: I guess little videos don't work)
Again, this sub is only $60 and doesn't require you to cut up the ELS-3D enclosure to mount it. Other folks have been using a $200 Rockford Fosgate sub, and you have to hack up the stock sub enclosure, and I wanted this to be cheaper and less desctructive. I'm going to provide Amazon links for the stuff I needed to buy, but just get whatever you need wherever you can, I don't work for them.
New vs Old.
Ingredients:
- MB Quart DS1-204 - 8" sub with DVC 4ohm - https://a.co/d/0iXoUg9I
- 8" Subwoofer Foam Surround - https://a.co/d/08TZt3oW
- Some screws for the sub - I used 8x of the 8mm x 16mm x 4mm - https://a.co/d/01KR7ZWw
- Kilmat 80mil deadener - https://a.co/d/0bsOckCM
- Aggsound sound deadener (thin stuff) - https://a.co/d/06MdaEnZ
- TroyStudio soundproof foam (fat stuff) - https://a.co/d/0cvClaDL
- Approximately one foot of 18awg speaker wire (stranded copper, not solid)
- 1/4" drive ratchet with 6" extension
- 10mm deep socket (keep your eye on this MFer, it will run away)
- 10mm ratcheting wrench (for the rear seat bolt, optional)
- Sounder deadener roller set - https://a.co/d/09bESy0i
- Trim tool set - https://a.co/d/03hsmqKt
- Electric drill with small drill bit for pre-drilling the holes to mount the sub. (Don't want to crack the enclosure)
- Philips screwdriver
- Small Torx bits (to remove the OEM sub screws)
- A glue stick or some other glue.
- Open the hatch and pull out the thick black weather-stripping that goes all the way around the top lip of the lower hatch area. Notice that the seam on the weather-stripping lines up with the hook for the rear hatch, remember that for when you have to put it back on.
- The metal cargo anchors are holding down the rear floorboard. Lift the metal anchors then use a plastic pry tool to hinge up the screw covers (they hinge the same direction as the metal anchors). Unscrew the screws, pop out the plastic bits out, then remove the floorboard.
- Remove the rear hatch panel (the lower big plastic center section that's against the rearmost side of the lower hatch). There's a black plastic rectangle that clips in around the hatch hook, pop that up with a trim tool in starting at the back and going forward. Once the black square is gone then lift straight up to remove the rear hatch panel.
- Remove the two big black styrofoam load-floor pieces that are under the hatch floor you just took out.
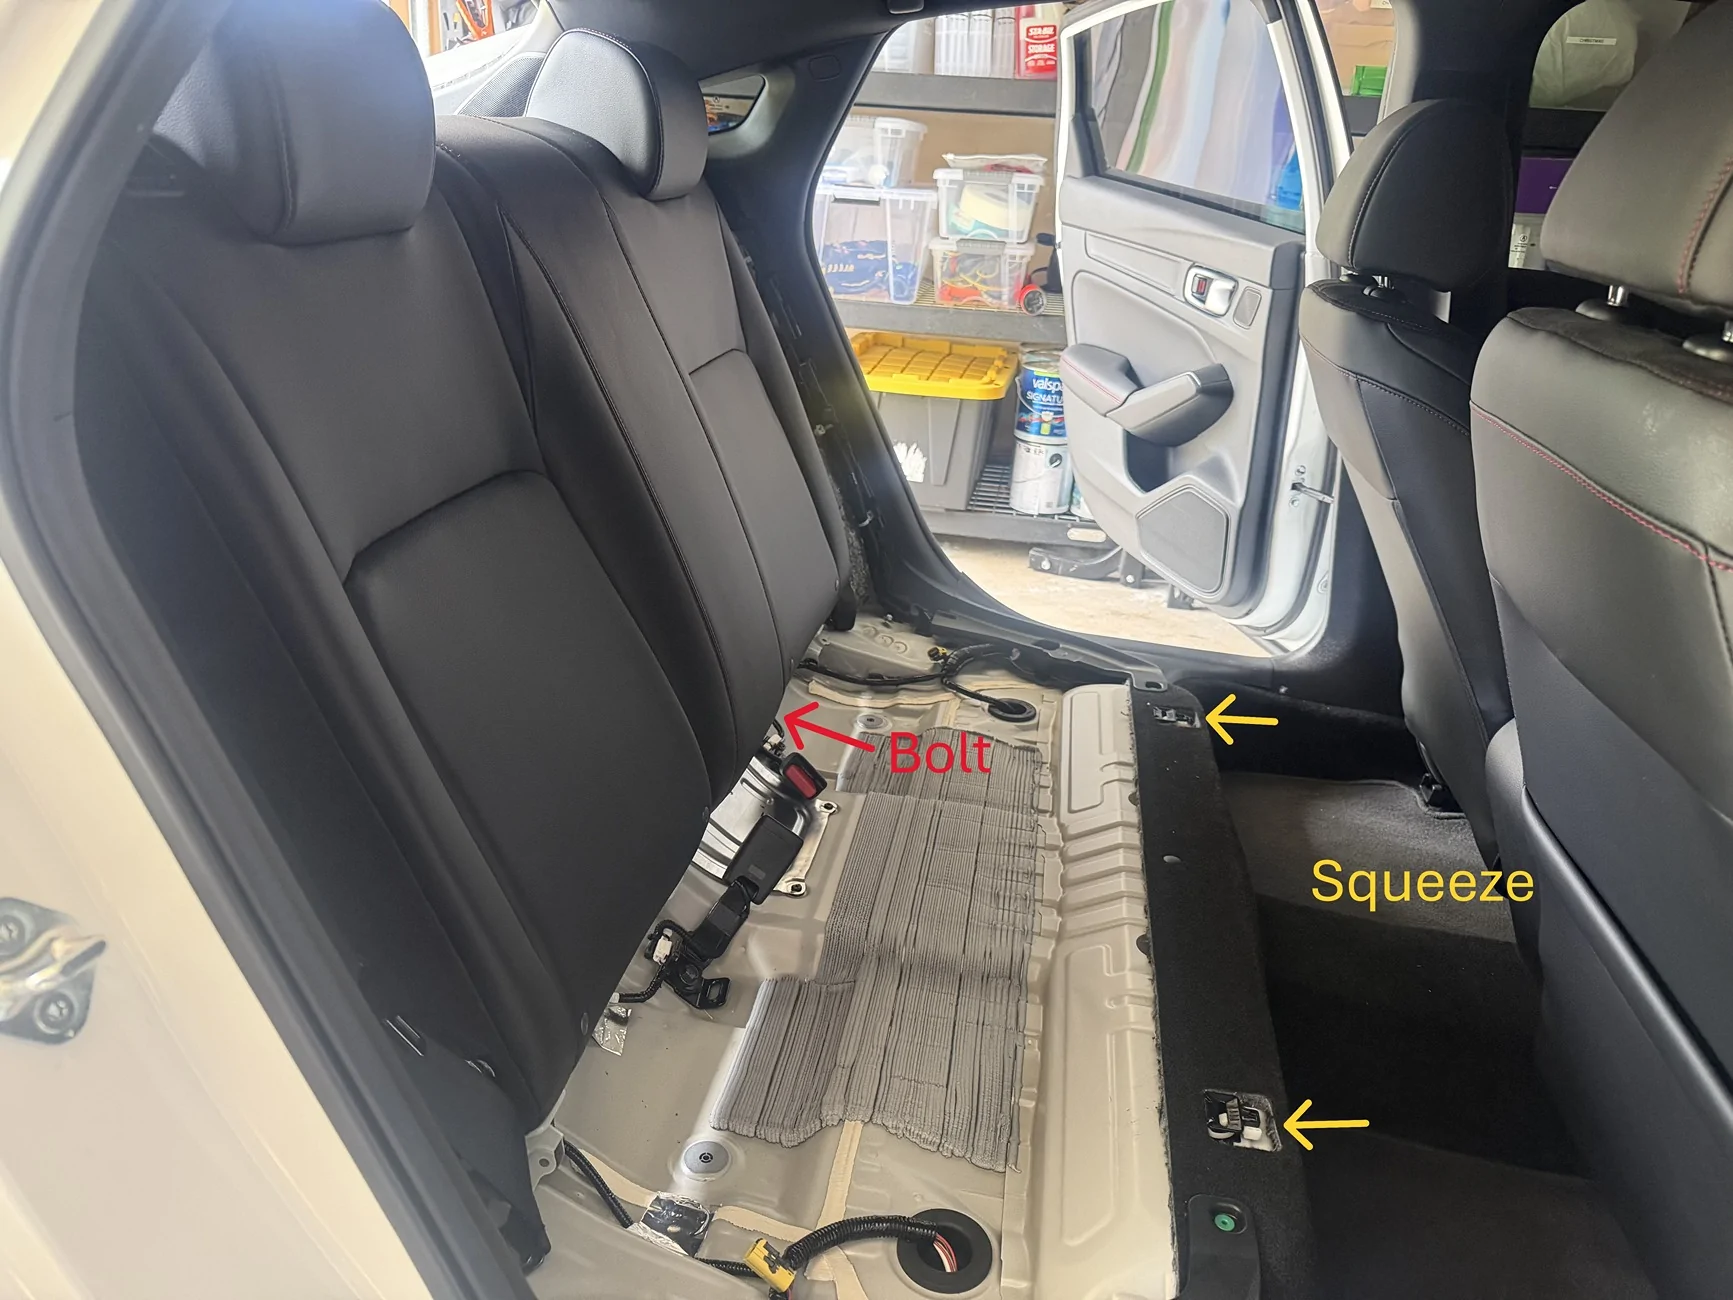
- Remove the rear seat bottoms. There's a single 10mm bolt in the middle of the driver side of the rear seat, fold the seatback down and use your 10mm wrench to get it out. Then there are two squeeze tabs in the front of the rear seat that you can reach with just your fingers and some swearing. Squeeze the tabs and lift up the seat cushion up.
- Remove the rear side-current airbags, these are located on the C-pillar next to the seatbacks. There are two 10mm bolts holding each airbacg on, one at the base, and the other under a little square cover panel halfway up the interior side of the airbags. Remove the bolts then undo the yellow wire connecter bottom by sliding the black plastic square on the connector away with your thumb. The connector pulls out the same direction the black plastic piece on it slides.
- Now you are clear to remove the big side trim pieces of the hatch area. There are approximately 4 clips along the top (pry the panels away from the wall, towards the center of the vehicle). There's also a little white wire clip on each side for the LED lights, just push down on the clip in the rear and pull out. You do not need to remove the upper-most trim pieces that have the little tweeters in them.
- For the sub enclosure there are two 10mm nuts, two 10mm bolts, and one wire harness. Remove all of that and take the sub enclosure out of the car for surgery.
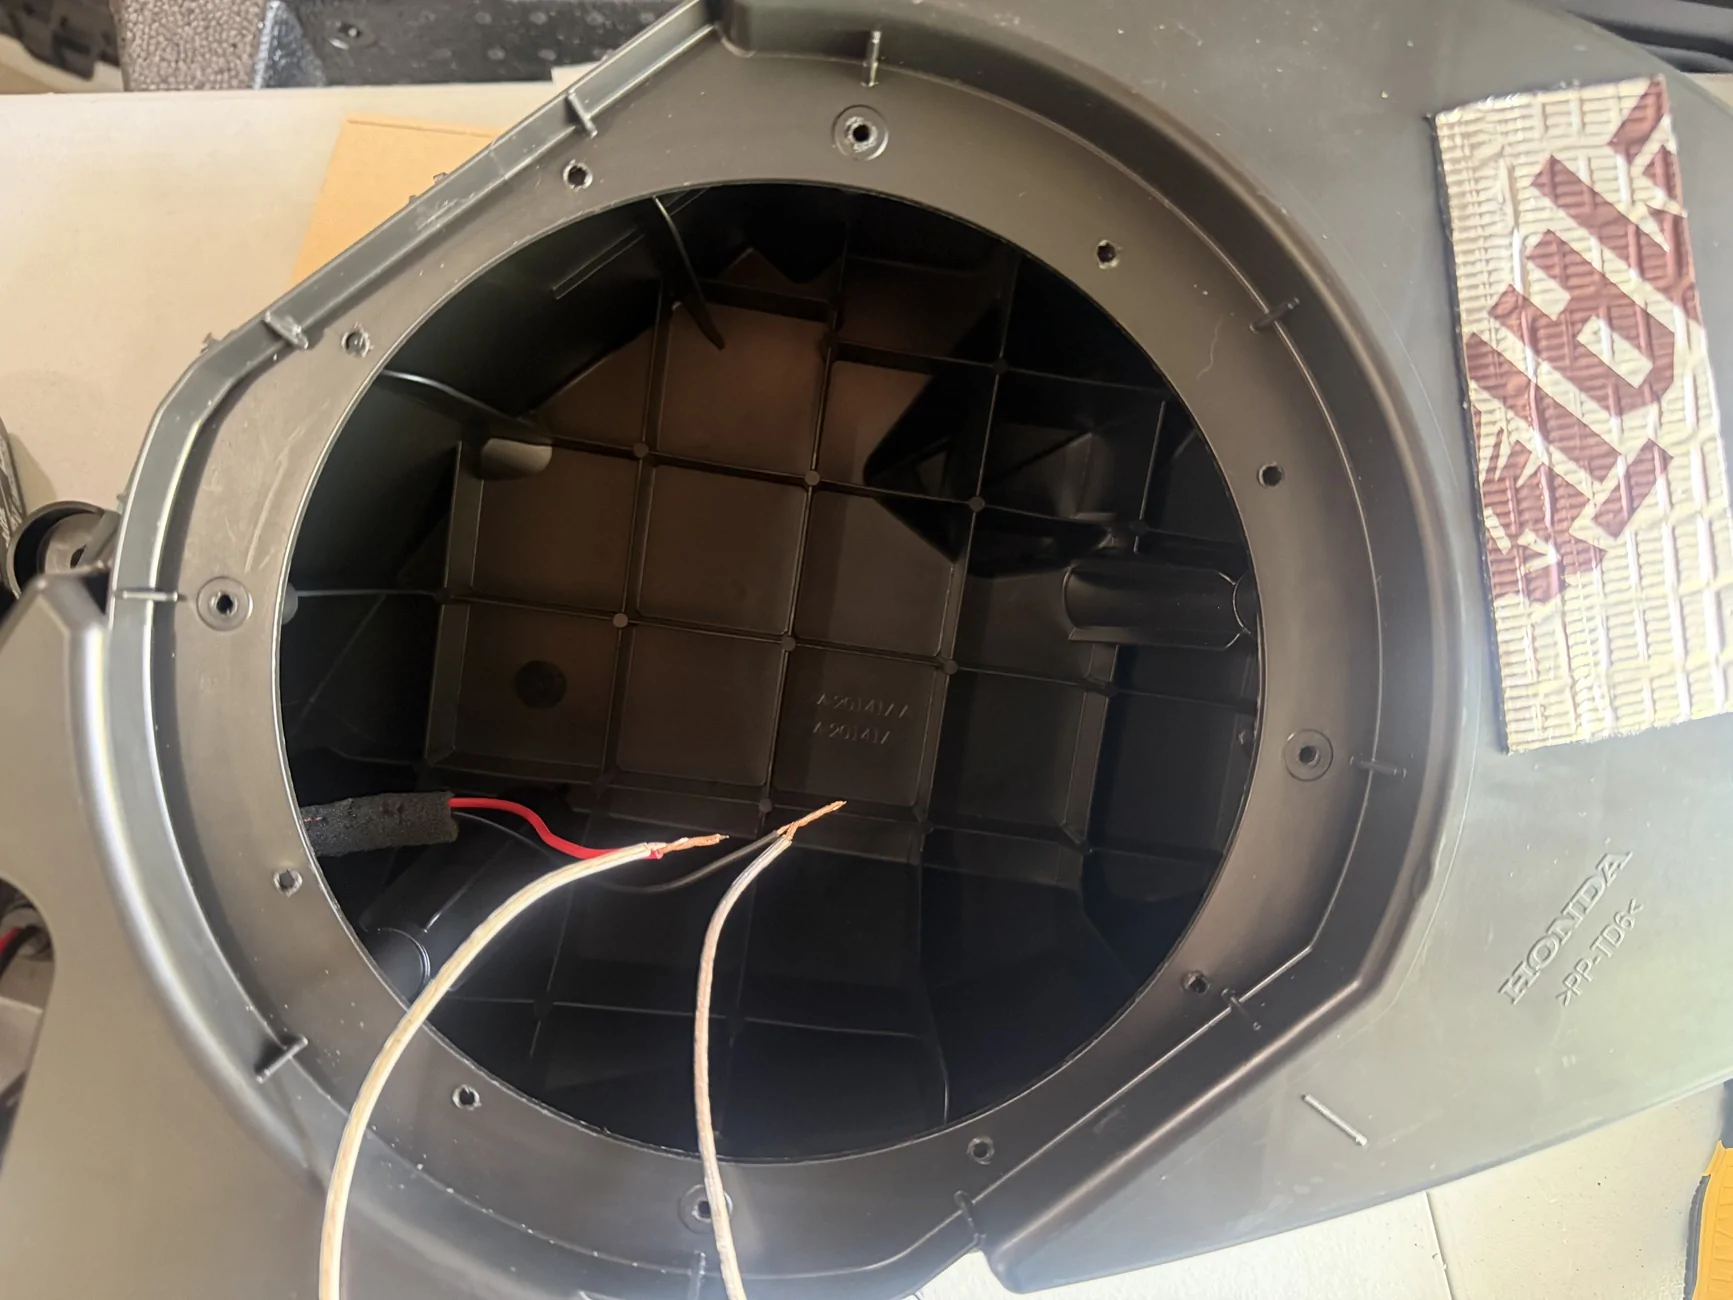
- Unscrew the four Torx screws holding in the OEM sub. We can't reuse these screws or holes, they're too far apart for the new sub, so we will drill 8 new holes.
- Unplug the OEM sub and throw it out a window.
- Pop the plastic surround covering off the face of the new sub (it's a PITA, used a metal pry tool) and toss it out with the old sub.
- Line up the new sub so that the MB Quart words are clocked the same way as the other text on the sub enclosure. Line up ONE of the old Torx scew holes with one of the speaker's holes and then drill 8 small pilot holes where the 4 original screw holes aren't located. See the picture below, the old Torx scew holes are the ones with the plastic circle around them, the other ones are new and are the ones we are going to use.
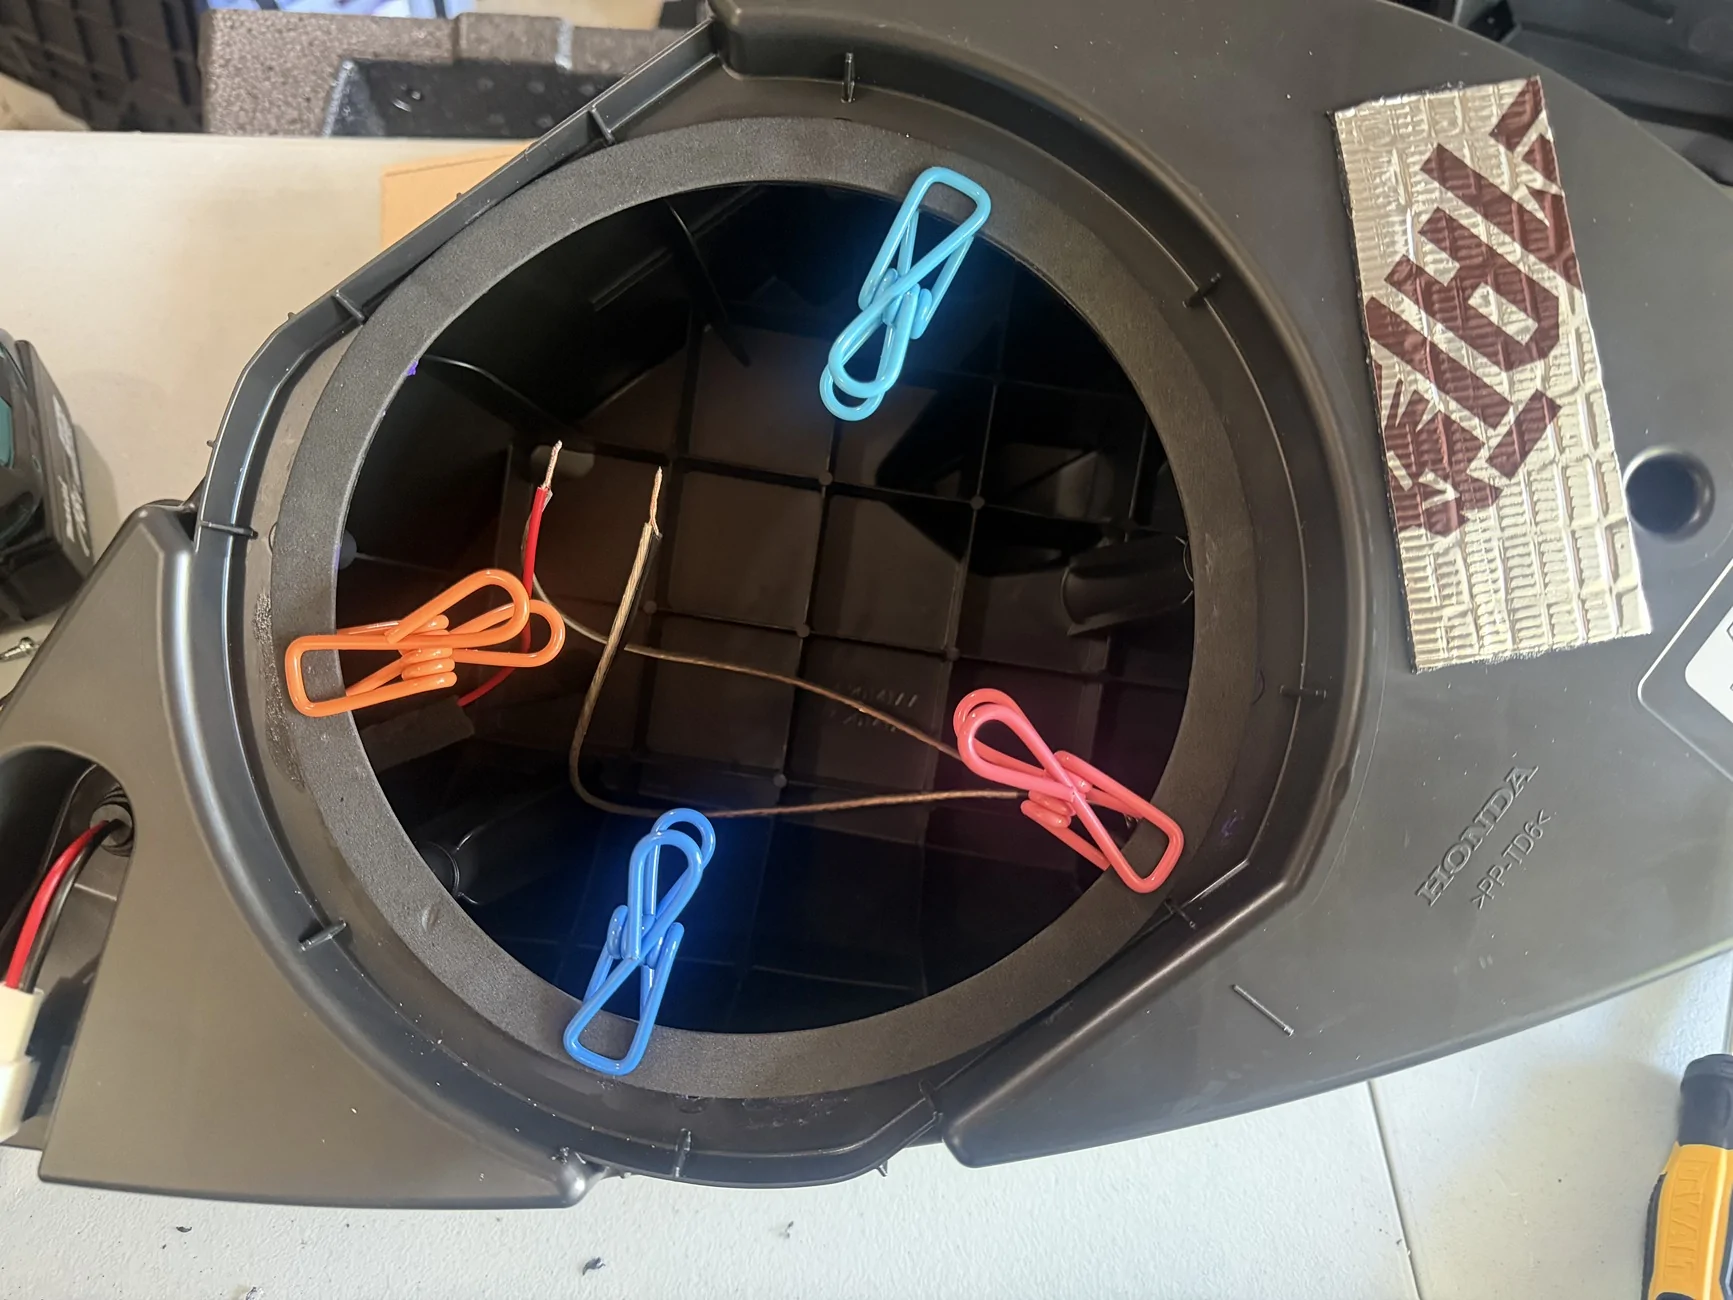
- Use some glue to stick the new foam speaker surround on over the new hole you drilled. You can clamp it down and wait a few minutes for it to dry, I'm just doing this to positively locate the surround while we put the new subwoofer in.
- Poke some holes in the new foam speaker surround so you can line up the new speaker surround holes.
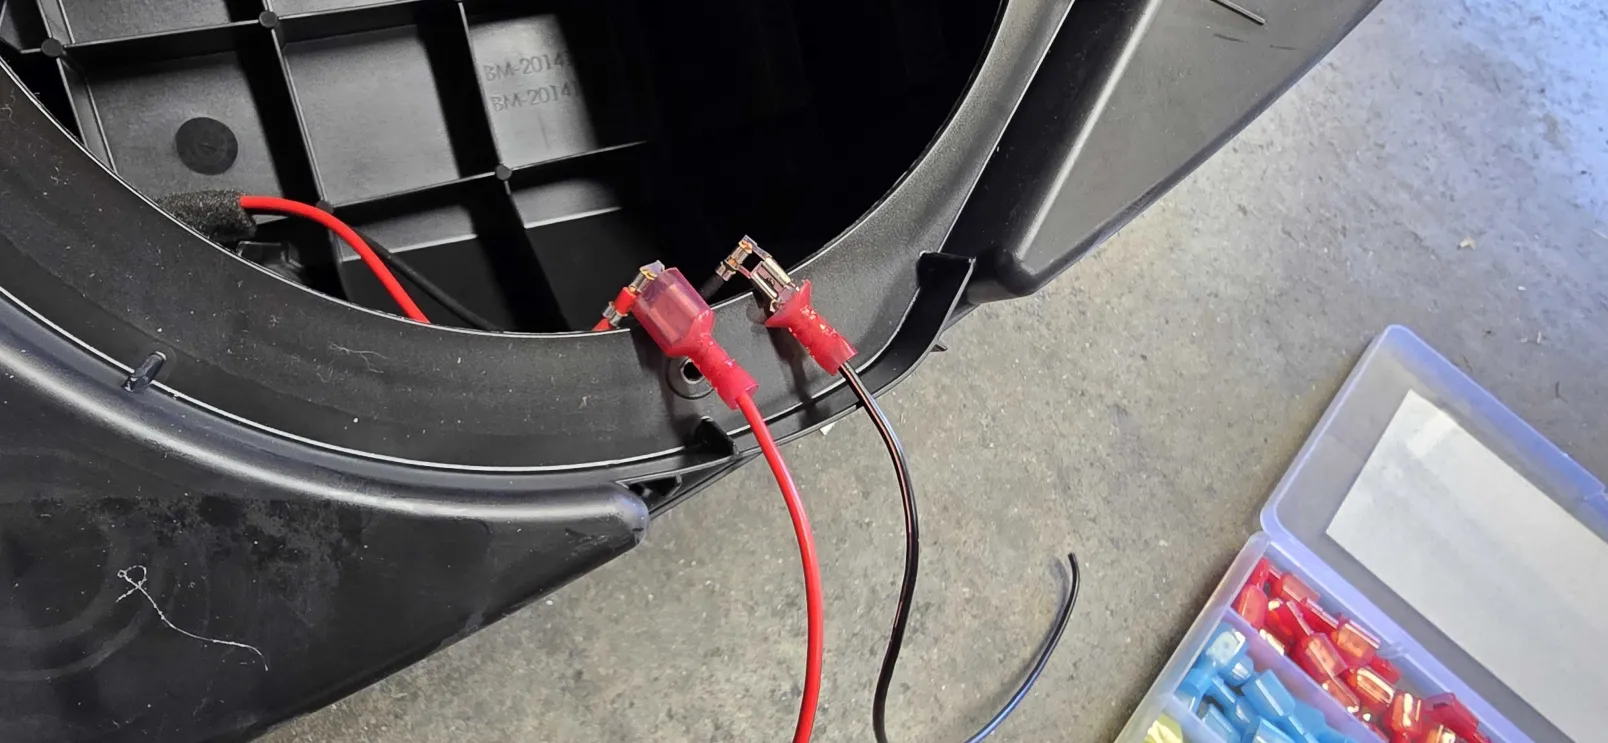
- Cut a ~12" length of 18awg speaker wire and strip 3/4" of the insulation off all four ends. Rip the two wires apart so that they are fully separated.
- Cut the OEM wire connect ends off the OEM speaker wire and then strip off 3/4" of the insulation off them too.
- Twist the end of the new wire to the OEM wire. Do this to both the positive and negative wires. Then twist the loose ends of the extra wires so they're easier to connect to the new sub. (I've already done this step in the images above).
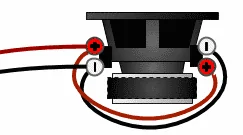
- Use the pogo connects to clamp the red and black wires to one side of the sub, and then extend the extra lengths of wire to the other side of the sub. This takes the two 4ohm voice coils down to a 2ohm load (the ELS amp spec). Use the following diagram for guidance.

- Place the now wired new sub into the enclosure and screw in the 8 holes that are NOT the 4 OEM mounting holes:
- I added a couple of small swatches of Kilmat to the enclosure, but I probably should not have bothered. The enclosure is part of the subwoofer system, and it works a little bit like a passive radiator. Making the enclosure "quieter" works against what you're trying to accomplish.
- The sub is done; you can now go test it by plugging it back into the car and playing some music. If you're doing the sound deadening, then take the sub back out and start working on the deadening.
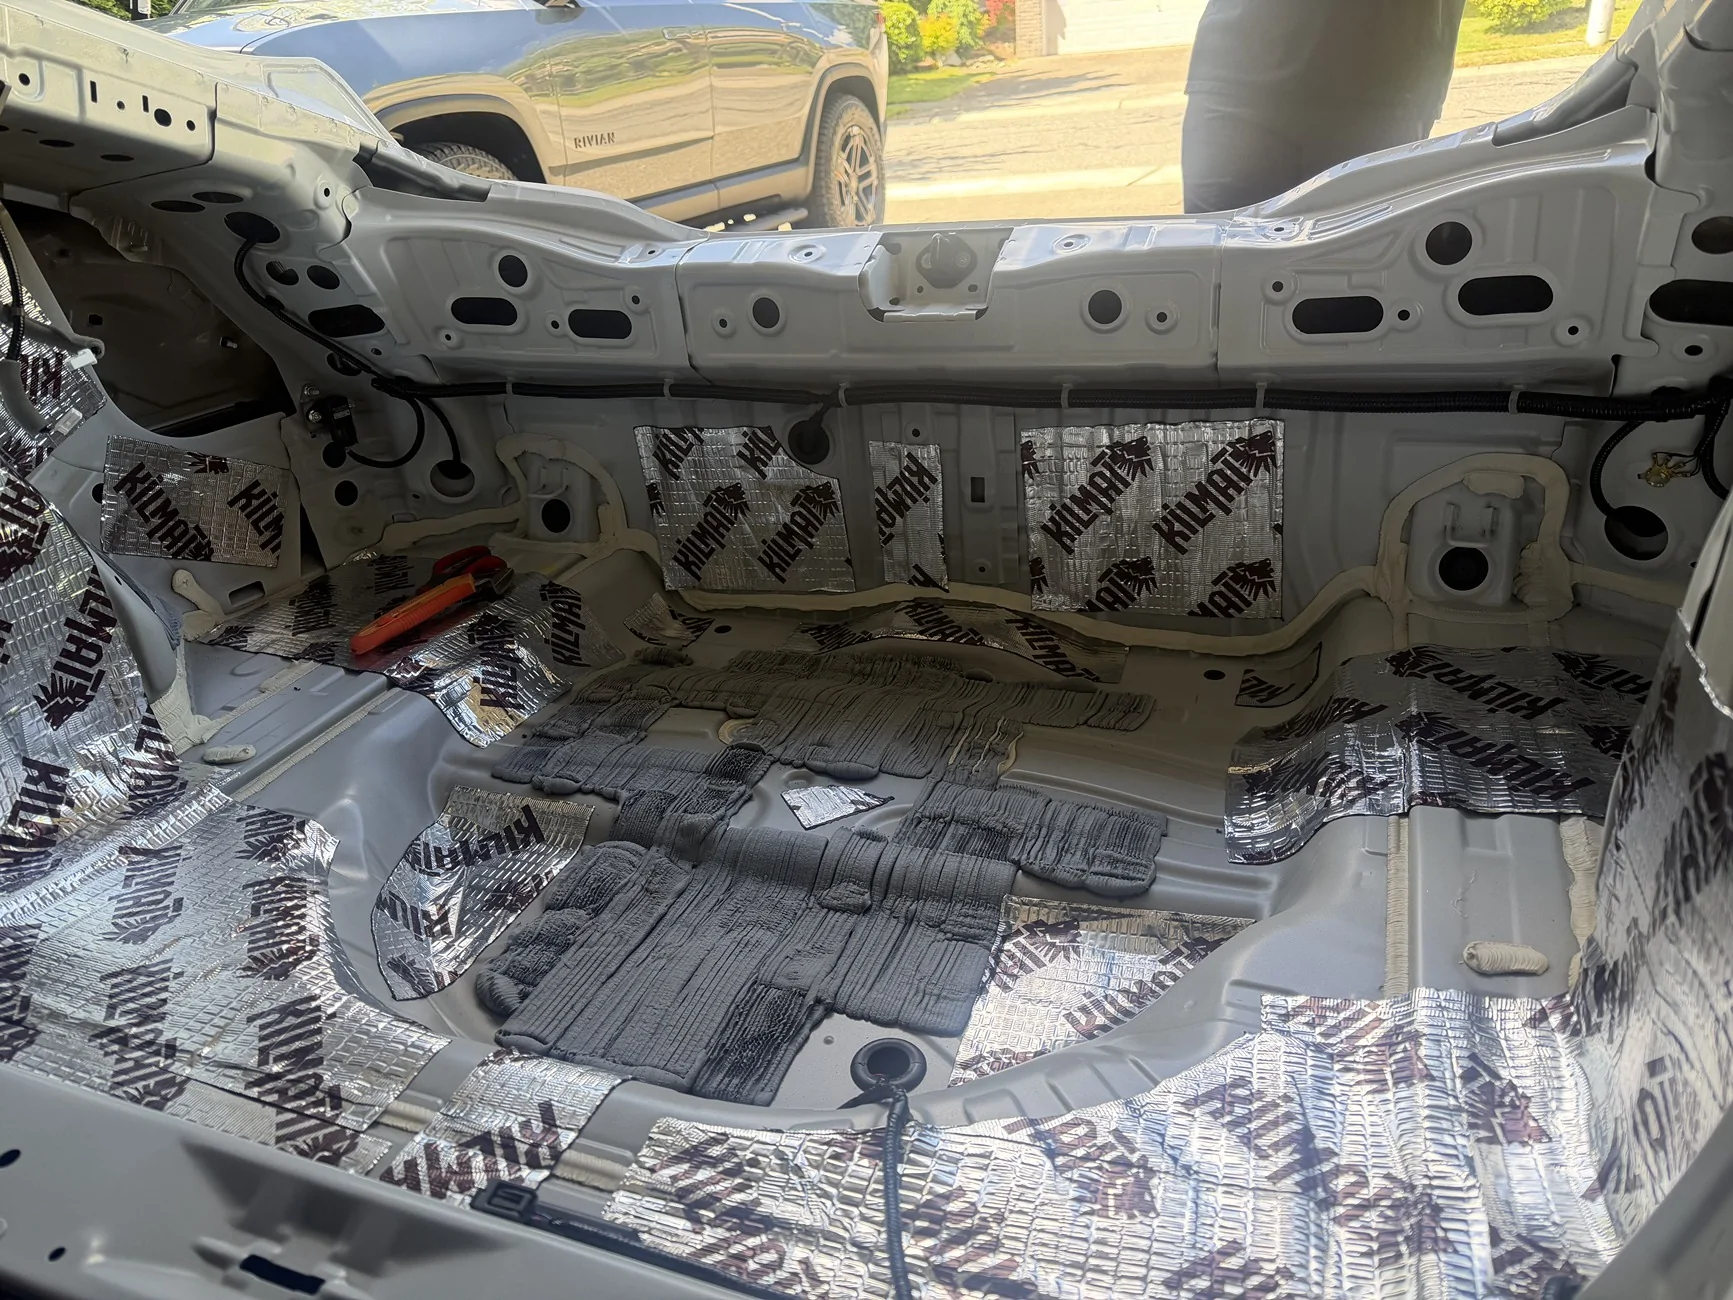
Here's the thing. These Kilmat alubutyl sheets aren't insulation, they're panel dampeners. They add spongy mass to an otherwise rigid plane of metal or plastic, which dampens how much NVH they transfer into the passenger cabin. You only need to get about 60% of a panel covered for this stuff to do its job, any more than that and you're just adding weight for diminishing returns. Long story short: you don't need to blanket every square inch of your panels.
You know where to put the sound deadener by knocking on a metal or plastic panel with your knuckle. If it's high pitched and loud then roll on a swatch of deadener and knock on it again. If the result is a much quieter and lower-frequency sound, then you've accomplished your goal. Honestly, I probably added a bit too much, but I'm happy with the results and it wasn't too much extra weight.
I did Killmat on the metal surfaces that sounded loudest with the knock test, and I did 3 pieces of the thick TroyStudio foam in the spare-tire well because it sounds like a tropical steel drum when you knock on it. I did the thin Aggsound insulation on the back of the plastic interior panels and the carpeted floorboard. I also added the TroySound under the rear seat, but it made putting the rear seat back in a pain in the ass, and the rear seat is mostly foam anyway. If I did it over again the rear seat would just be some Kilmat with a thin layer of Aggsound on top of it. Here's some pics (BTW, the factory gray foam sound deadening sucks ass and should be covered over with the good stuff):
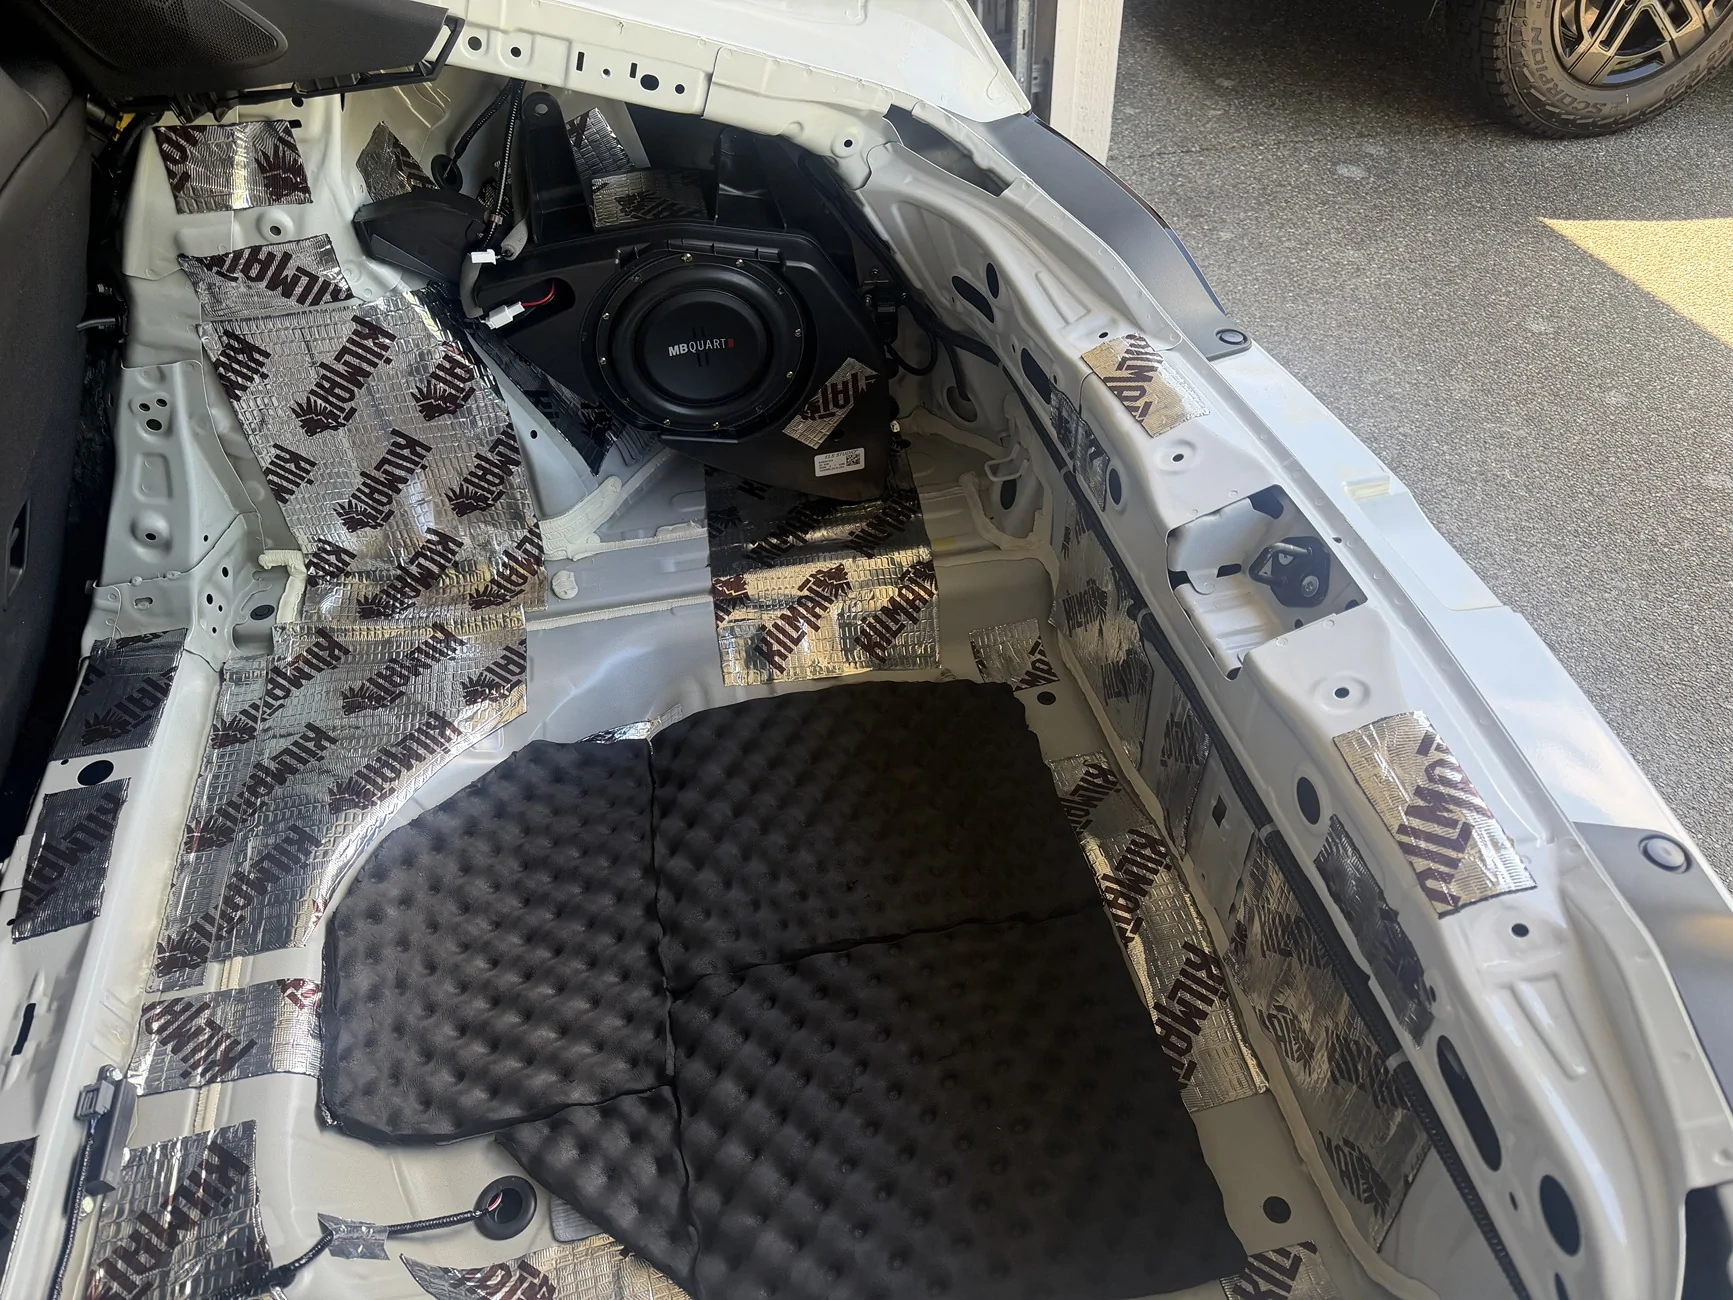
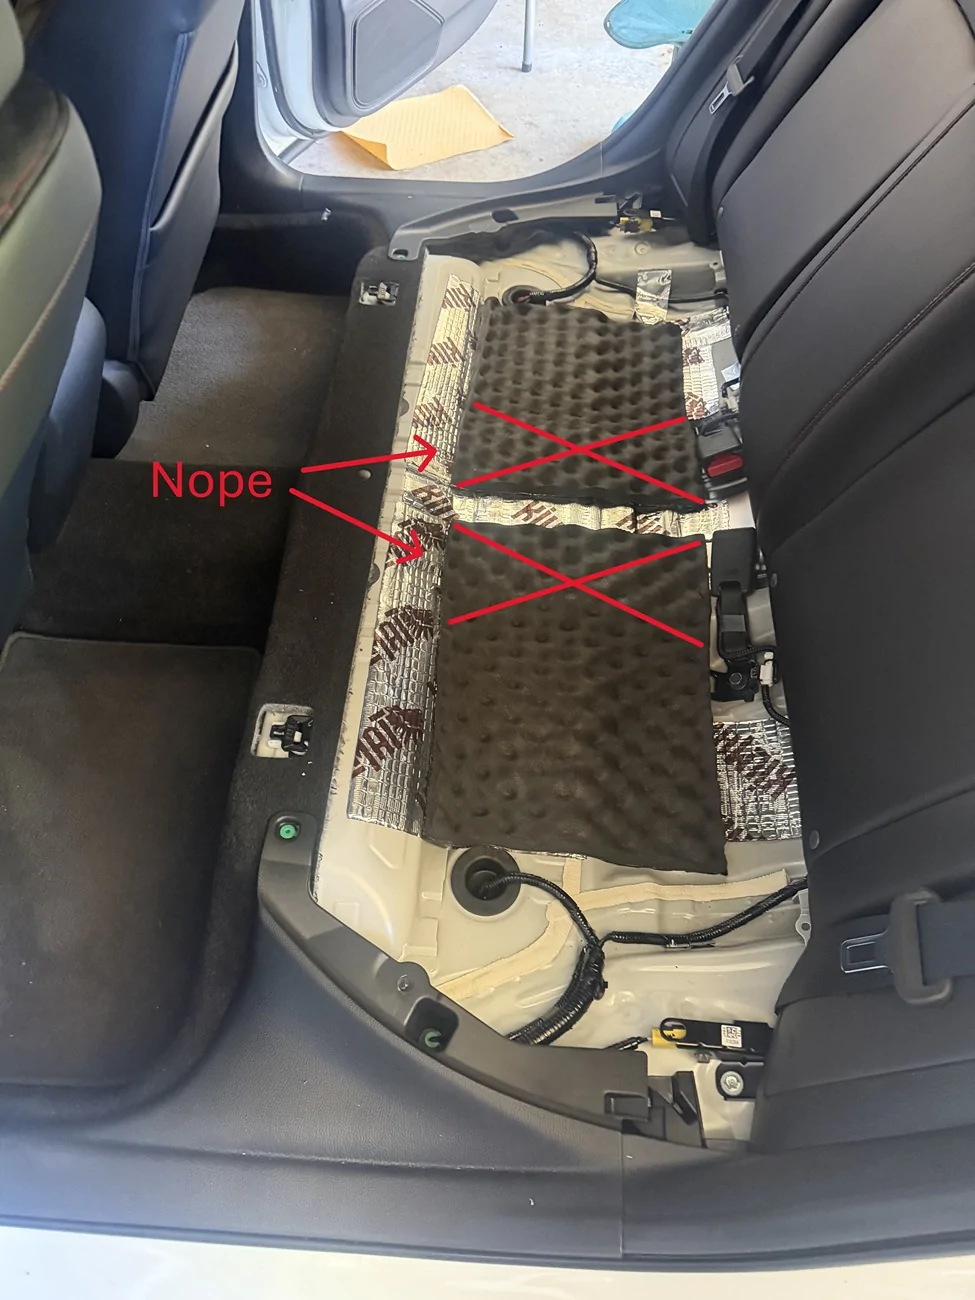
Here's the back seat, and I marked where you SHOULDN'T put foam down because of clearance issue. I cut them out where I marked in the picture, just don't do the TroyStudio stuff there, do Kilmat and Aggsoun
The last bit before putting everything back together it to alter the black styrofoam piece that goes into the spare tire well. I added about a 1/2" of foam padding in a few places, which made the styrofoam piece ride high and get wobbly. I used a little hacksaw (a bread knife would also work) to take some material off of the parts that were riding too high. I then stuck some Aggsound on the sawed-off parts to make them look nicer. This is just a trial-and-error process until the sytrofoam fits nice and snug again. EDIT: Do this step after you get the side panels back on so you know how high the styrofoam should be.
After that just reverse the removal process to get everything back in. You should have enough sound deadening left over to maybe do some doors or part of the main cabin floor.
For sound settings I have DTS Neural Surround turned on, with Trebble and Mid-Bass flat, and Bass at +2 gain (to send a bit more power to the beefier subwoofer). This seems like a pleasant balance but YMMV.
Here's a video of the sub bumping to Redbone. (Edit: I guess little videos don't work)
Sponsored
Last edited: