ABPDE5
Senior Member
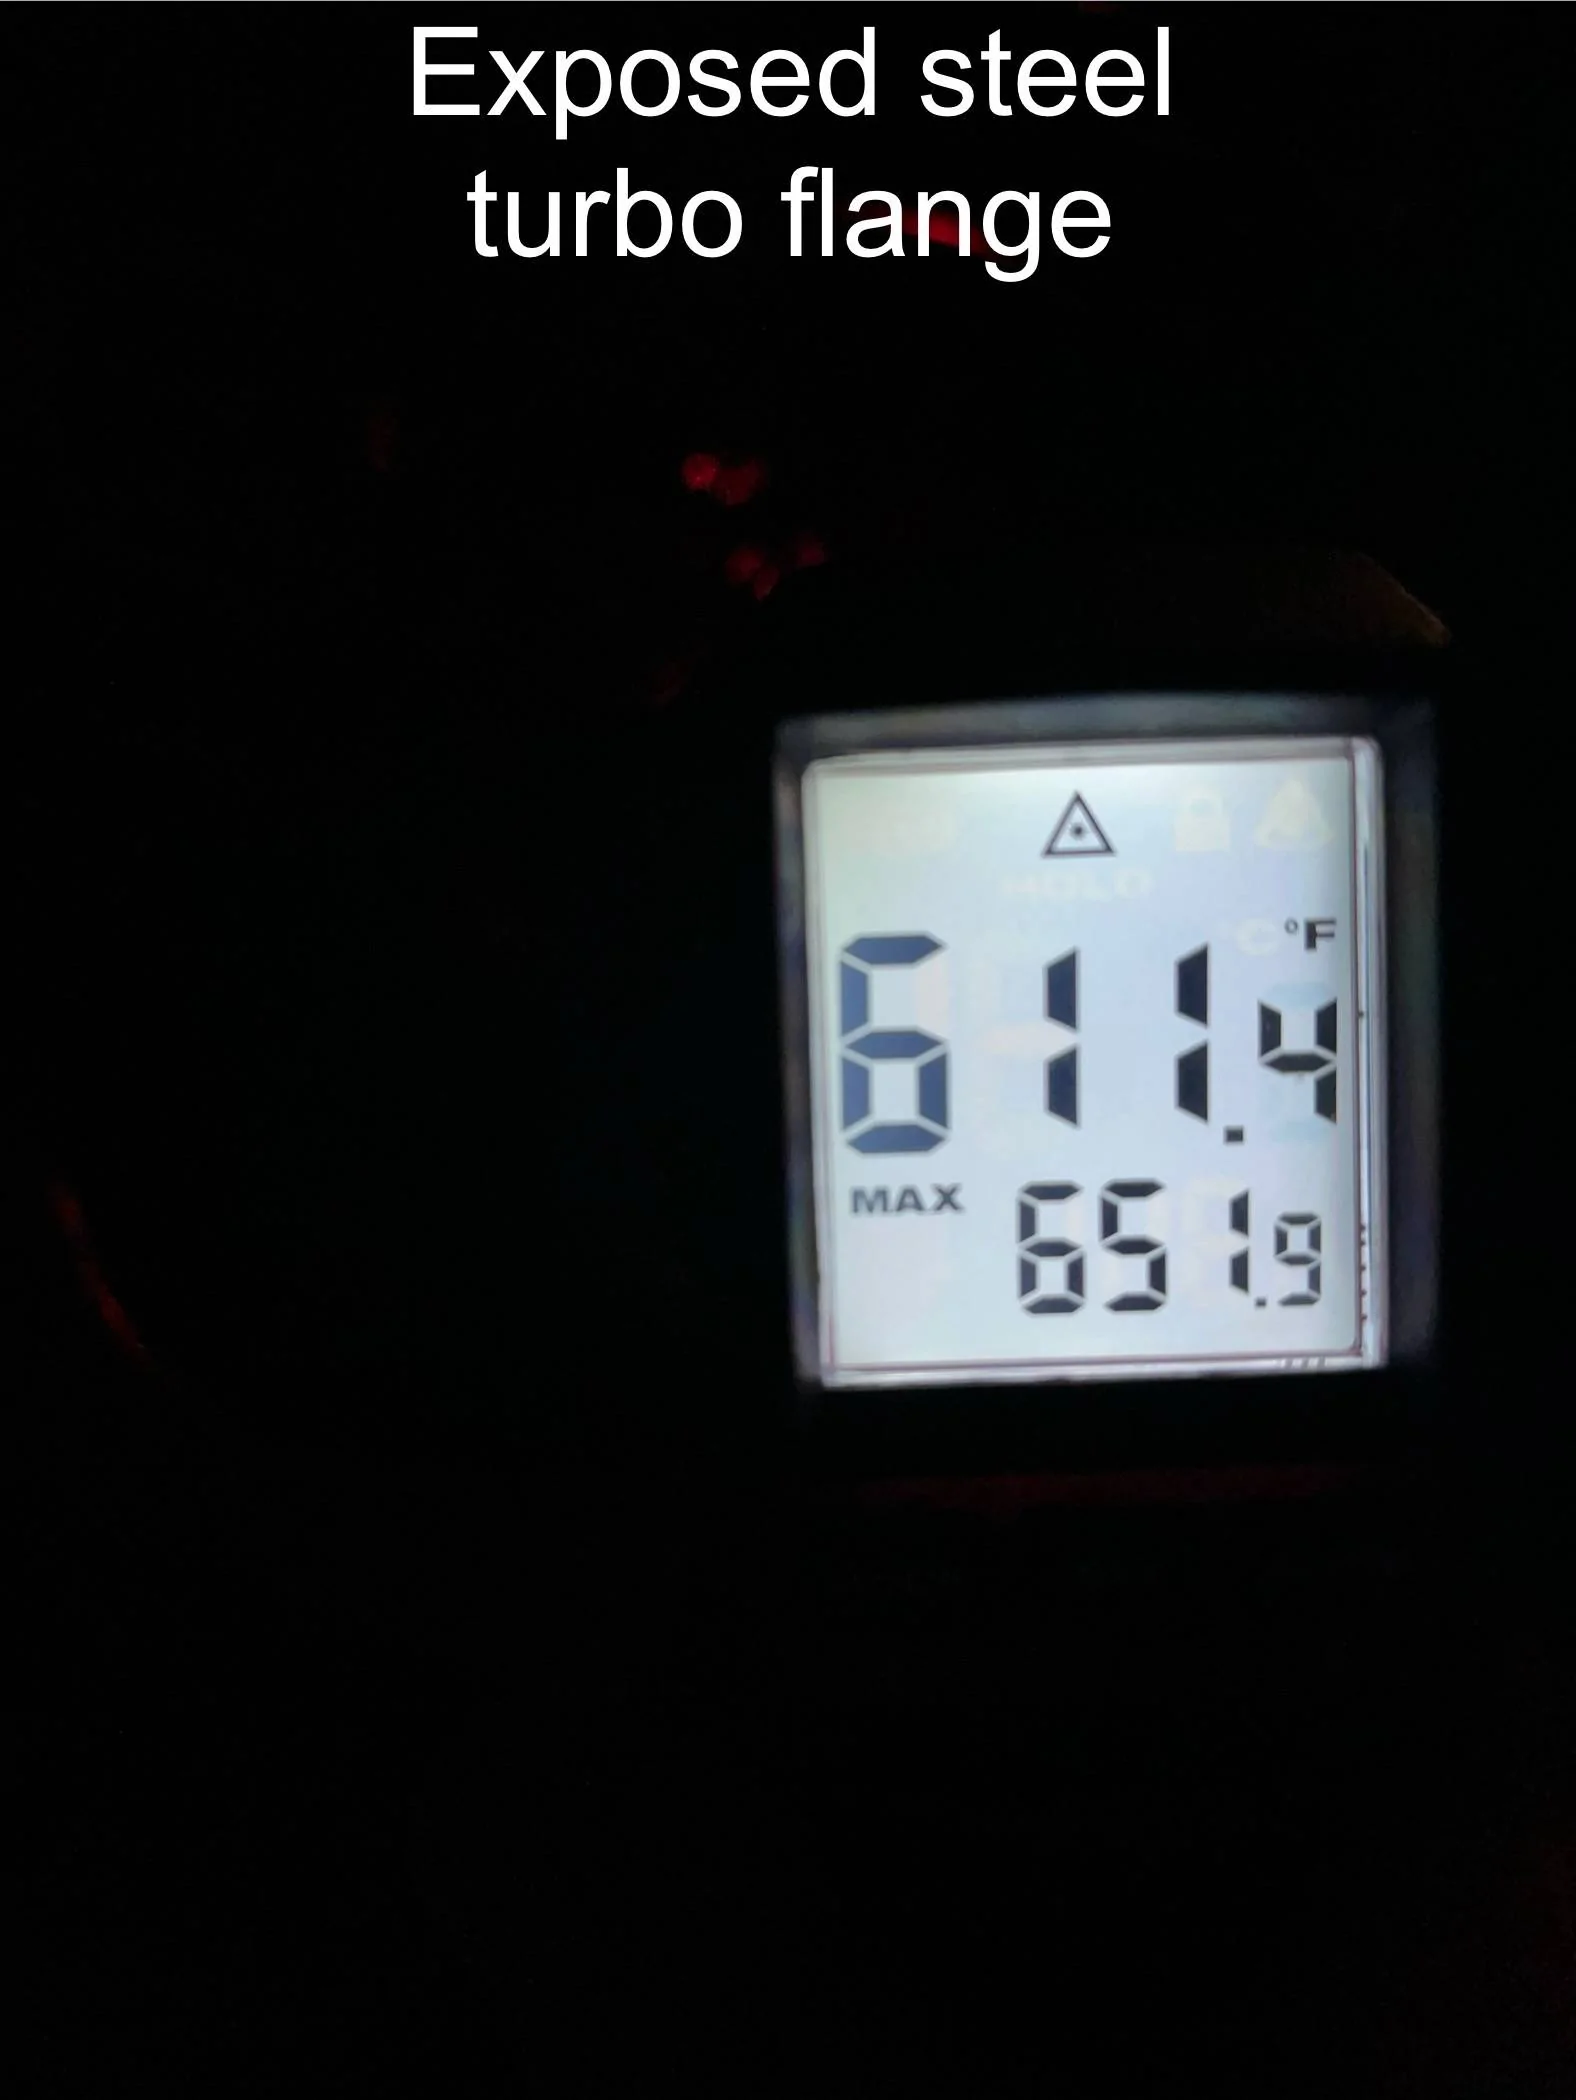
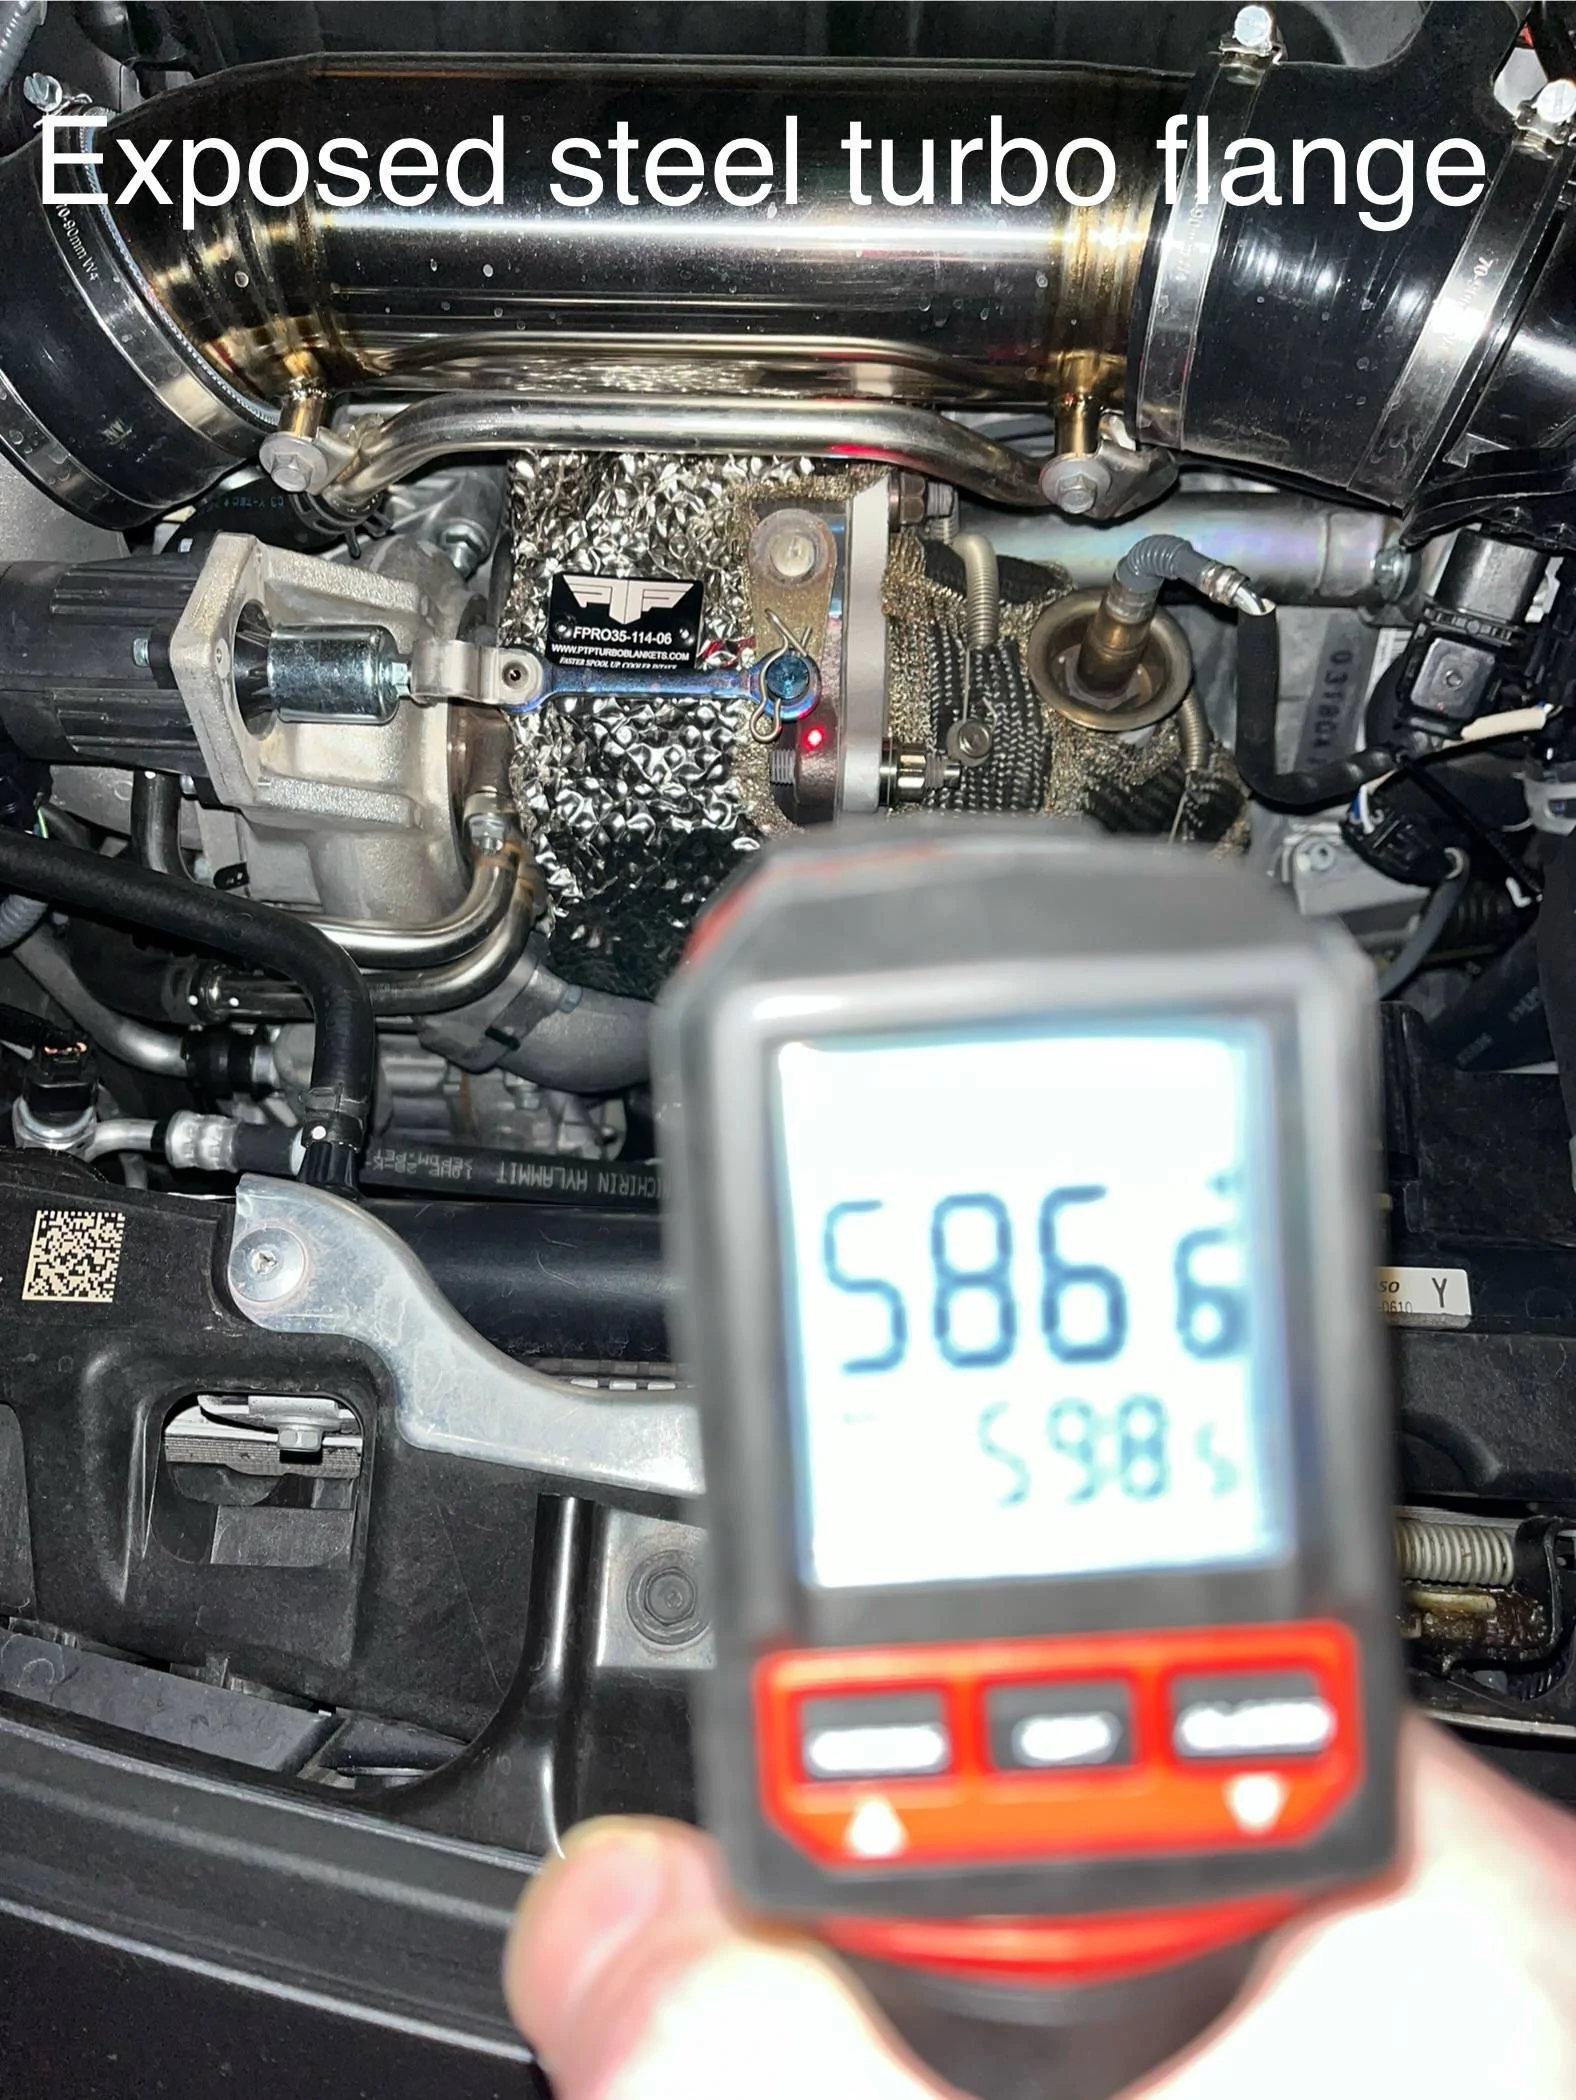
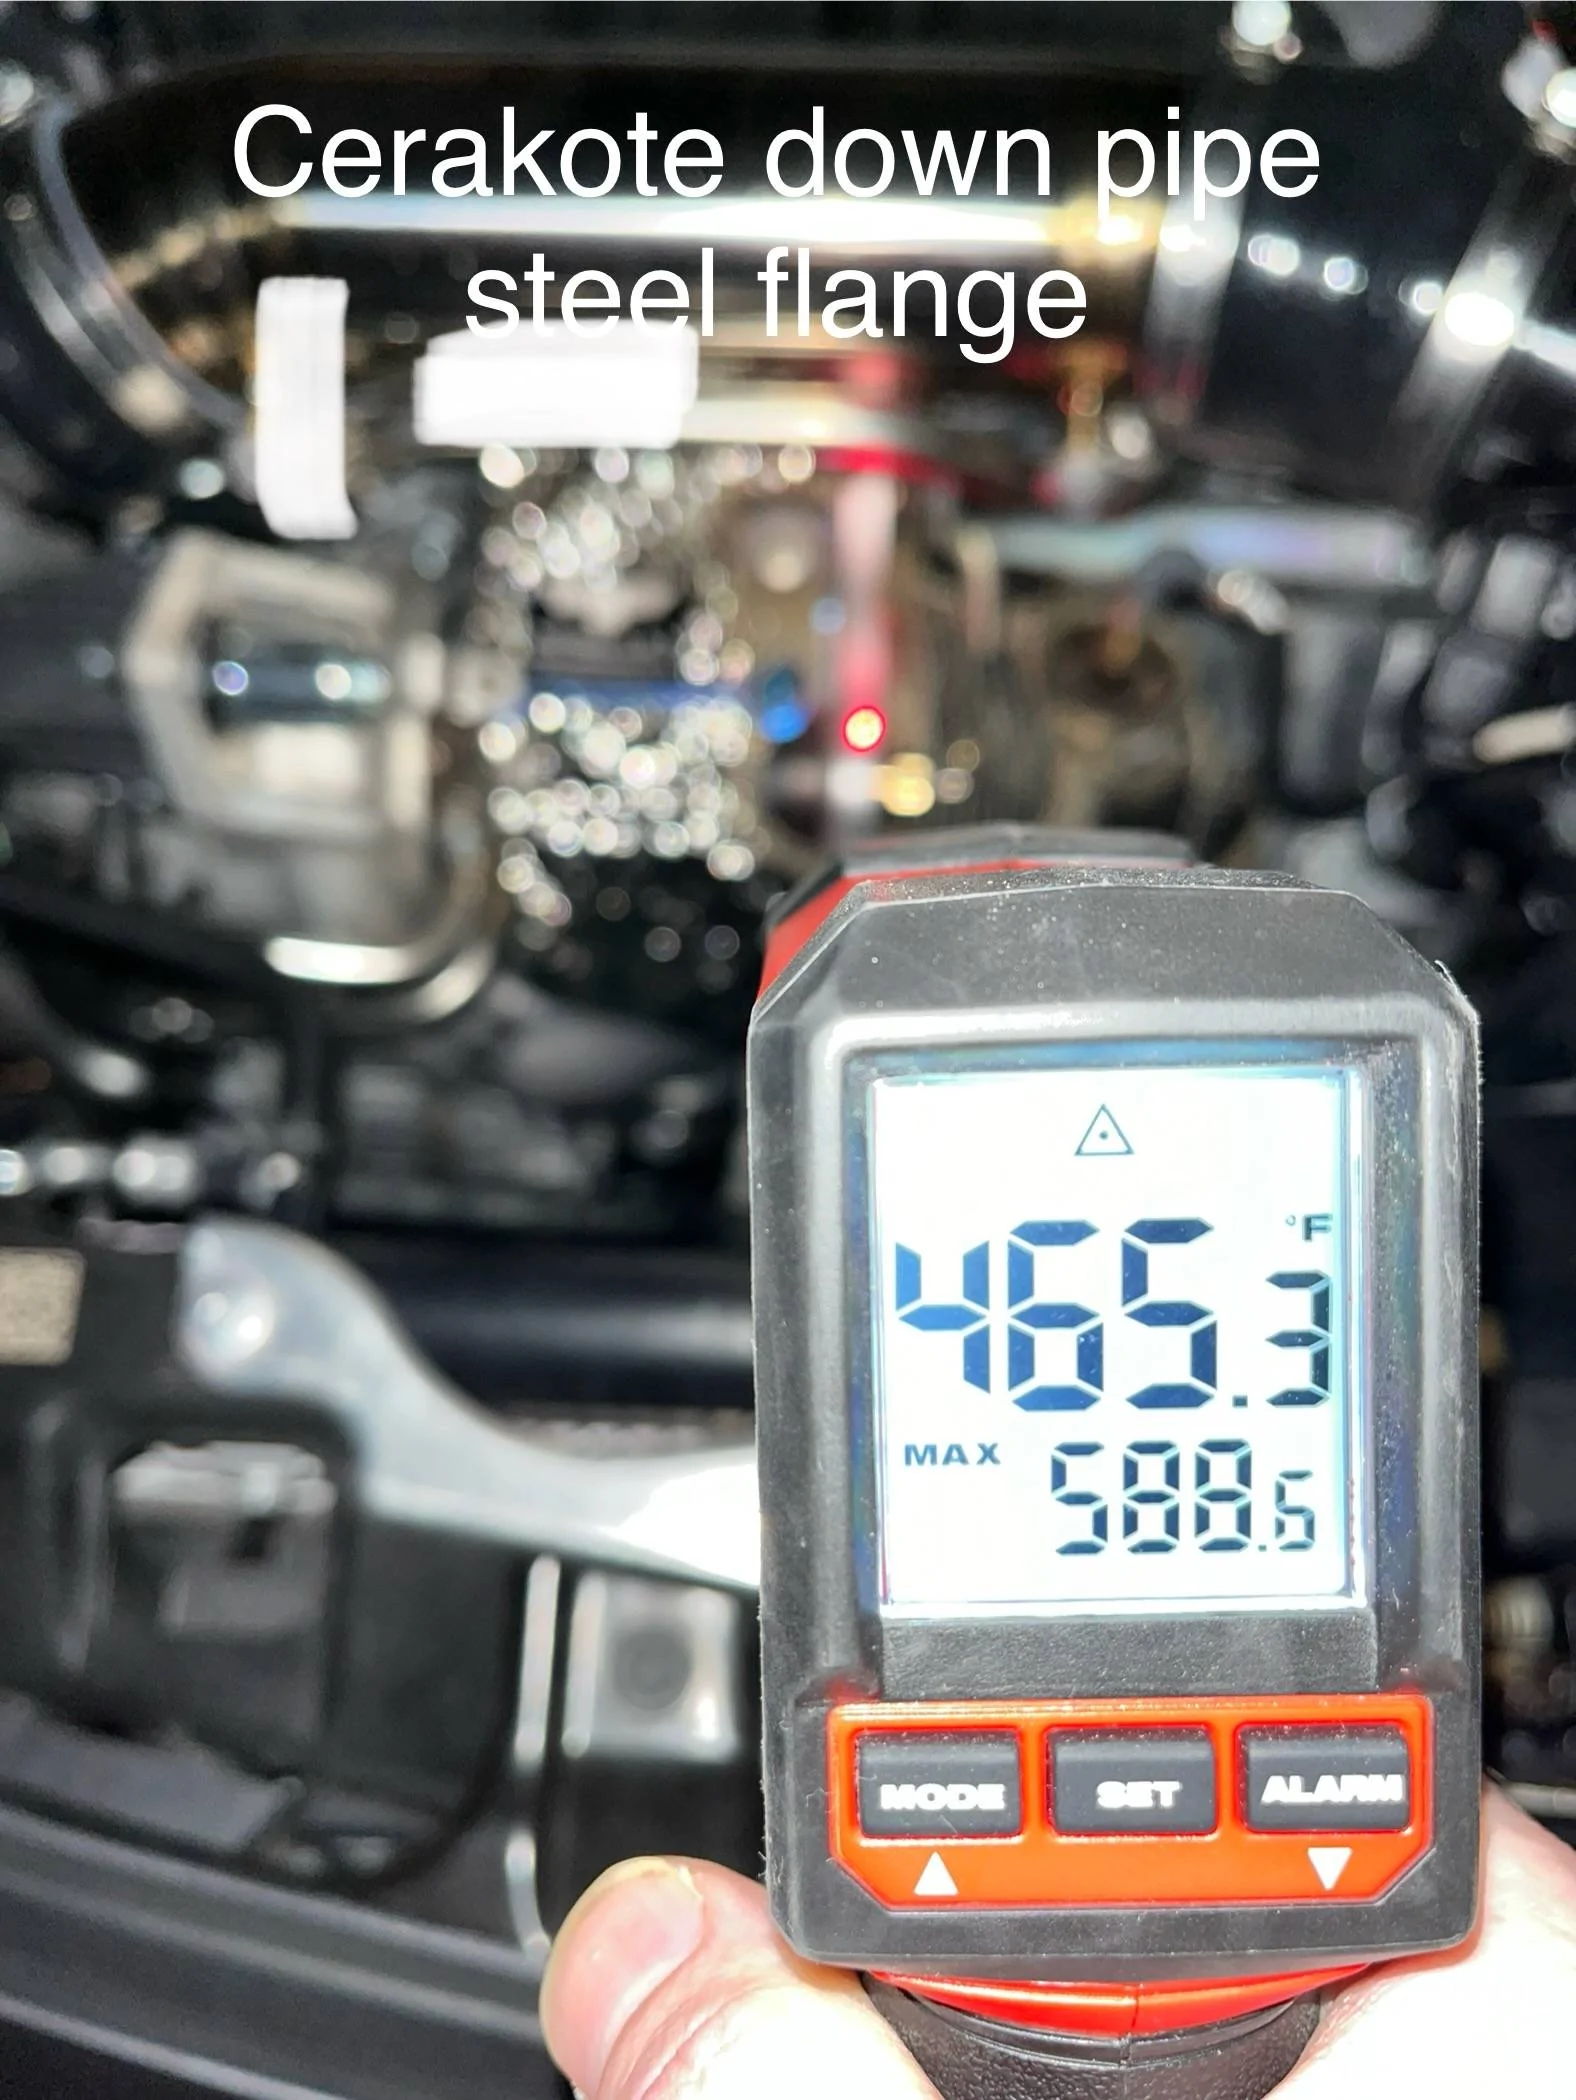
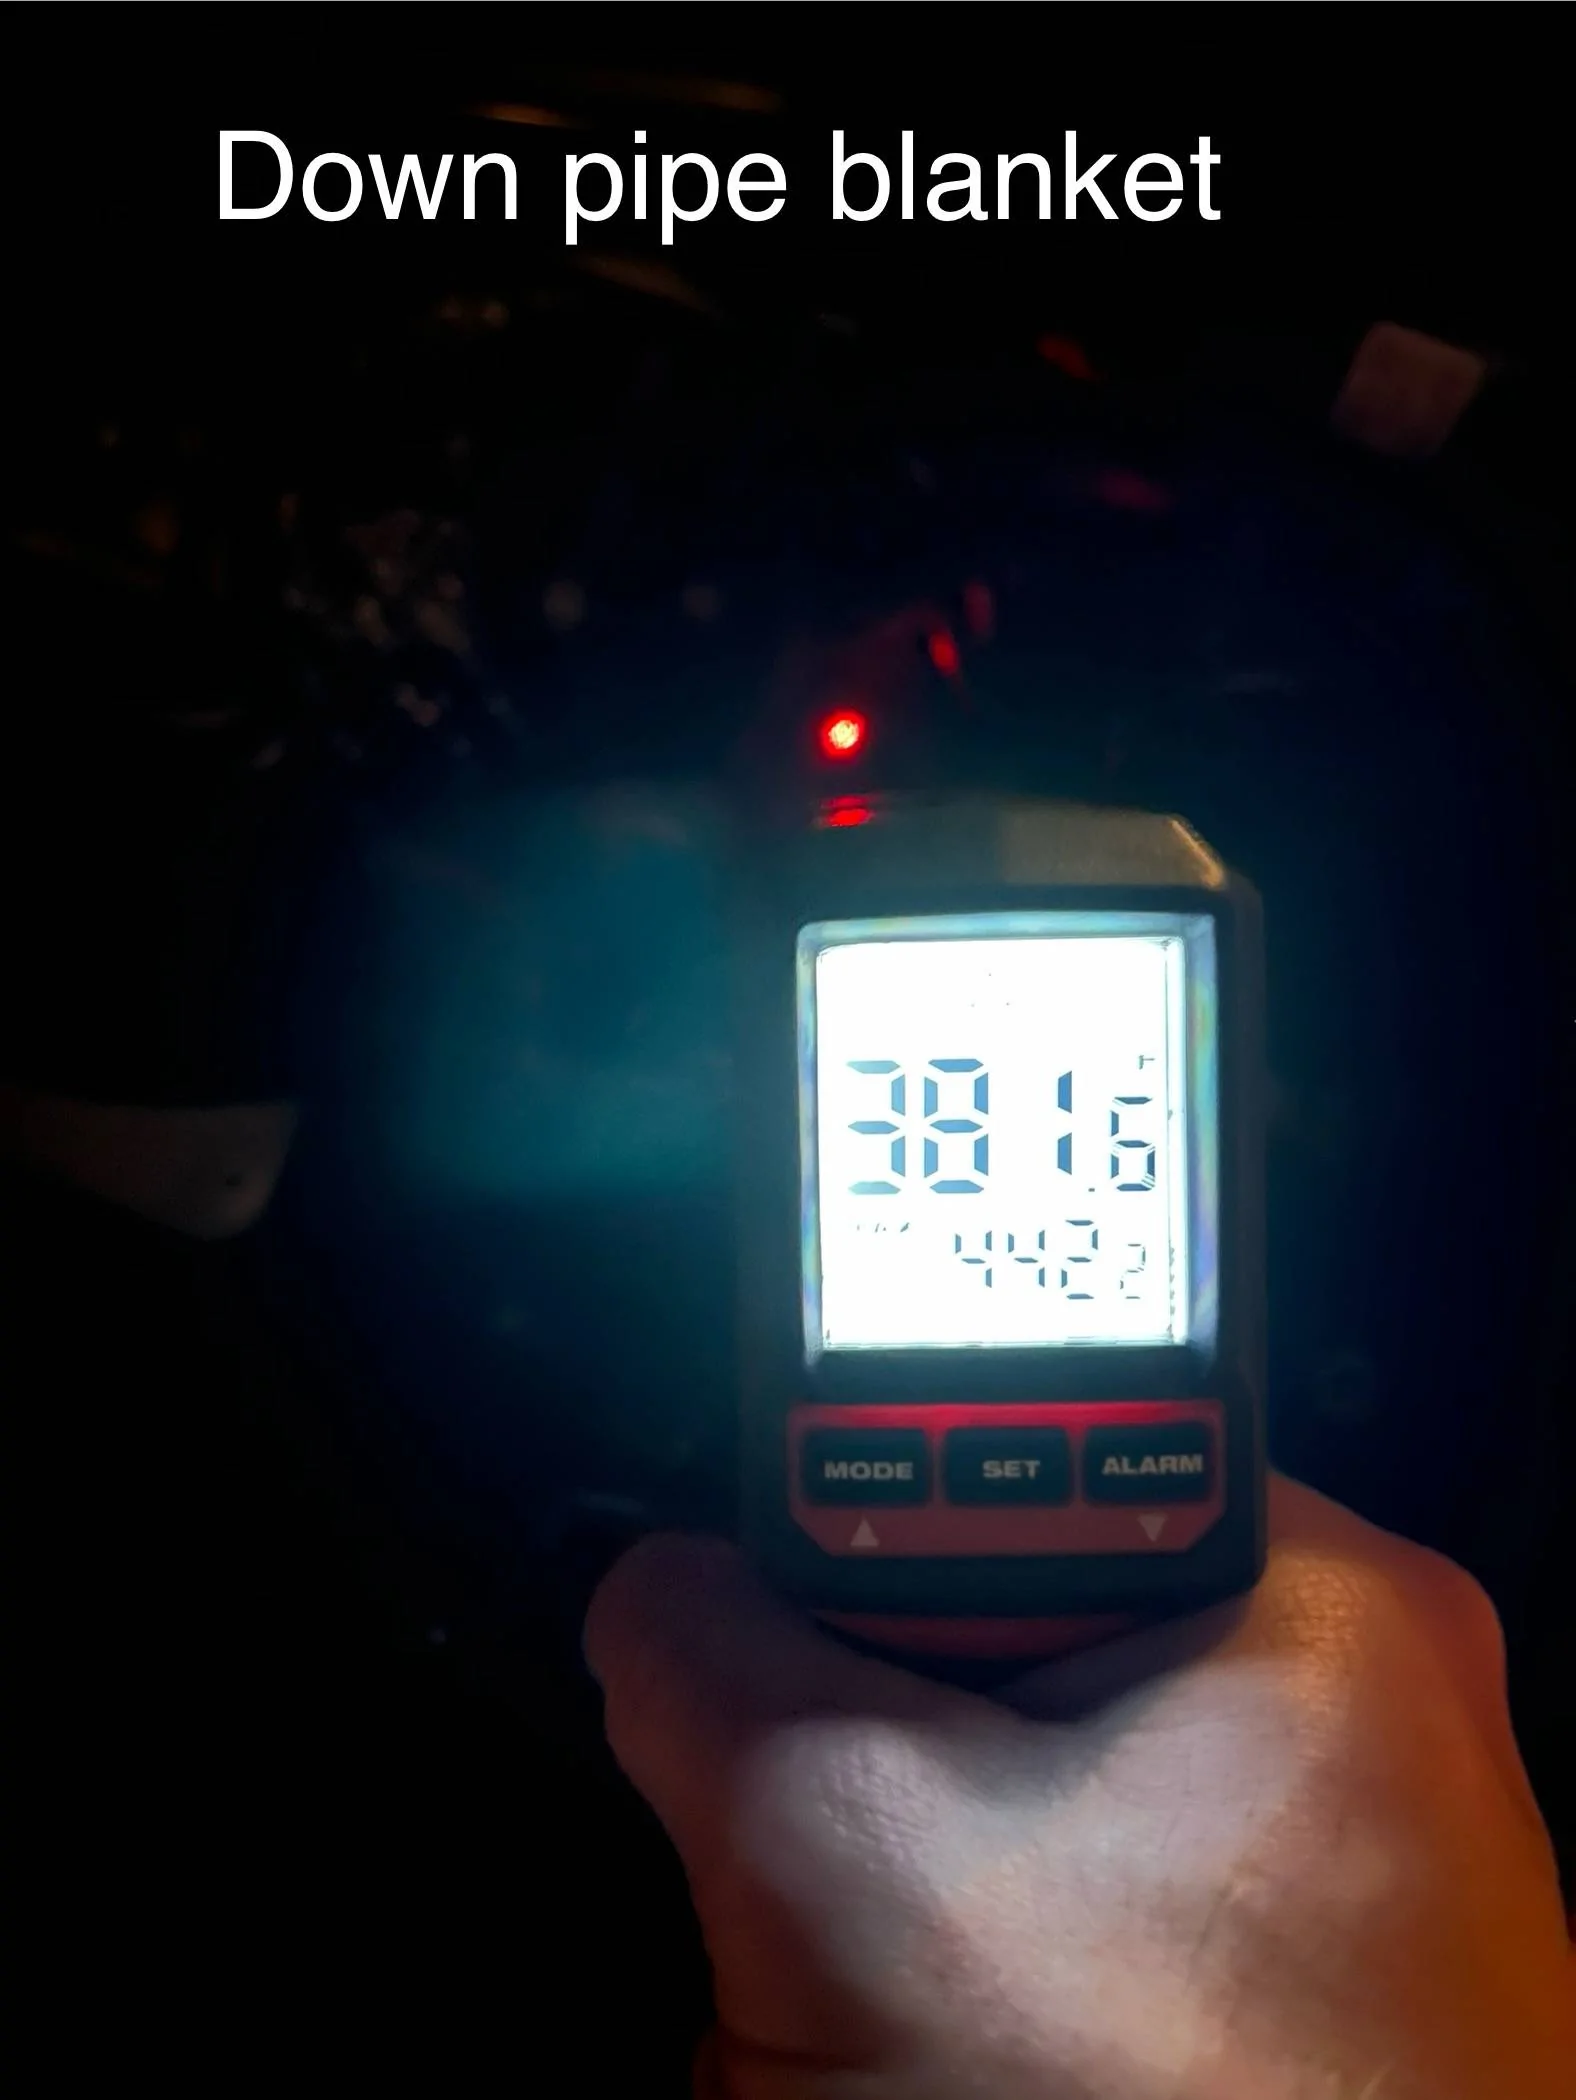
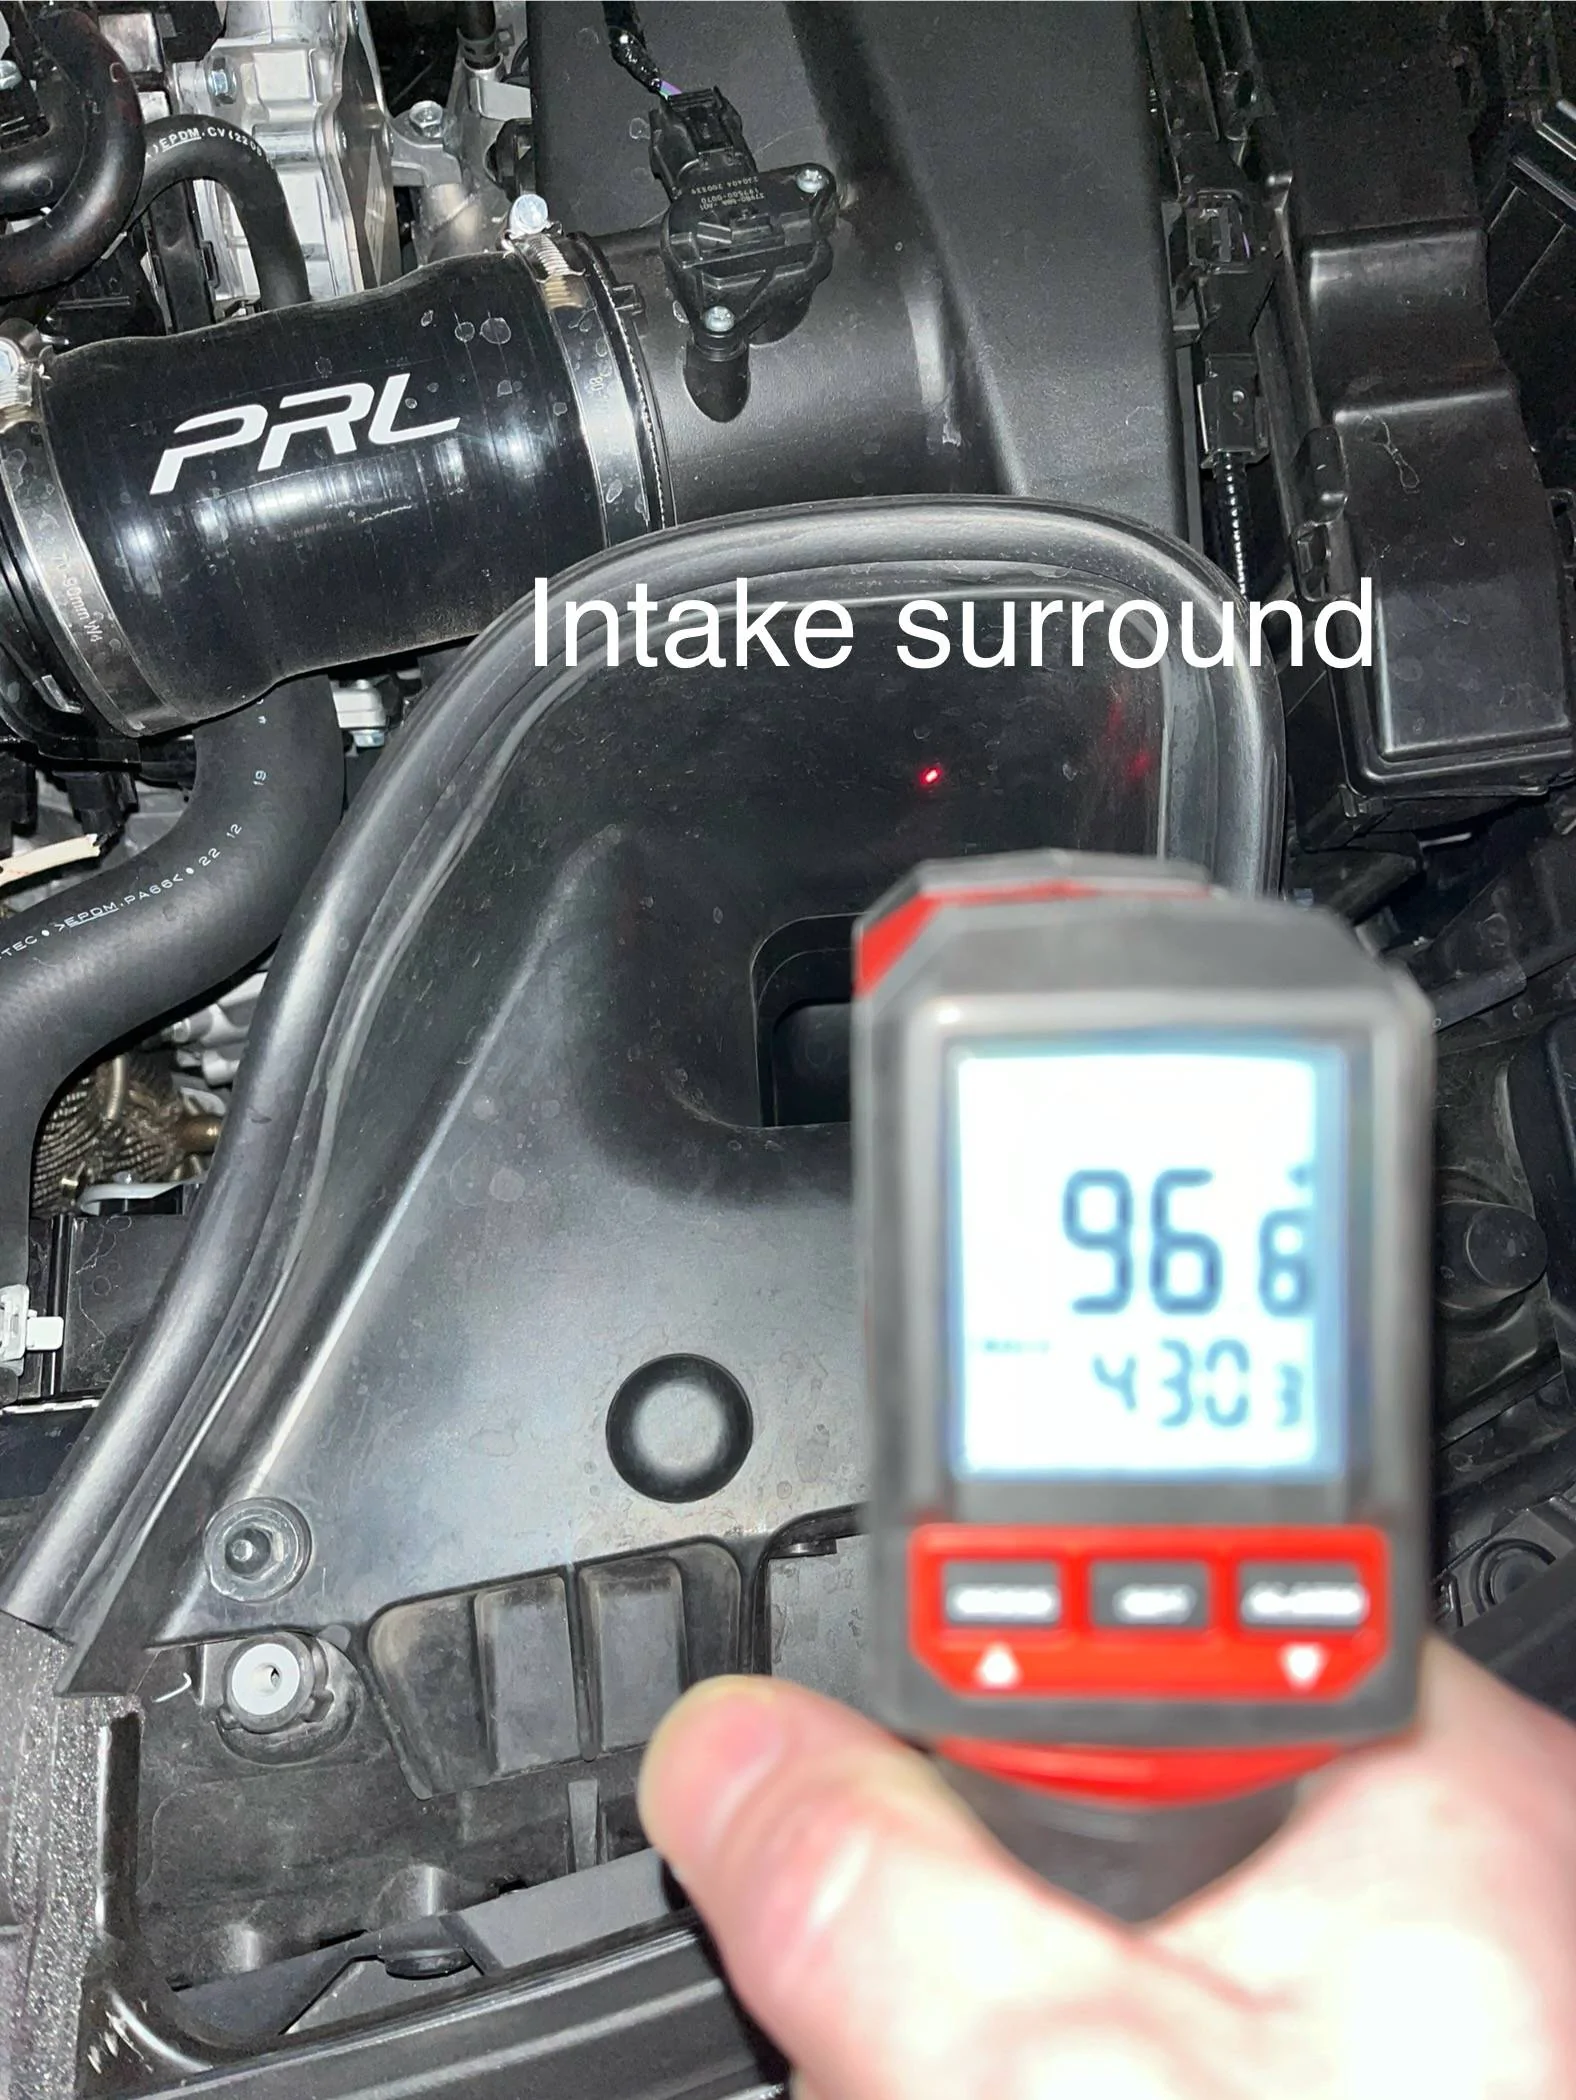
How is the ceramic coat holding up? Any cracks / flaking?Do you happen to have a digital thermometer by chance? I have a Milwaukee infrared thermometer that works well. I don’t need it for work anymore so it pretty much only gets used when we use the outdoor pizza stove slab. ?
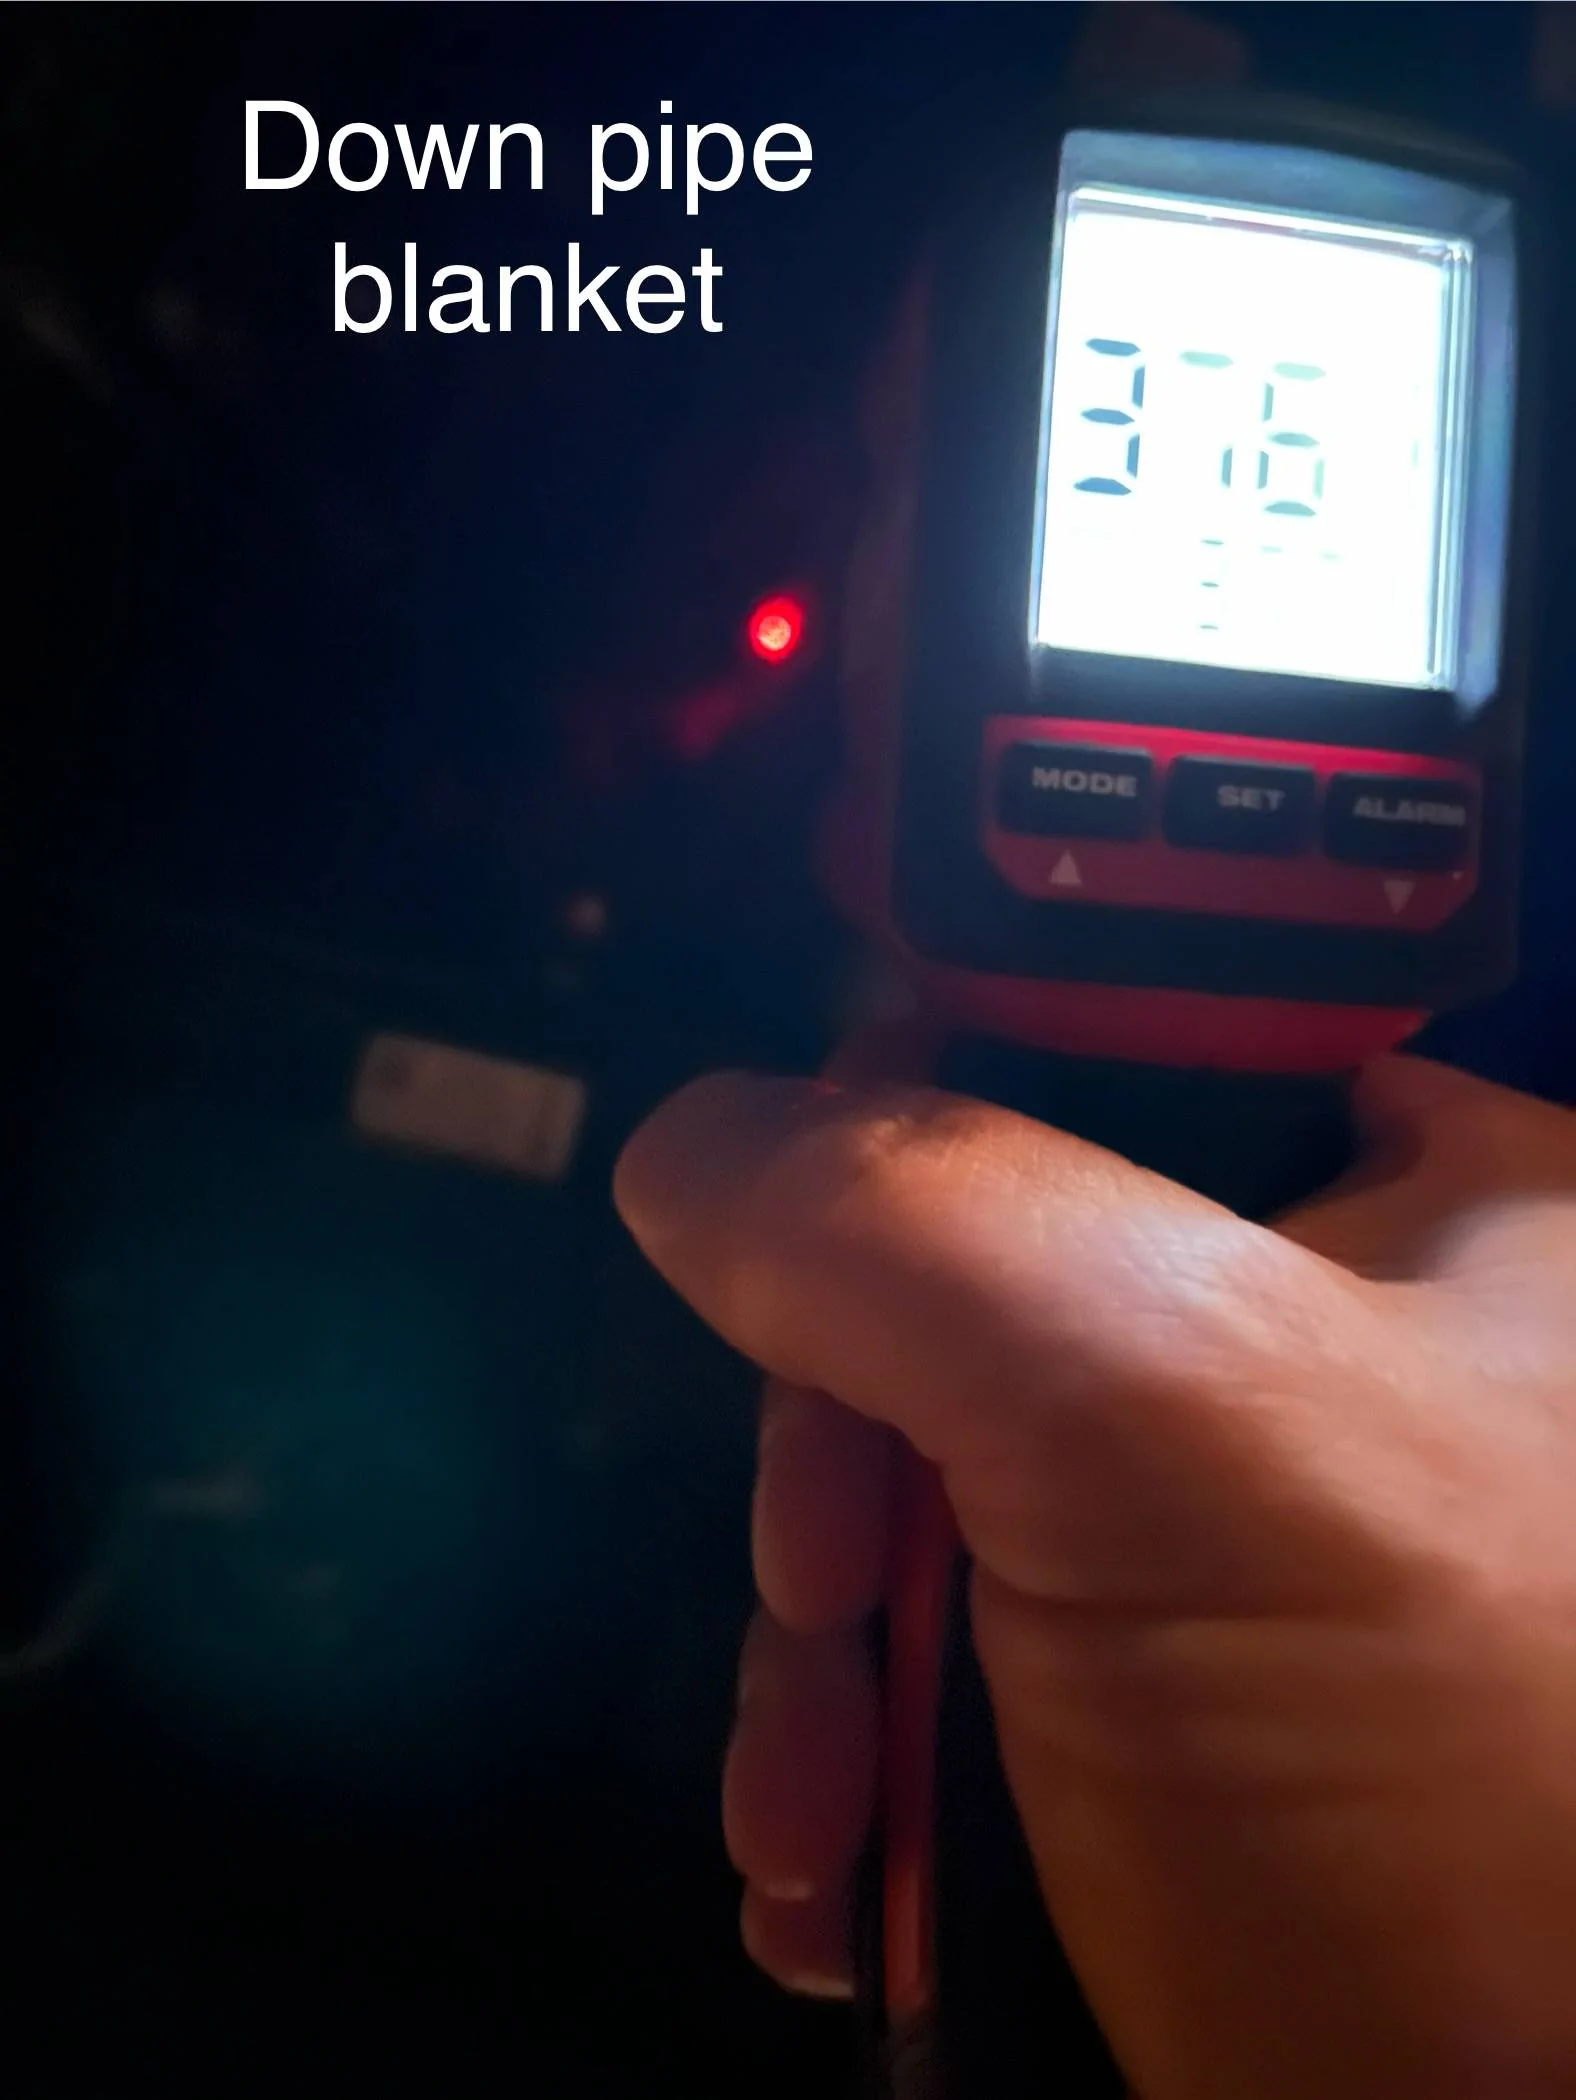
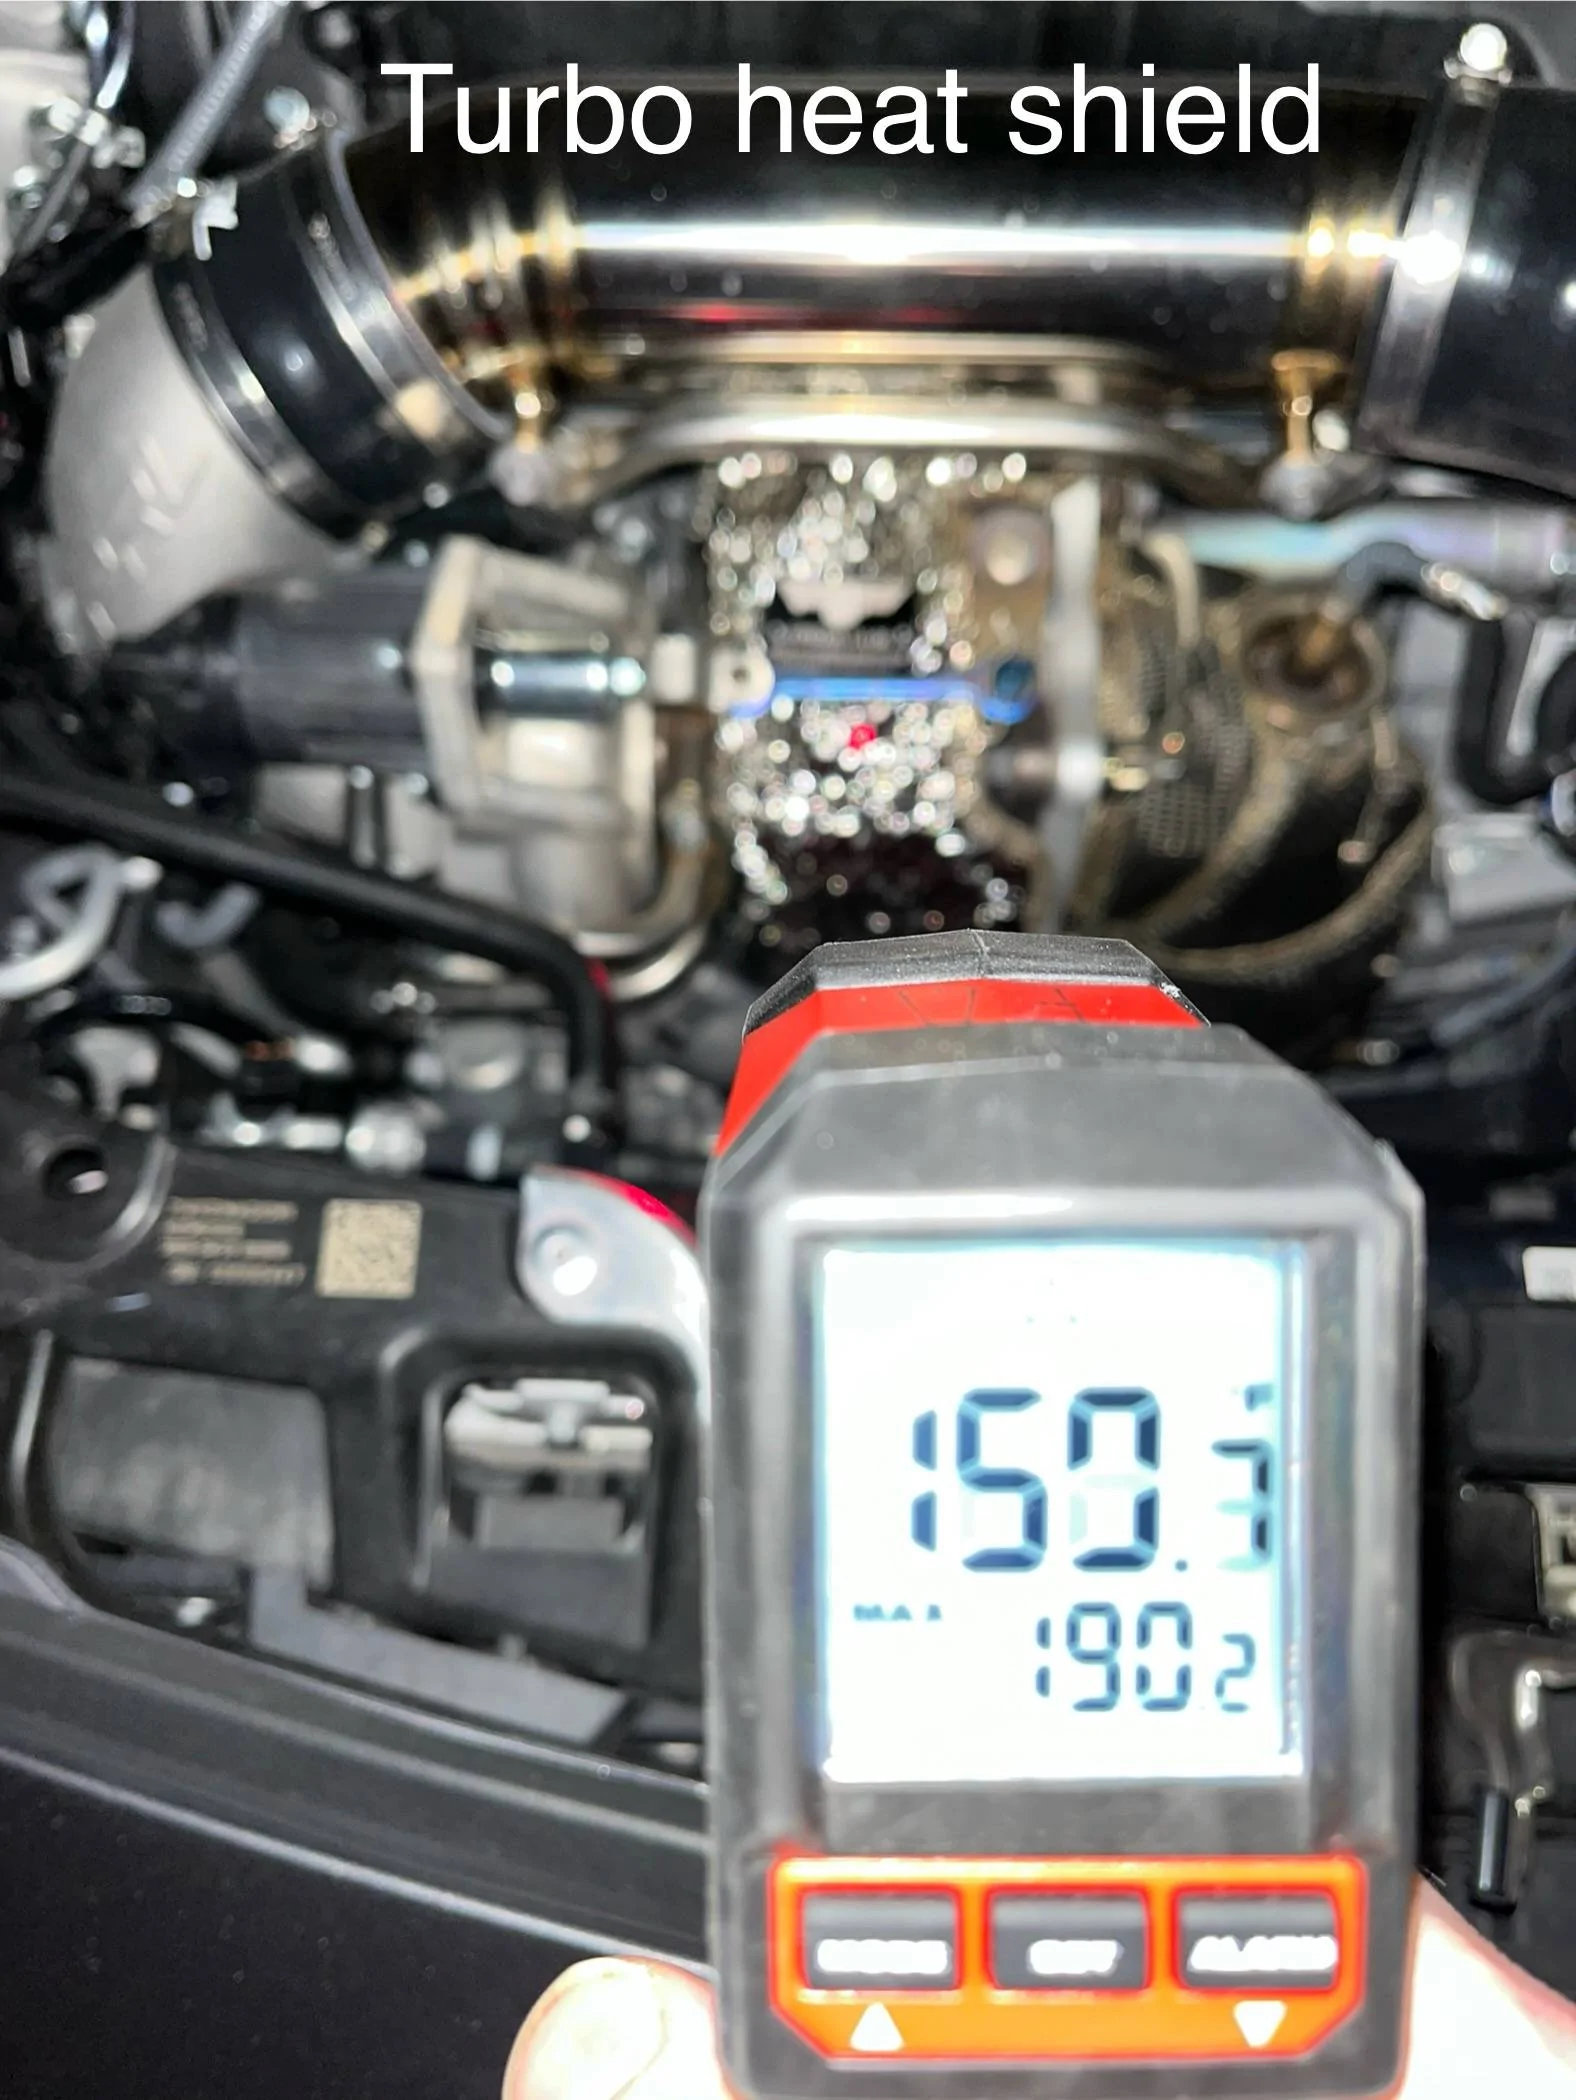
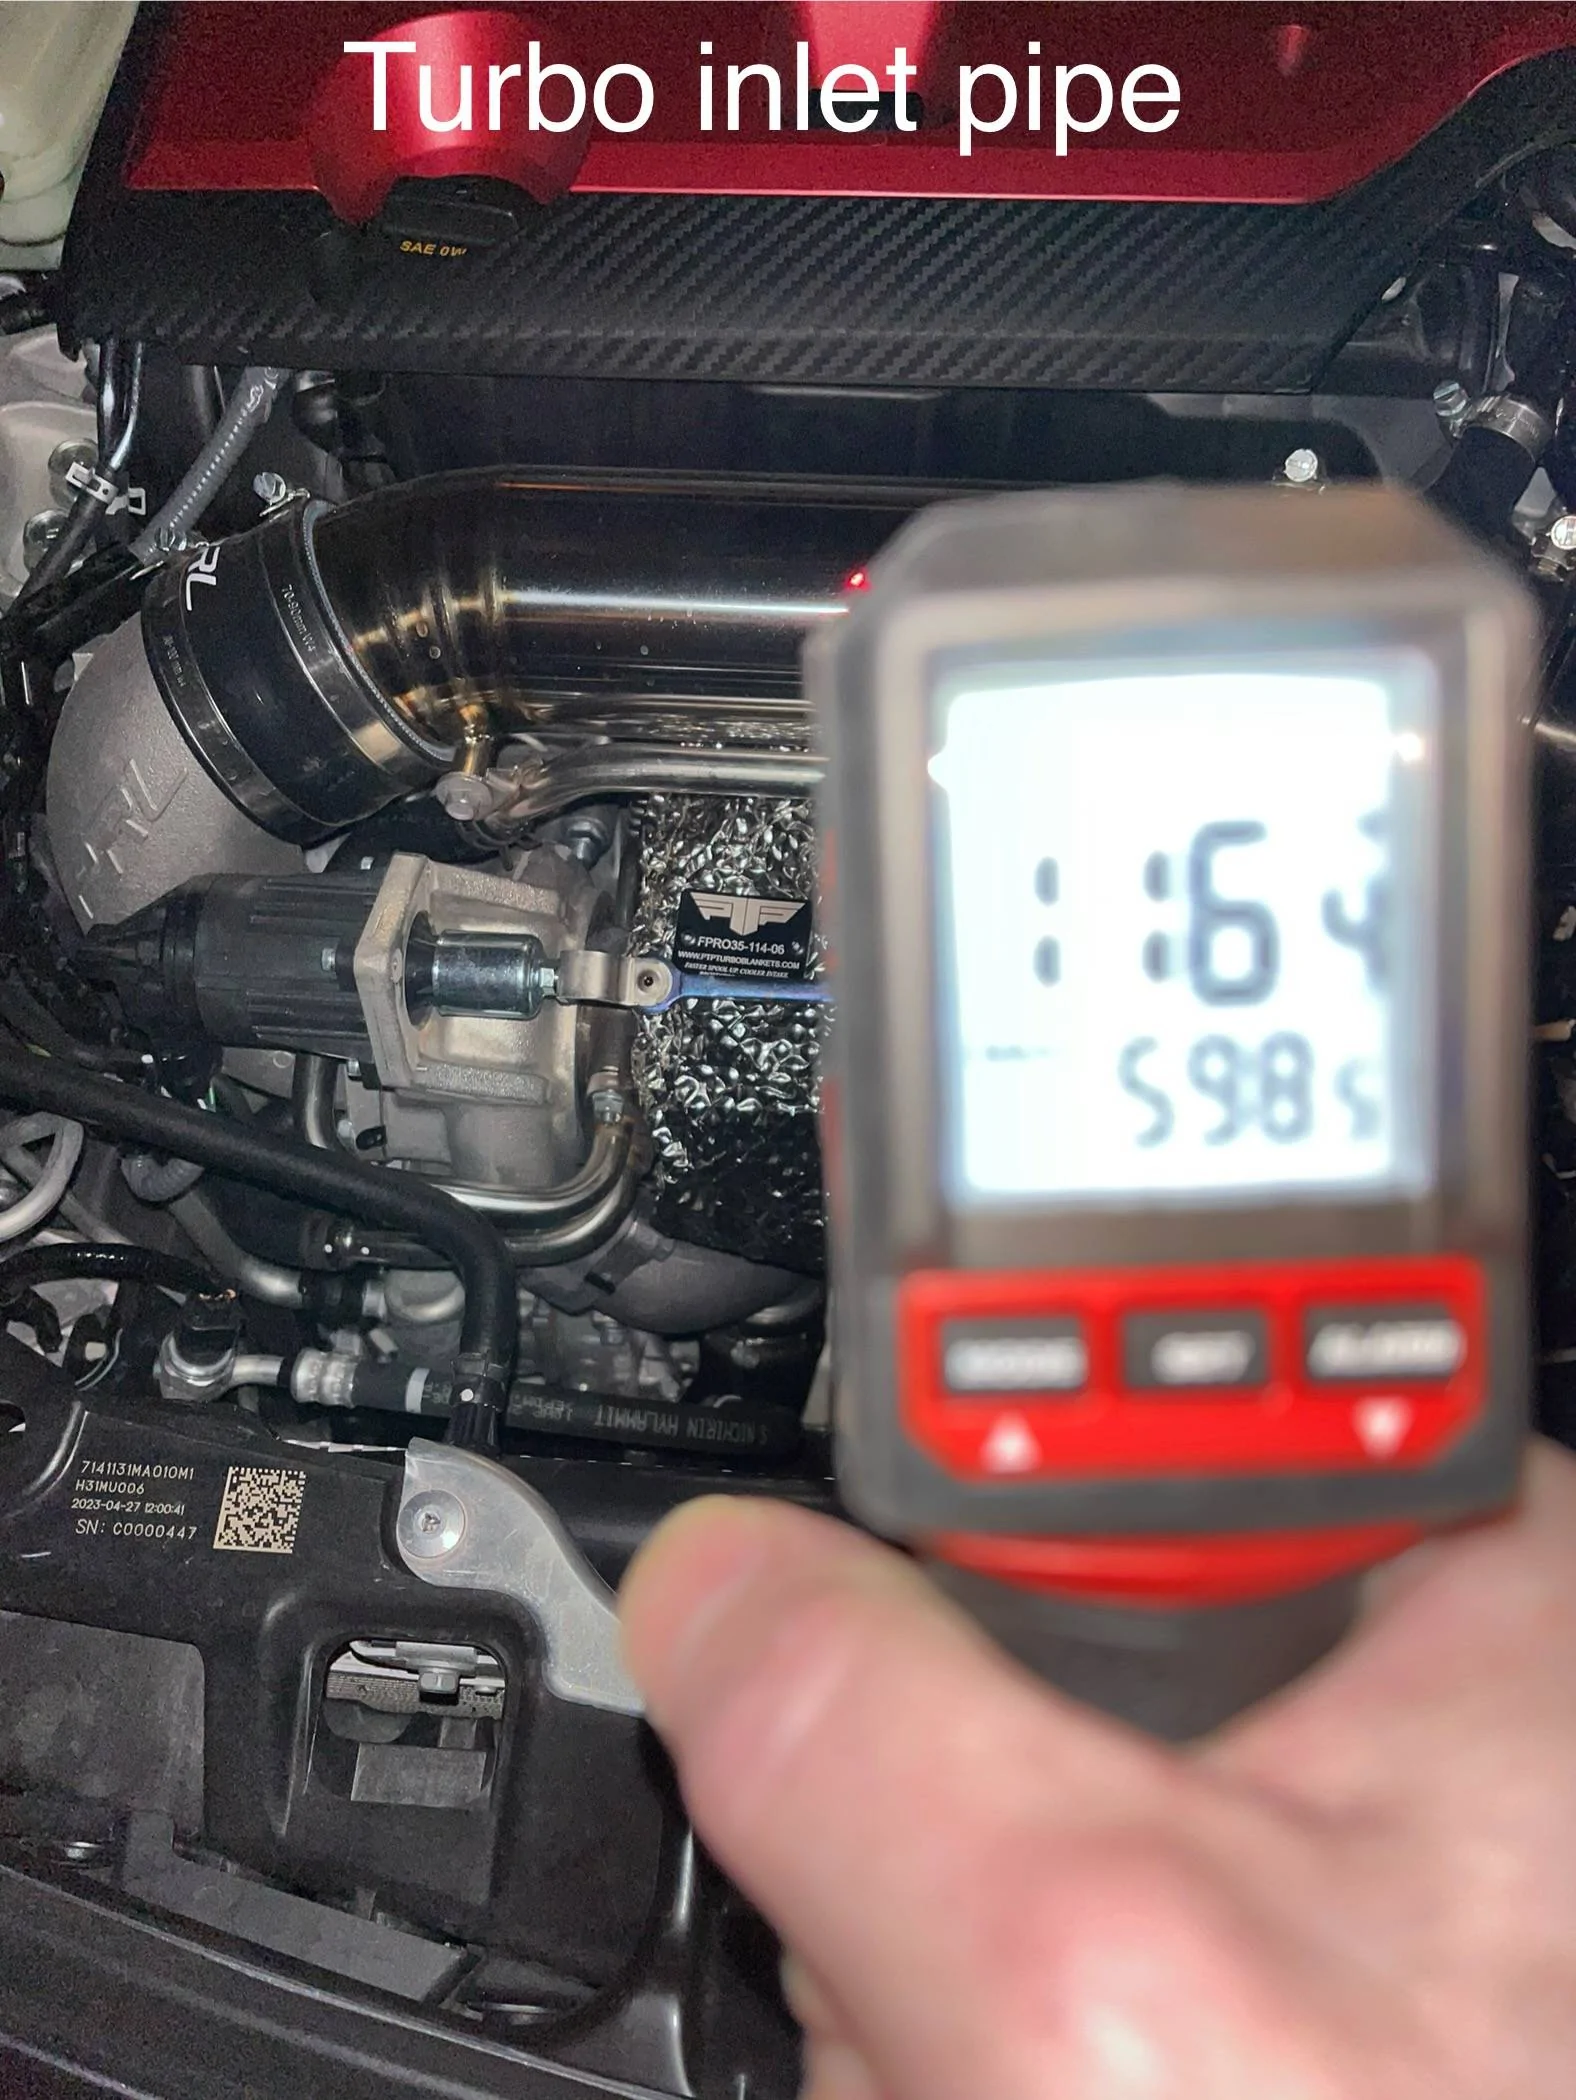
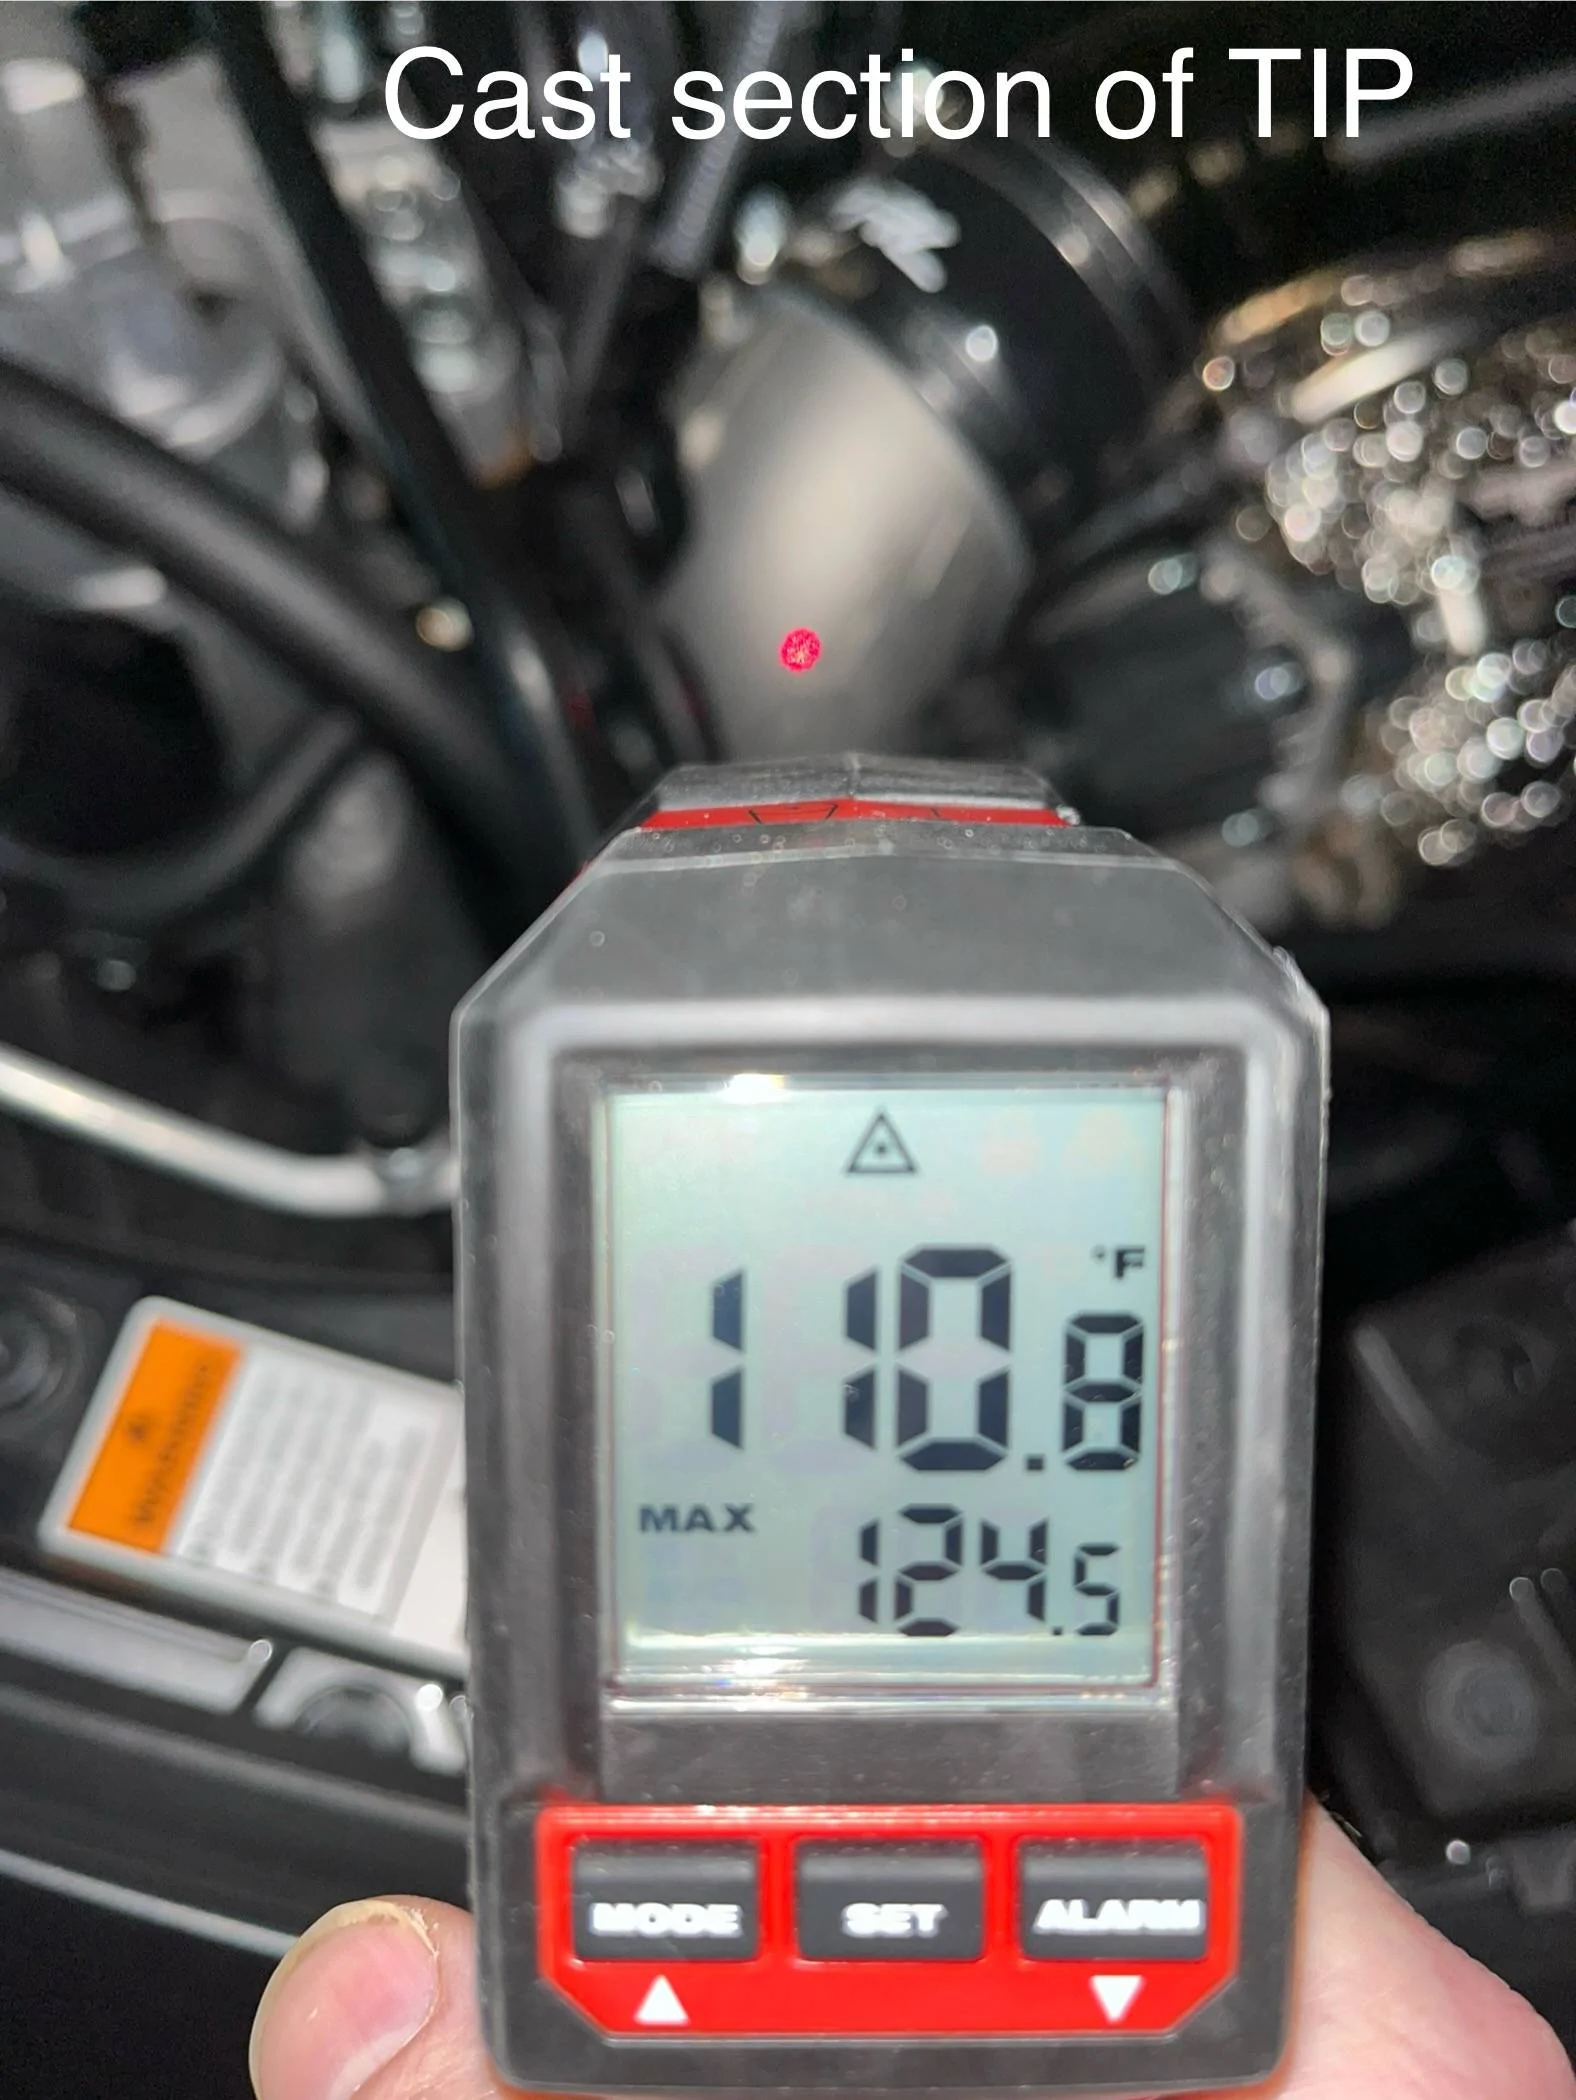
I should have taken readings prior to installing everything, but did not. If you could get some readings without the blankets, I can take some tomorrow after getting everything nice & hot & we can compare them to see the difference. I have the PTP turbo shield & the downpipe blanket as well on the silver cerakoted TSP Downpipe. Maybe we could compare downpipe area readings also & see how well the products actually perform.
Sponsored