VTEC4ME
Member
- Joined
- Aug 24, 2023
- Threads
- 0
- Messages
- 43
- Reaction score
- 26
- Location
- Salt Lake City
- Car(s)
- 2024 Integra 6MT
I've just done this mod today using the Accord frameless mirror (08V03-3A0-100) and it was quite easy. I had initially bought the $40 harness with the Accord mirror connector that you route to the fusebox (08V03-30A-100) but I didnt end up using it and will return or resell it.
Here are the steps I followed:
In the car:
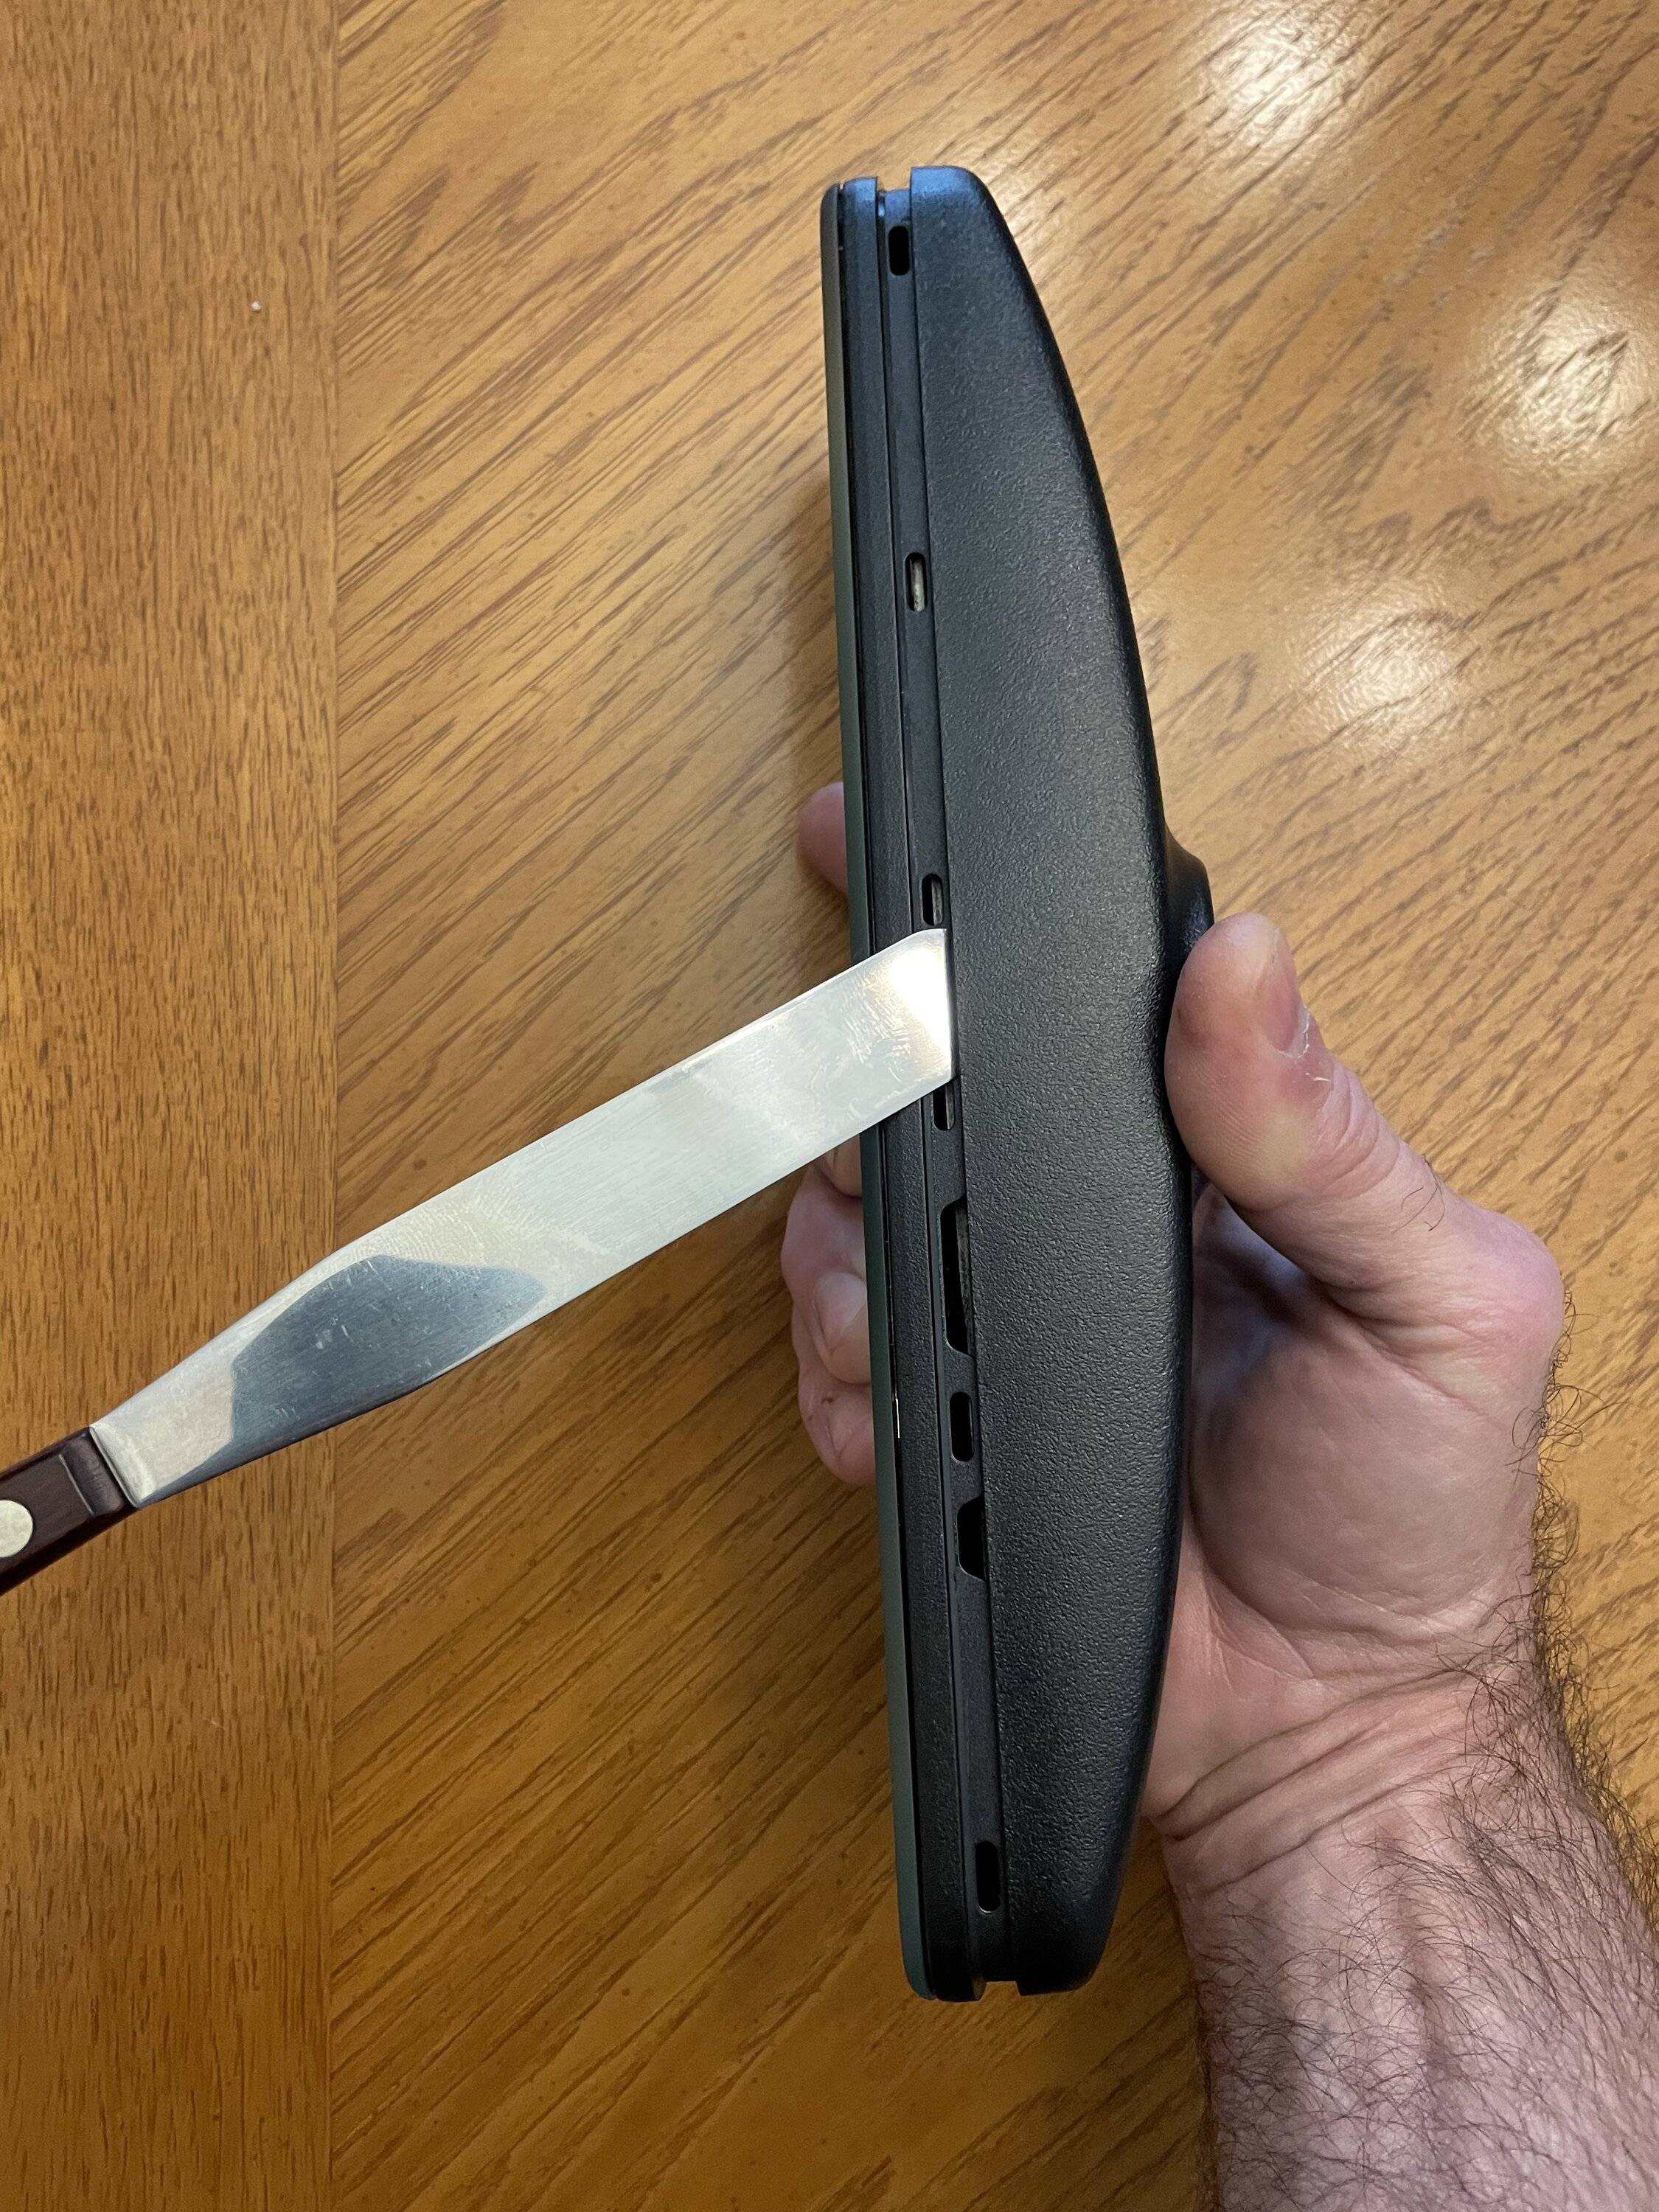
1) Remove the stock mirror shroud trim pieces (see other videoes in this thread for details on that). It was not hard, more or less I used a small plastic trim tool to pry apart, starting with a plastic razorblade at the parting line in the center of the trim pieces).
2) Unplug the stock mirror connector and remove the stock mirror by rotating counter clockwise about 30 degrees. I did this by hand but you could easily use some channel locks to make it very easy. Mentally note the position and way the twist connector fastens to the windshield as you'll have to align it again this way during reassembly.
On your workbench:
3) Purchase a new Accord Homelink Gen5 mirror, 08V03-3A0-100. (At time of writing this was $161 new from All Discount Parts).
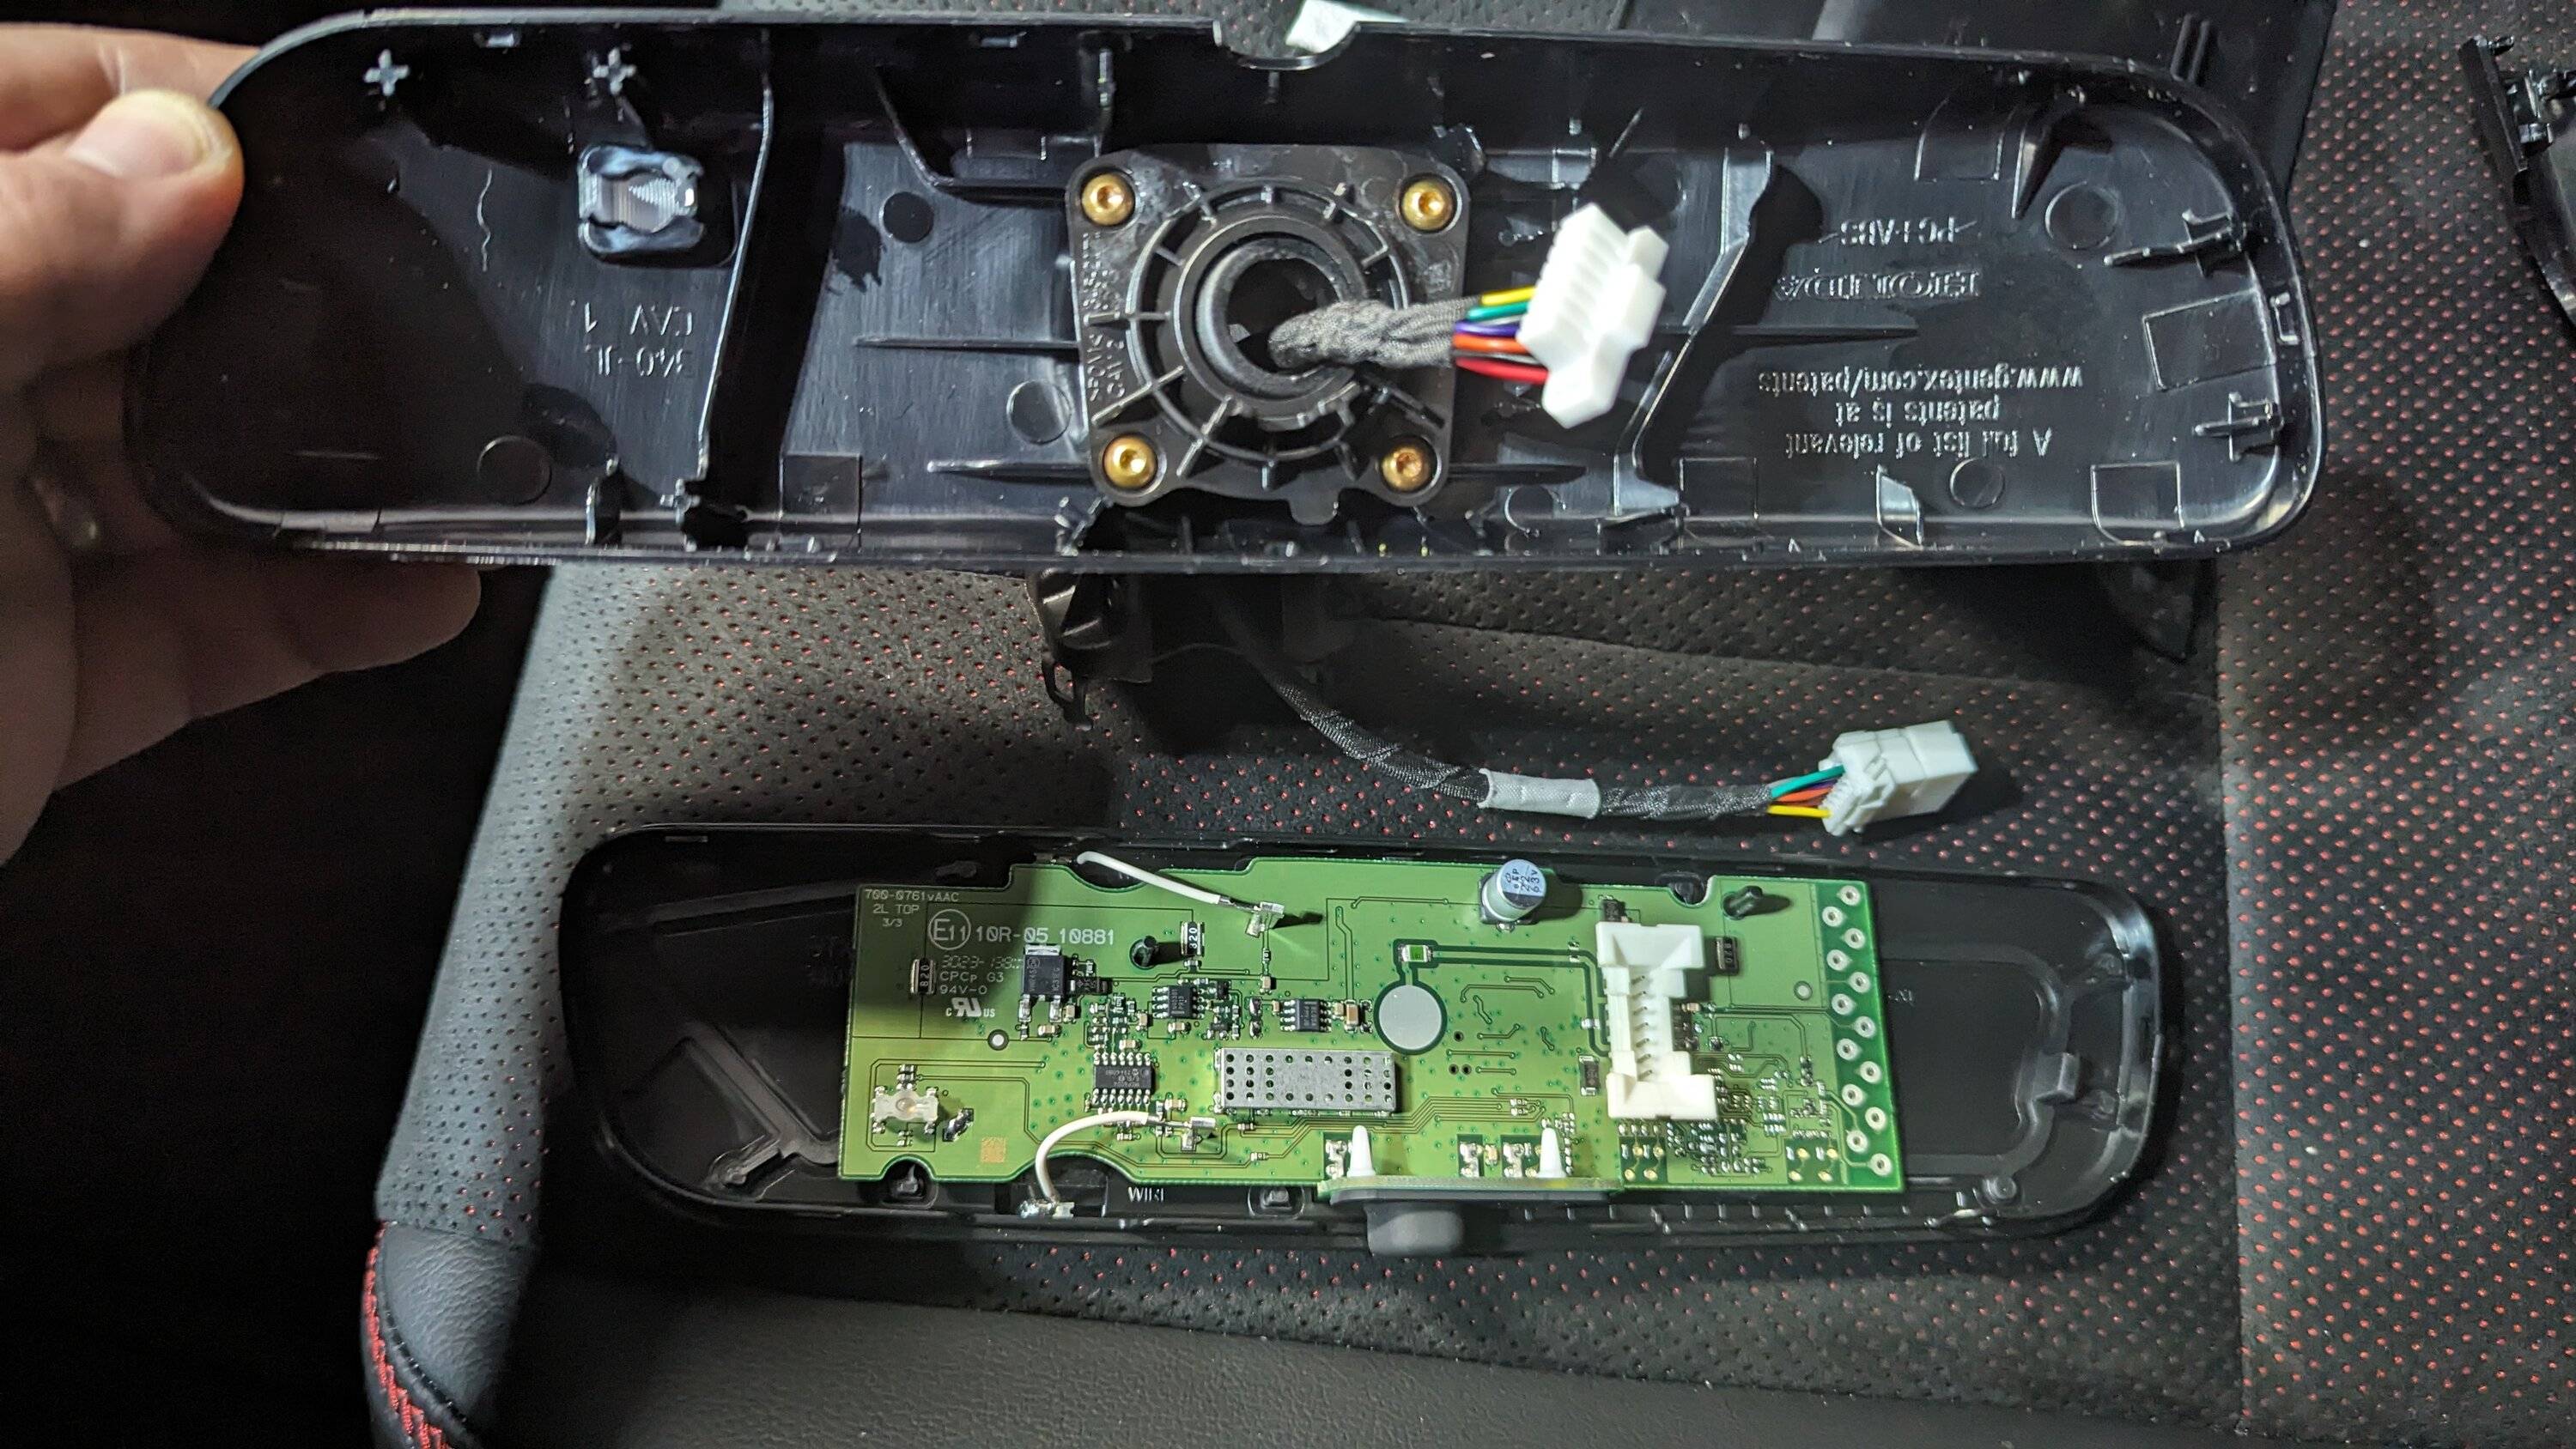
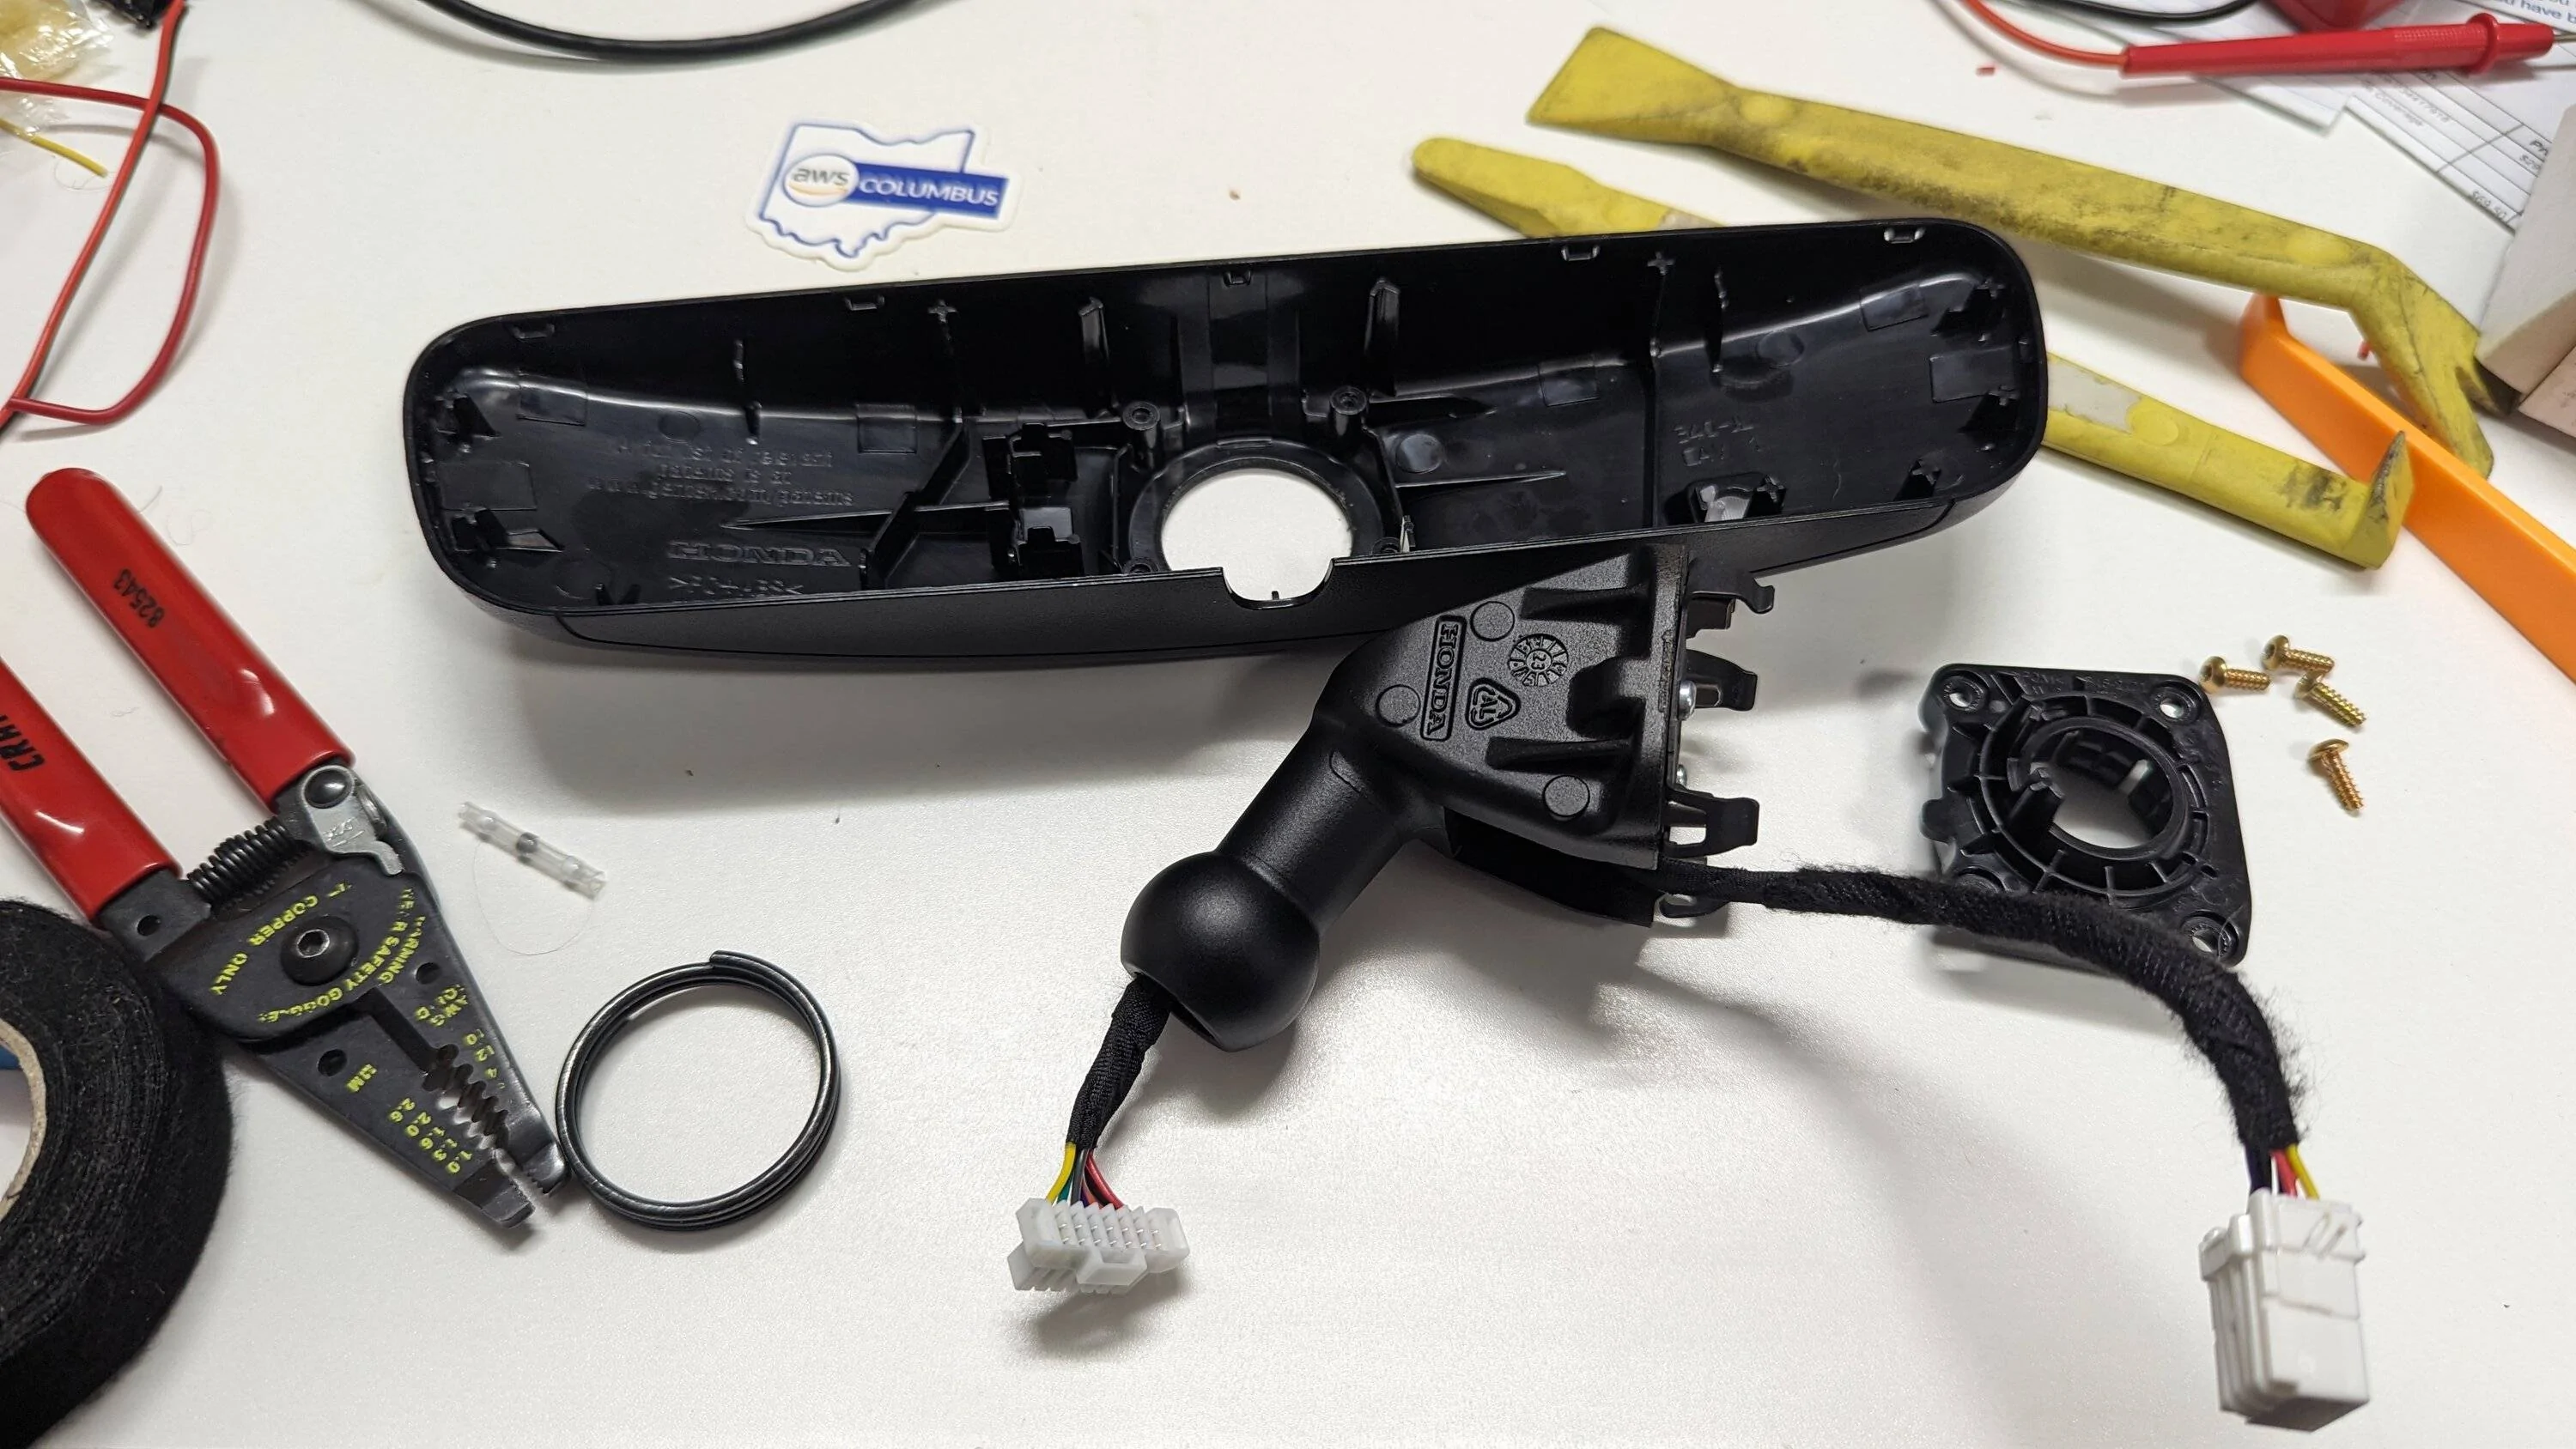
4) Use a small plastic trim tool to pry apart the clamshell of the factory frameless mirror. (Pry at the seam between the black parts, don't pry by the glass.) I was successful in getting the side apart that doesnt have the on/off button first, then moving around the sides, then getting the side with the on/off button. This took maybe 10-15 mins on the first mirror as I was exploring and being gentle, then maybe 2-3 minutes once I had the technique for the 2nd mirror.
5) Repeat the disassembly to the brand new Homelink mirror
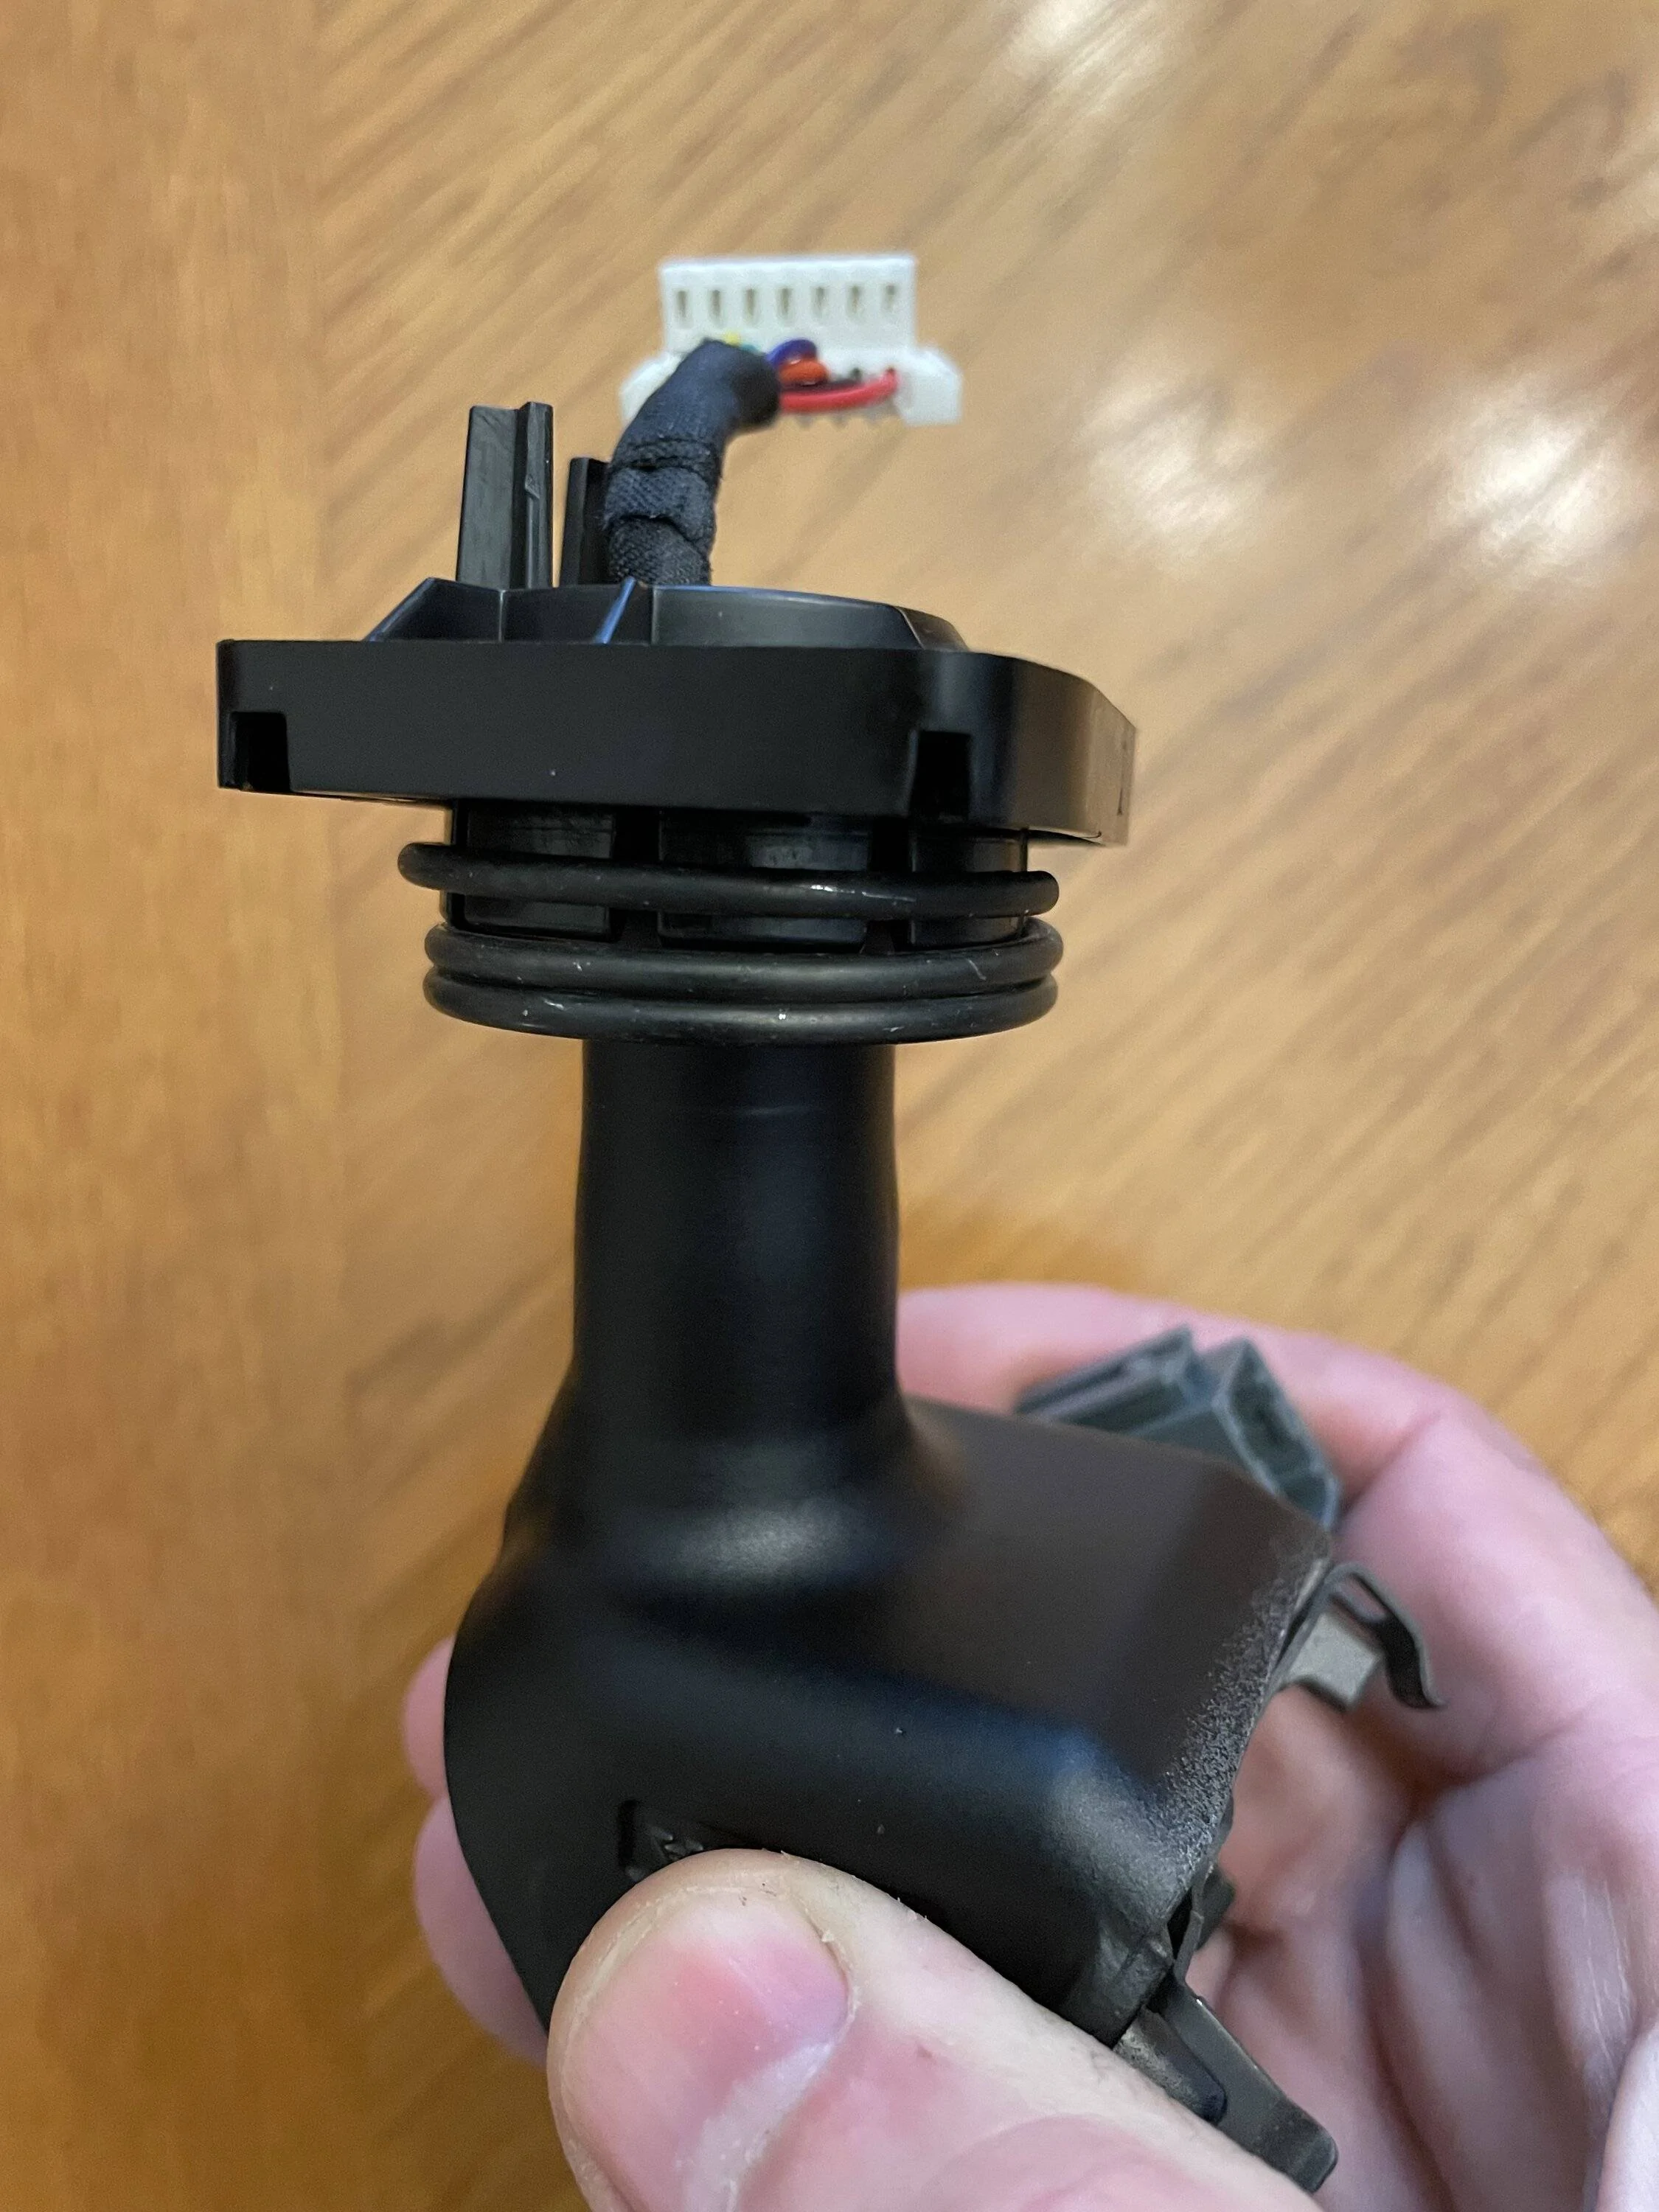
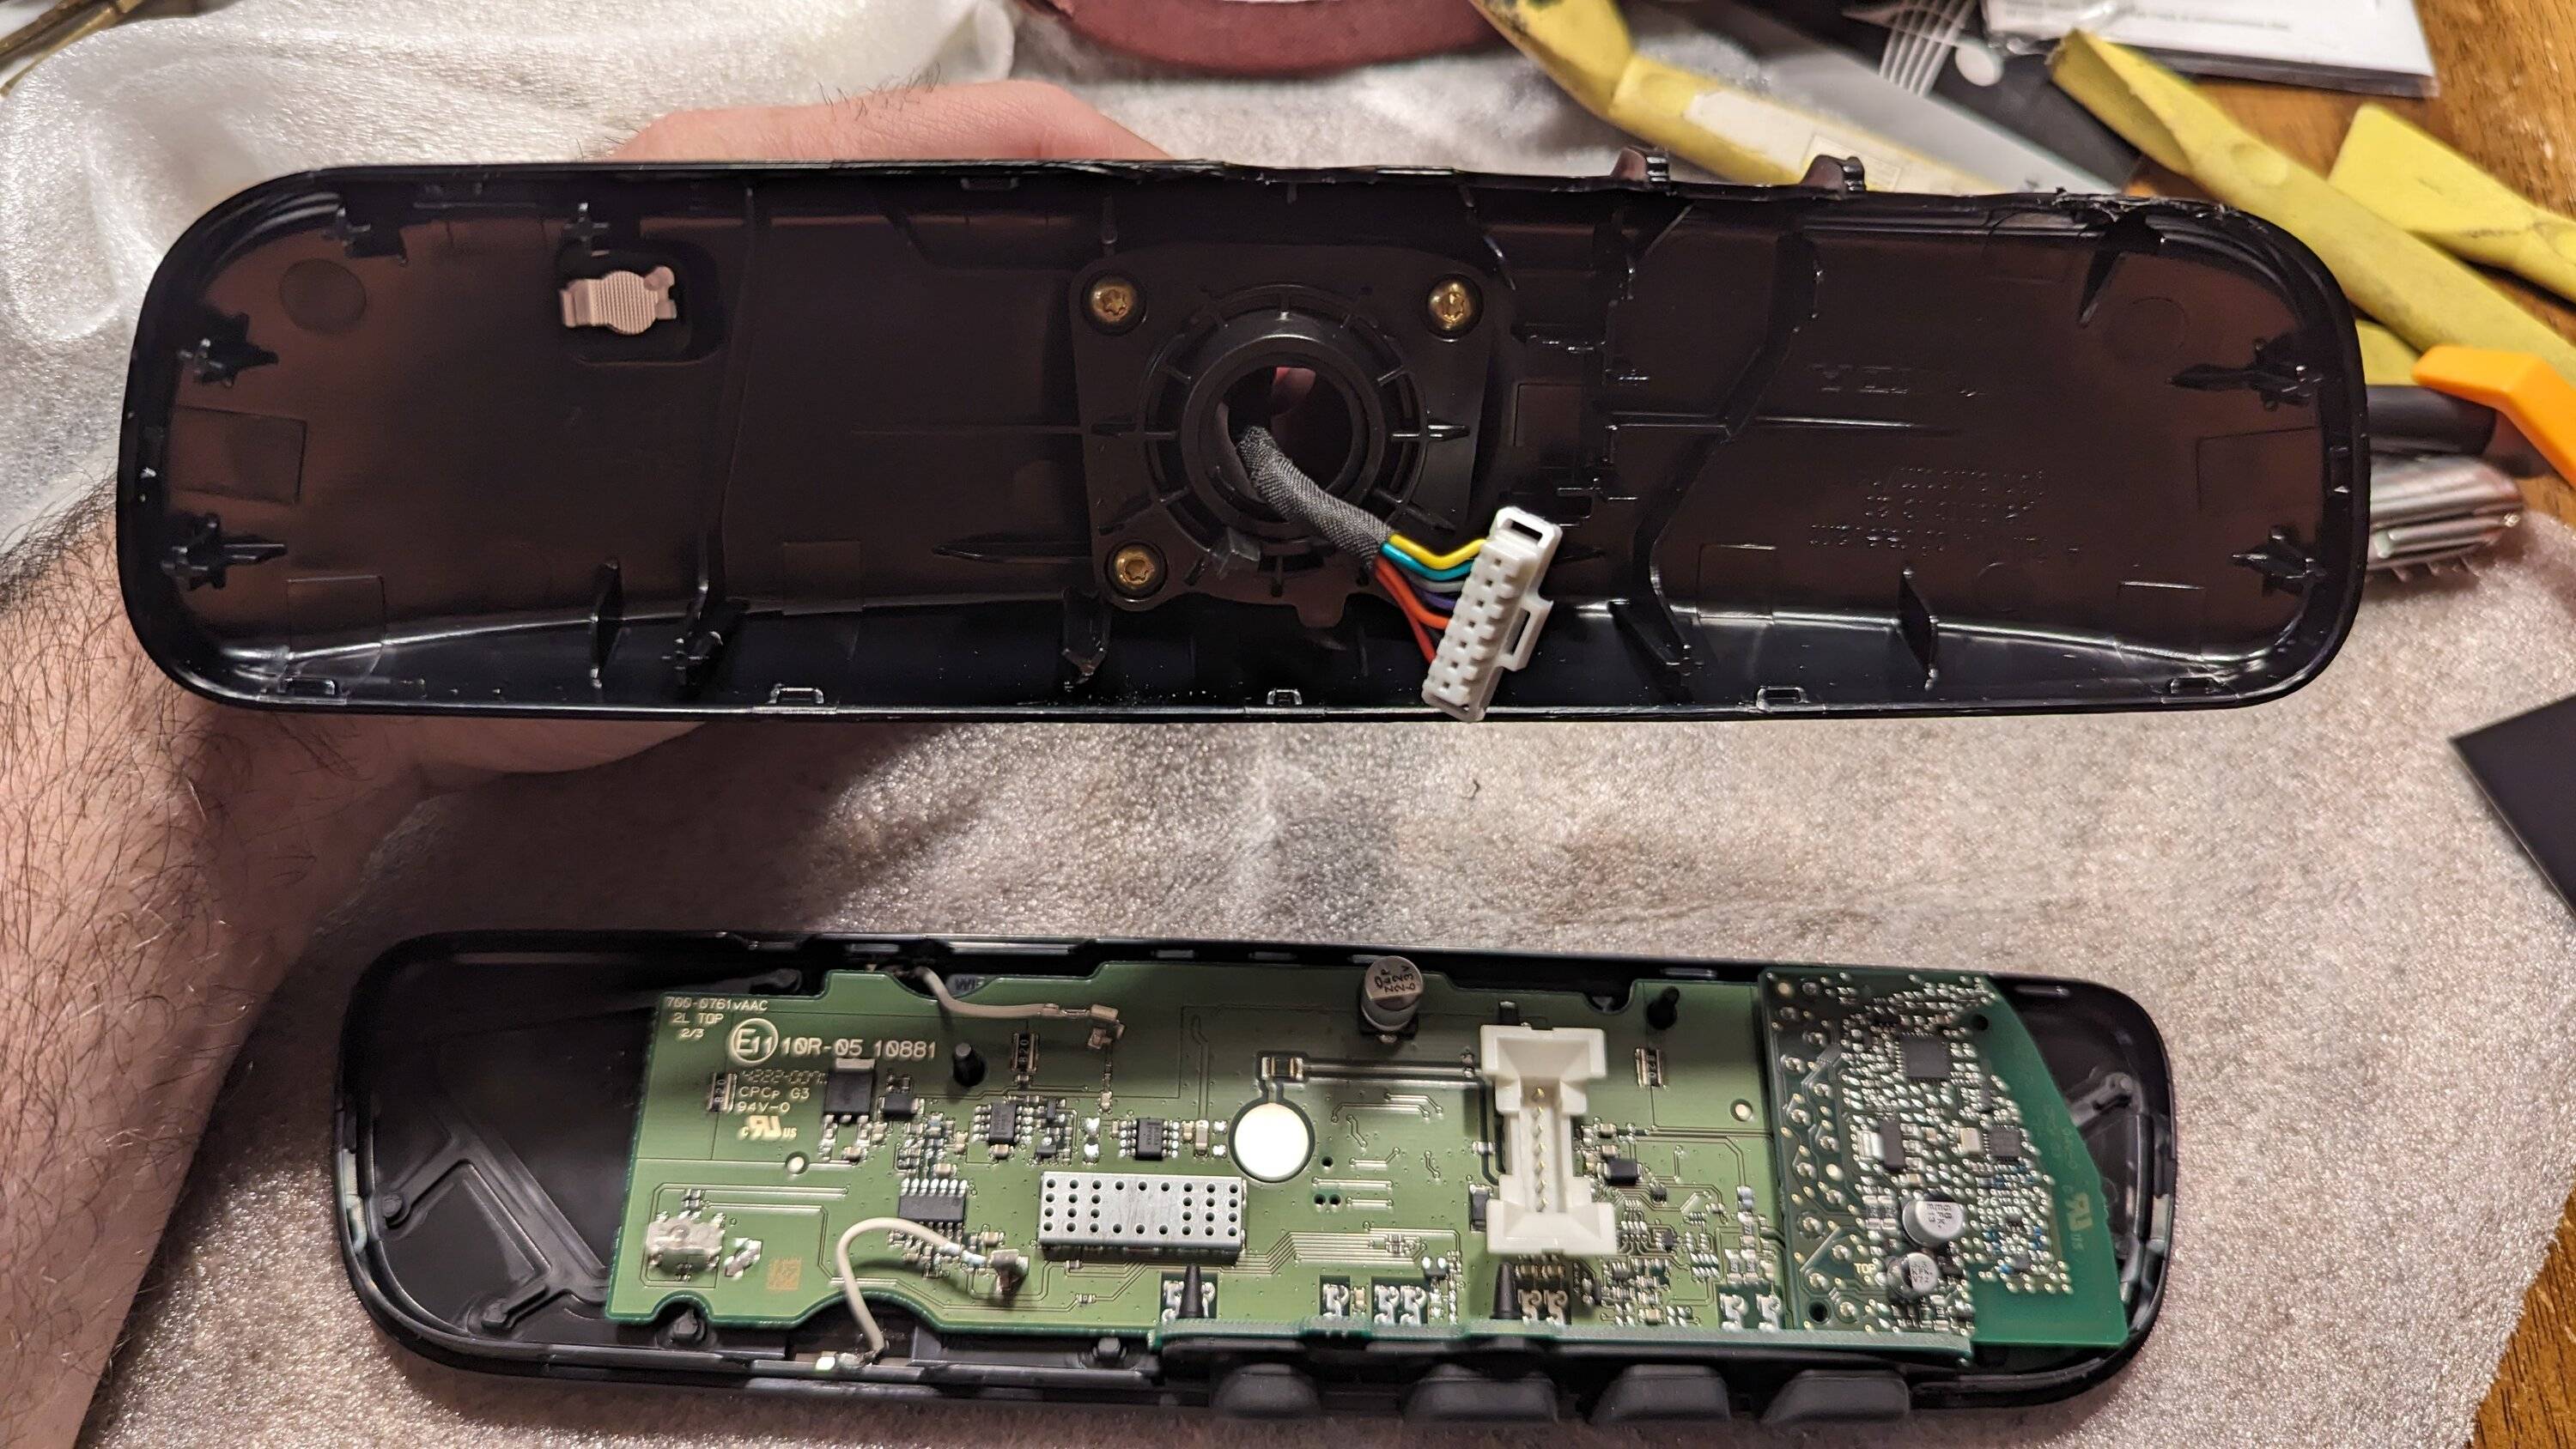
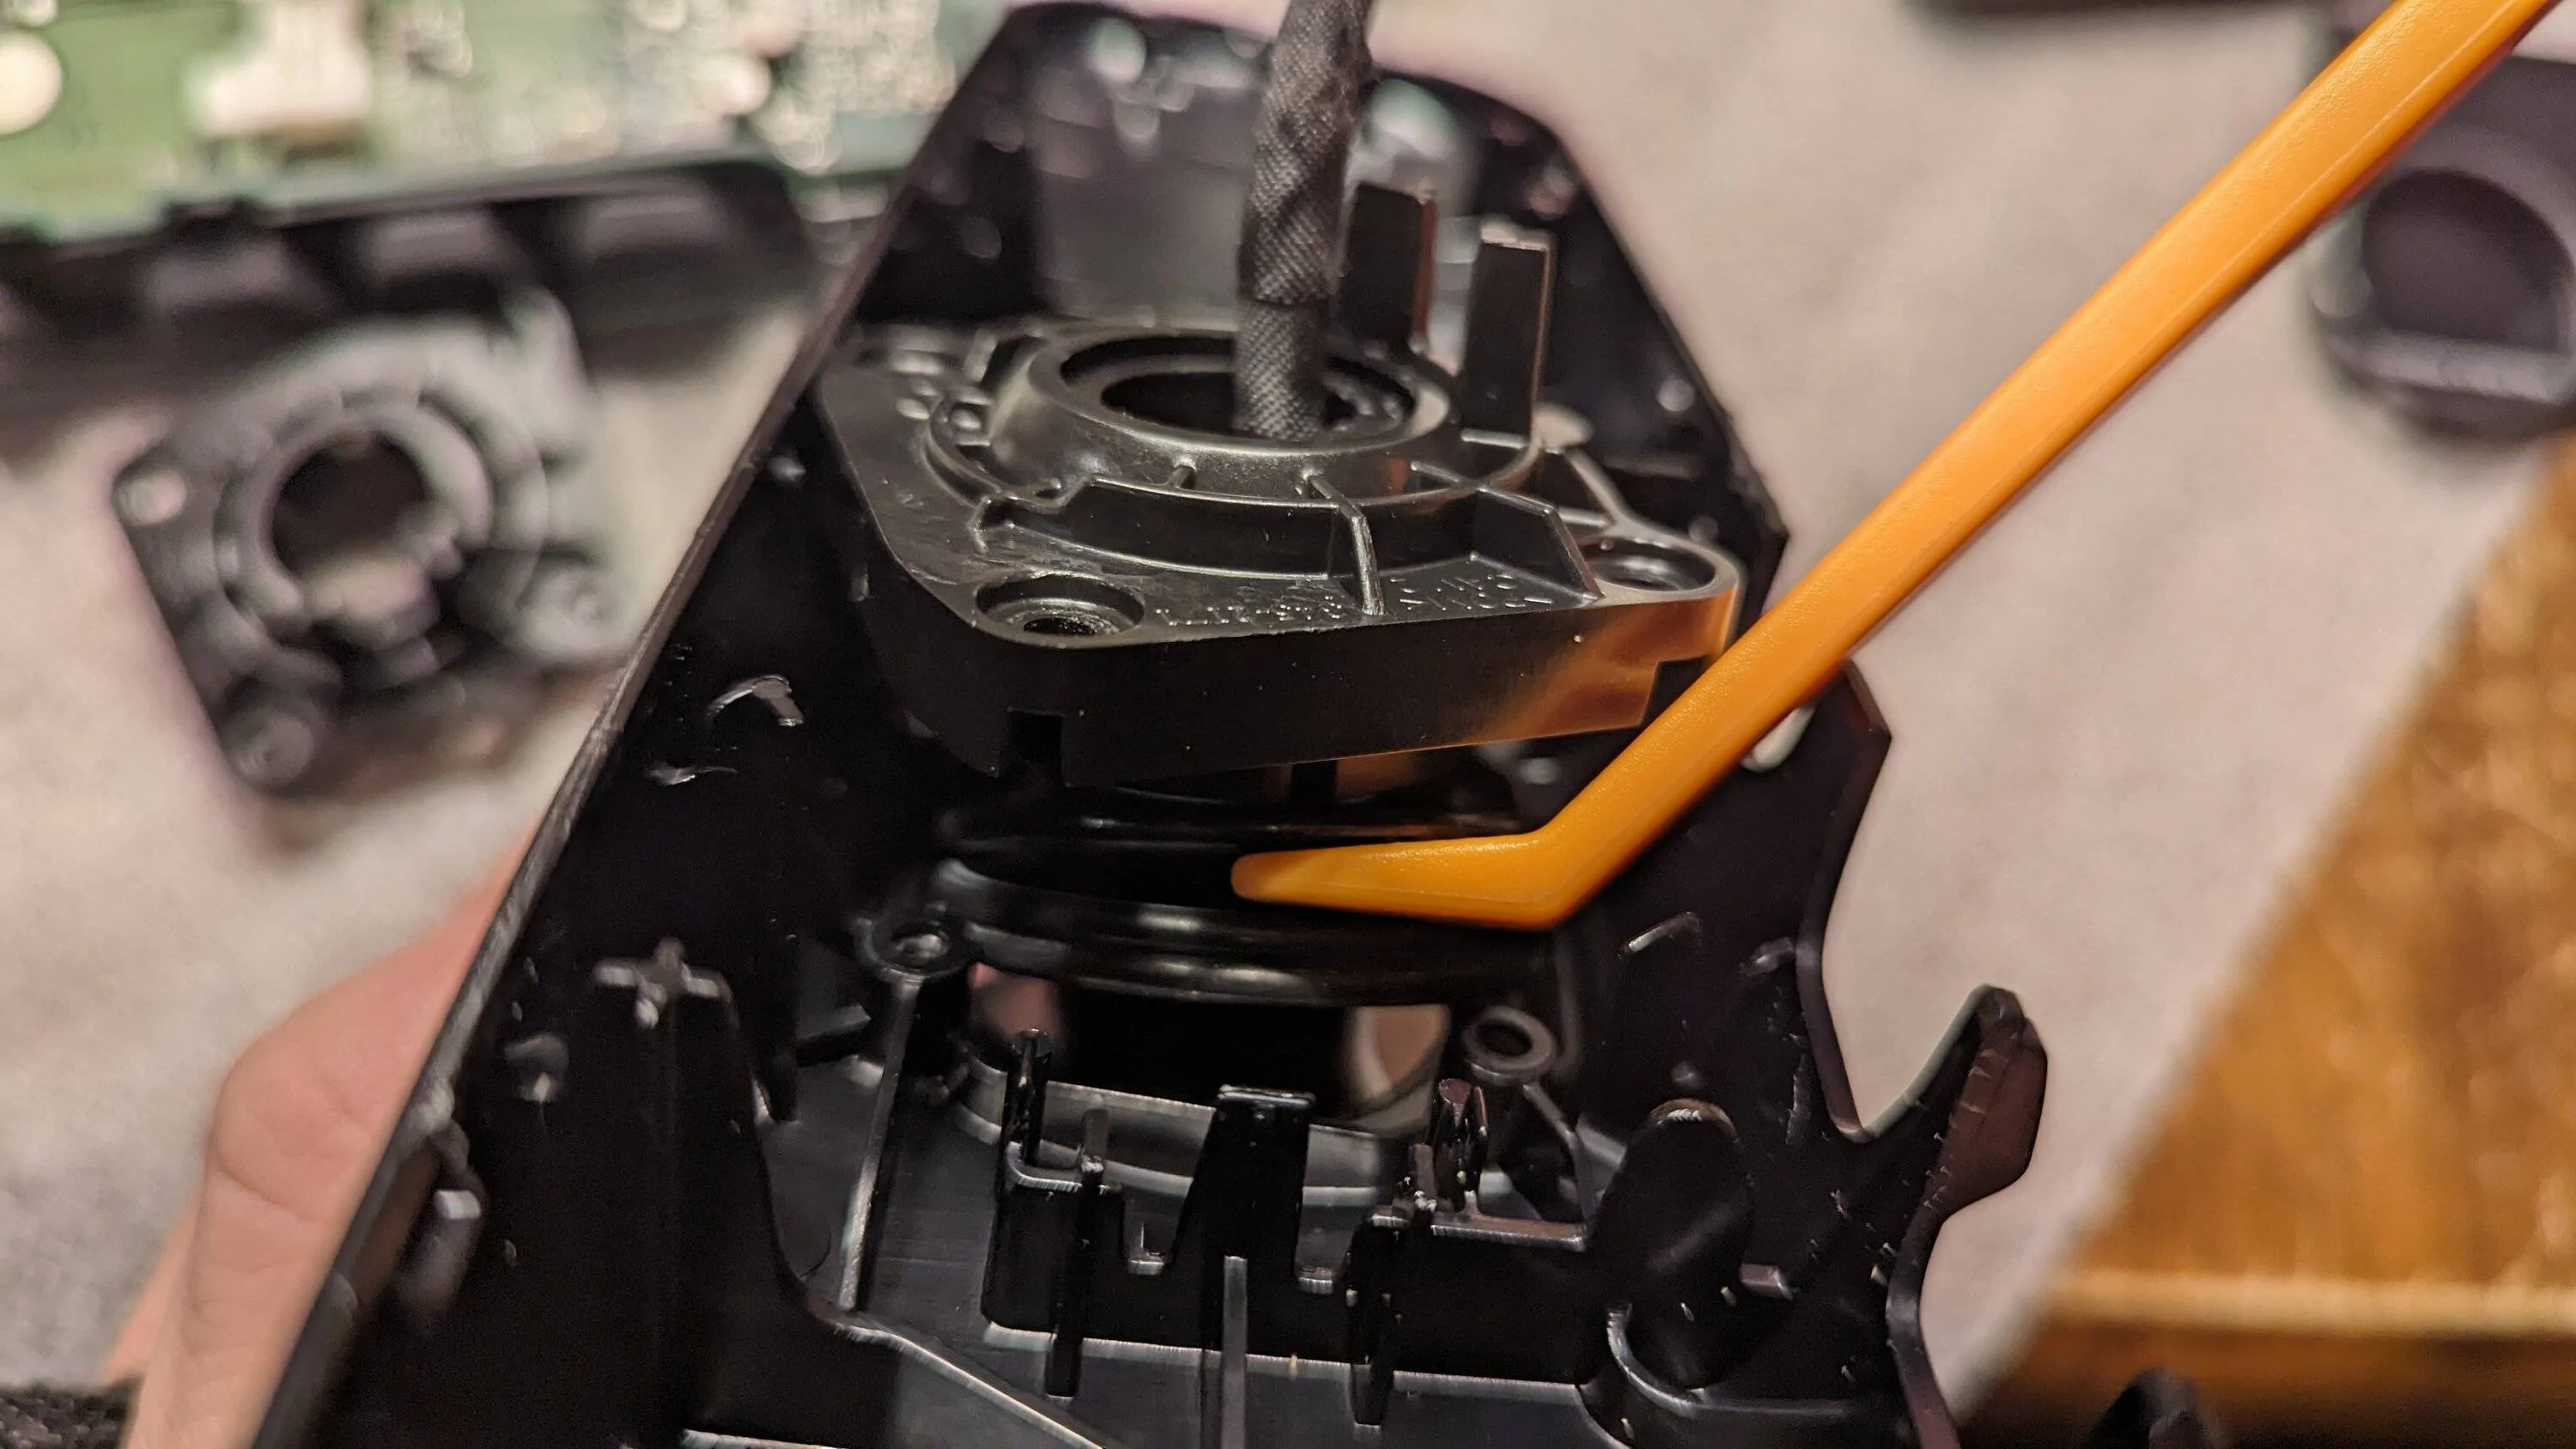
6) Swap the internal wiring harness and stem out of your stock Integra mirror onto the Accord frameless mirror. You are swapping the harness so you can use your Integra's factory mirror connector and not the Accord setup.. Note, there are 4 screws that hold the stem in place, then you remove the spring and pull it apart. To get the spring to reinstall behind the ball joint on the stem I just lined things up flat and fastened the screws again evenly and it pushed the spring back in place behind the ball socket itself..
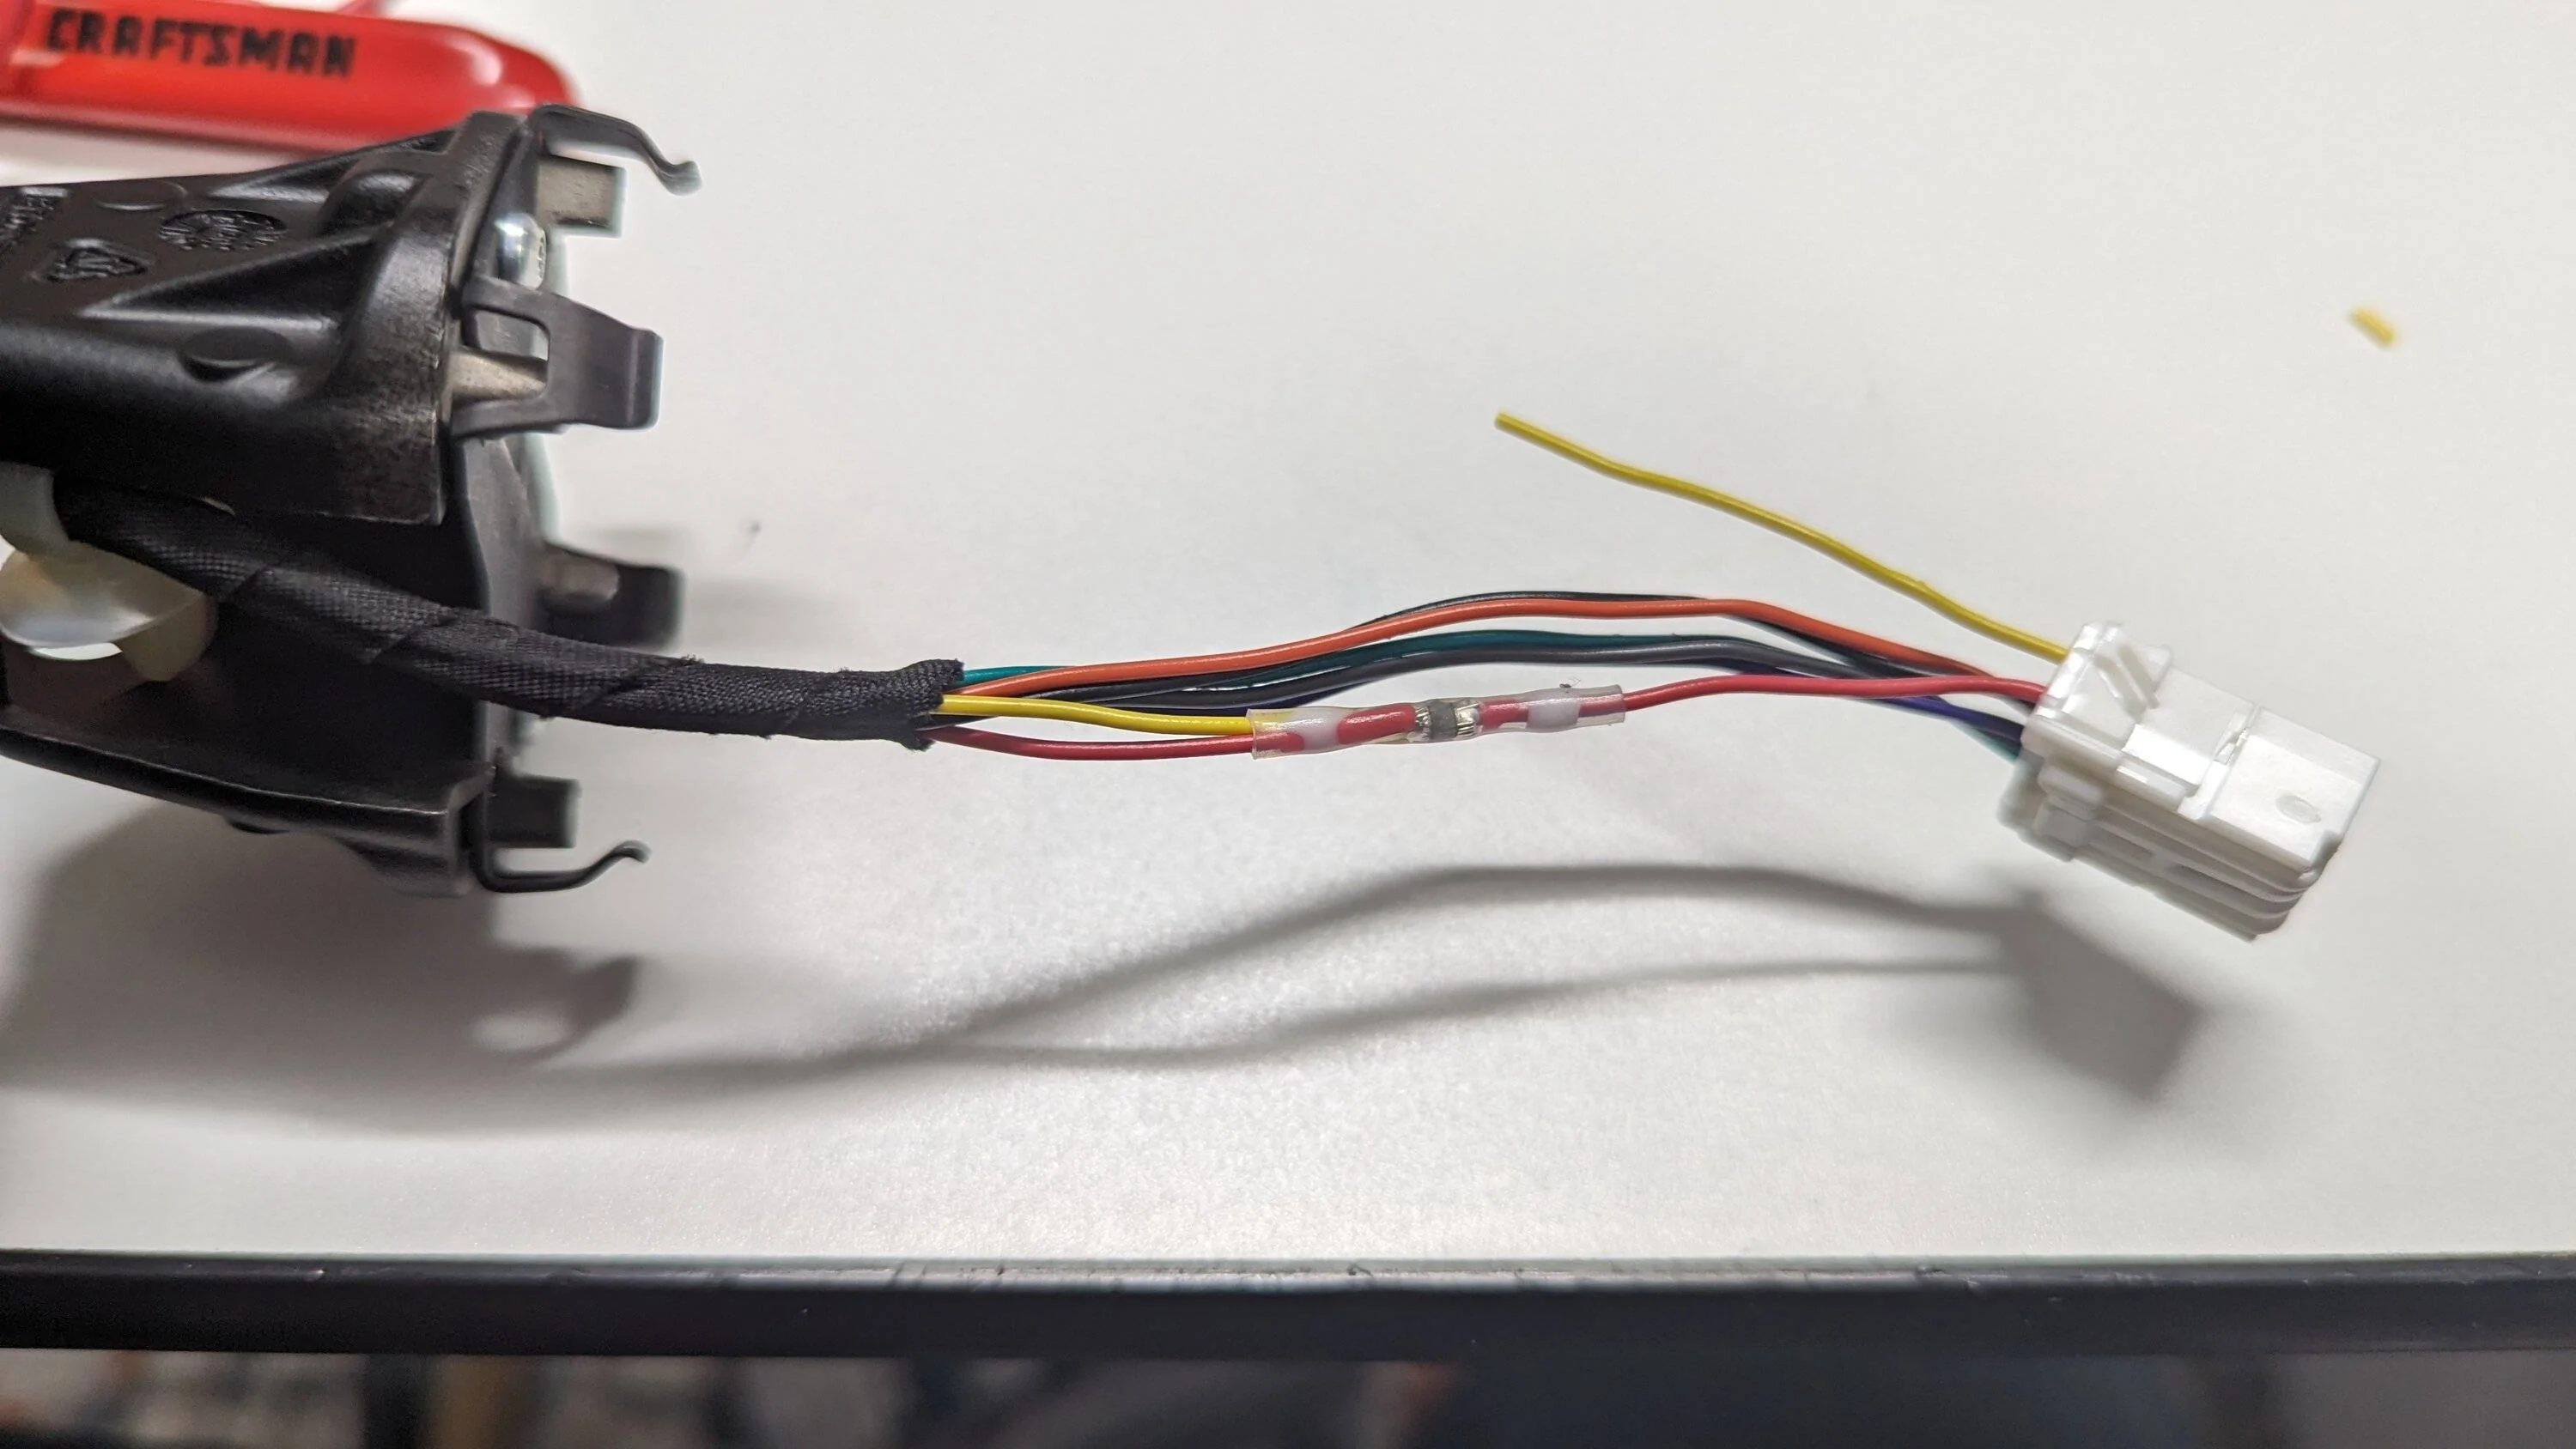
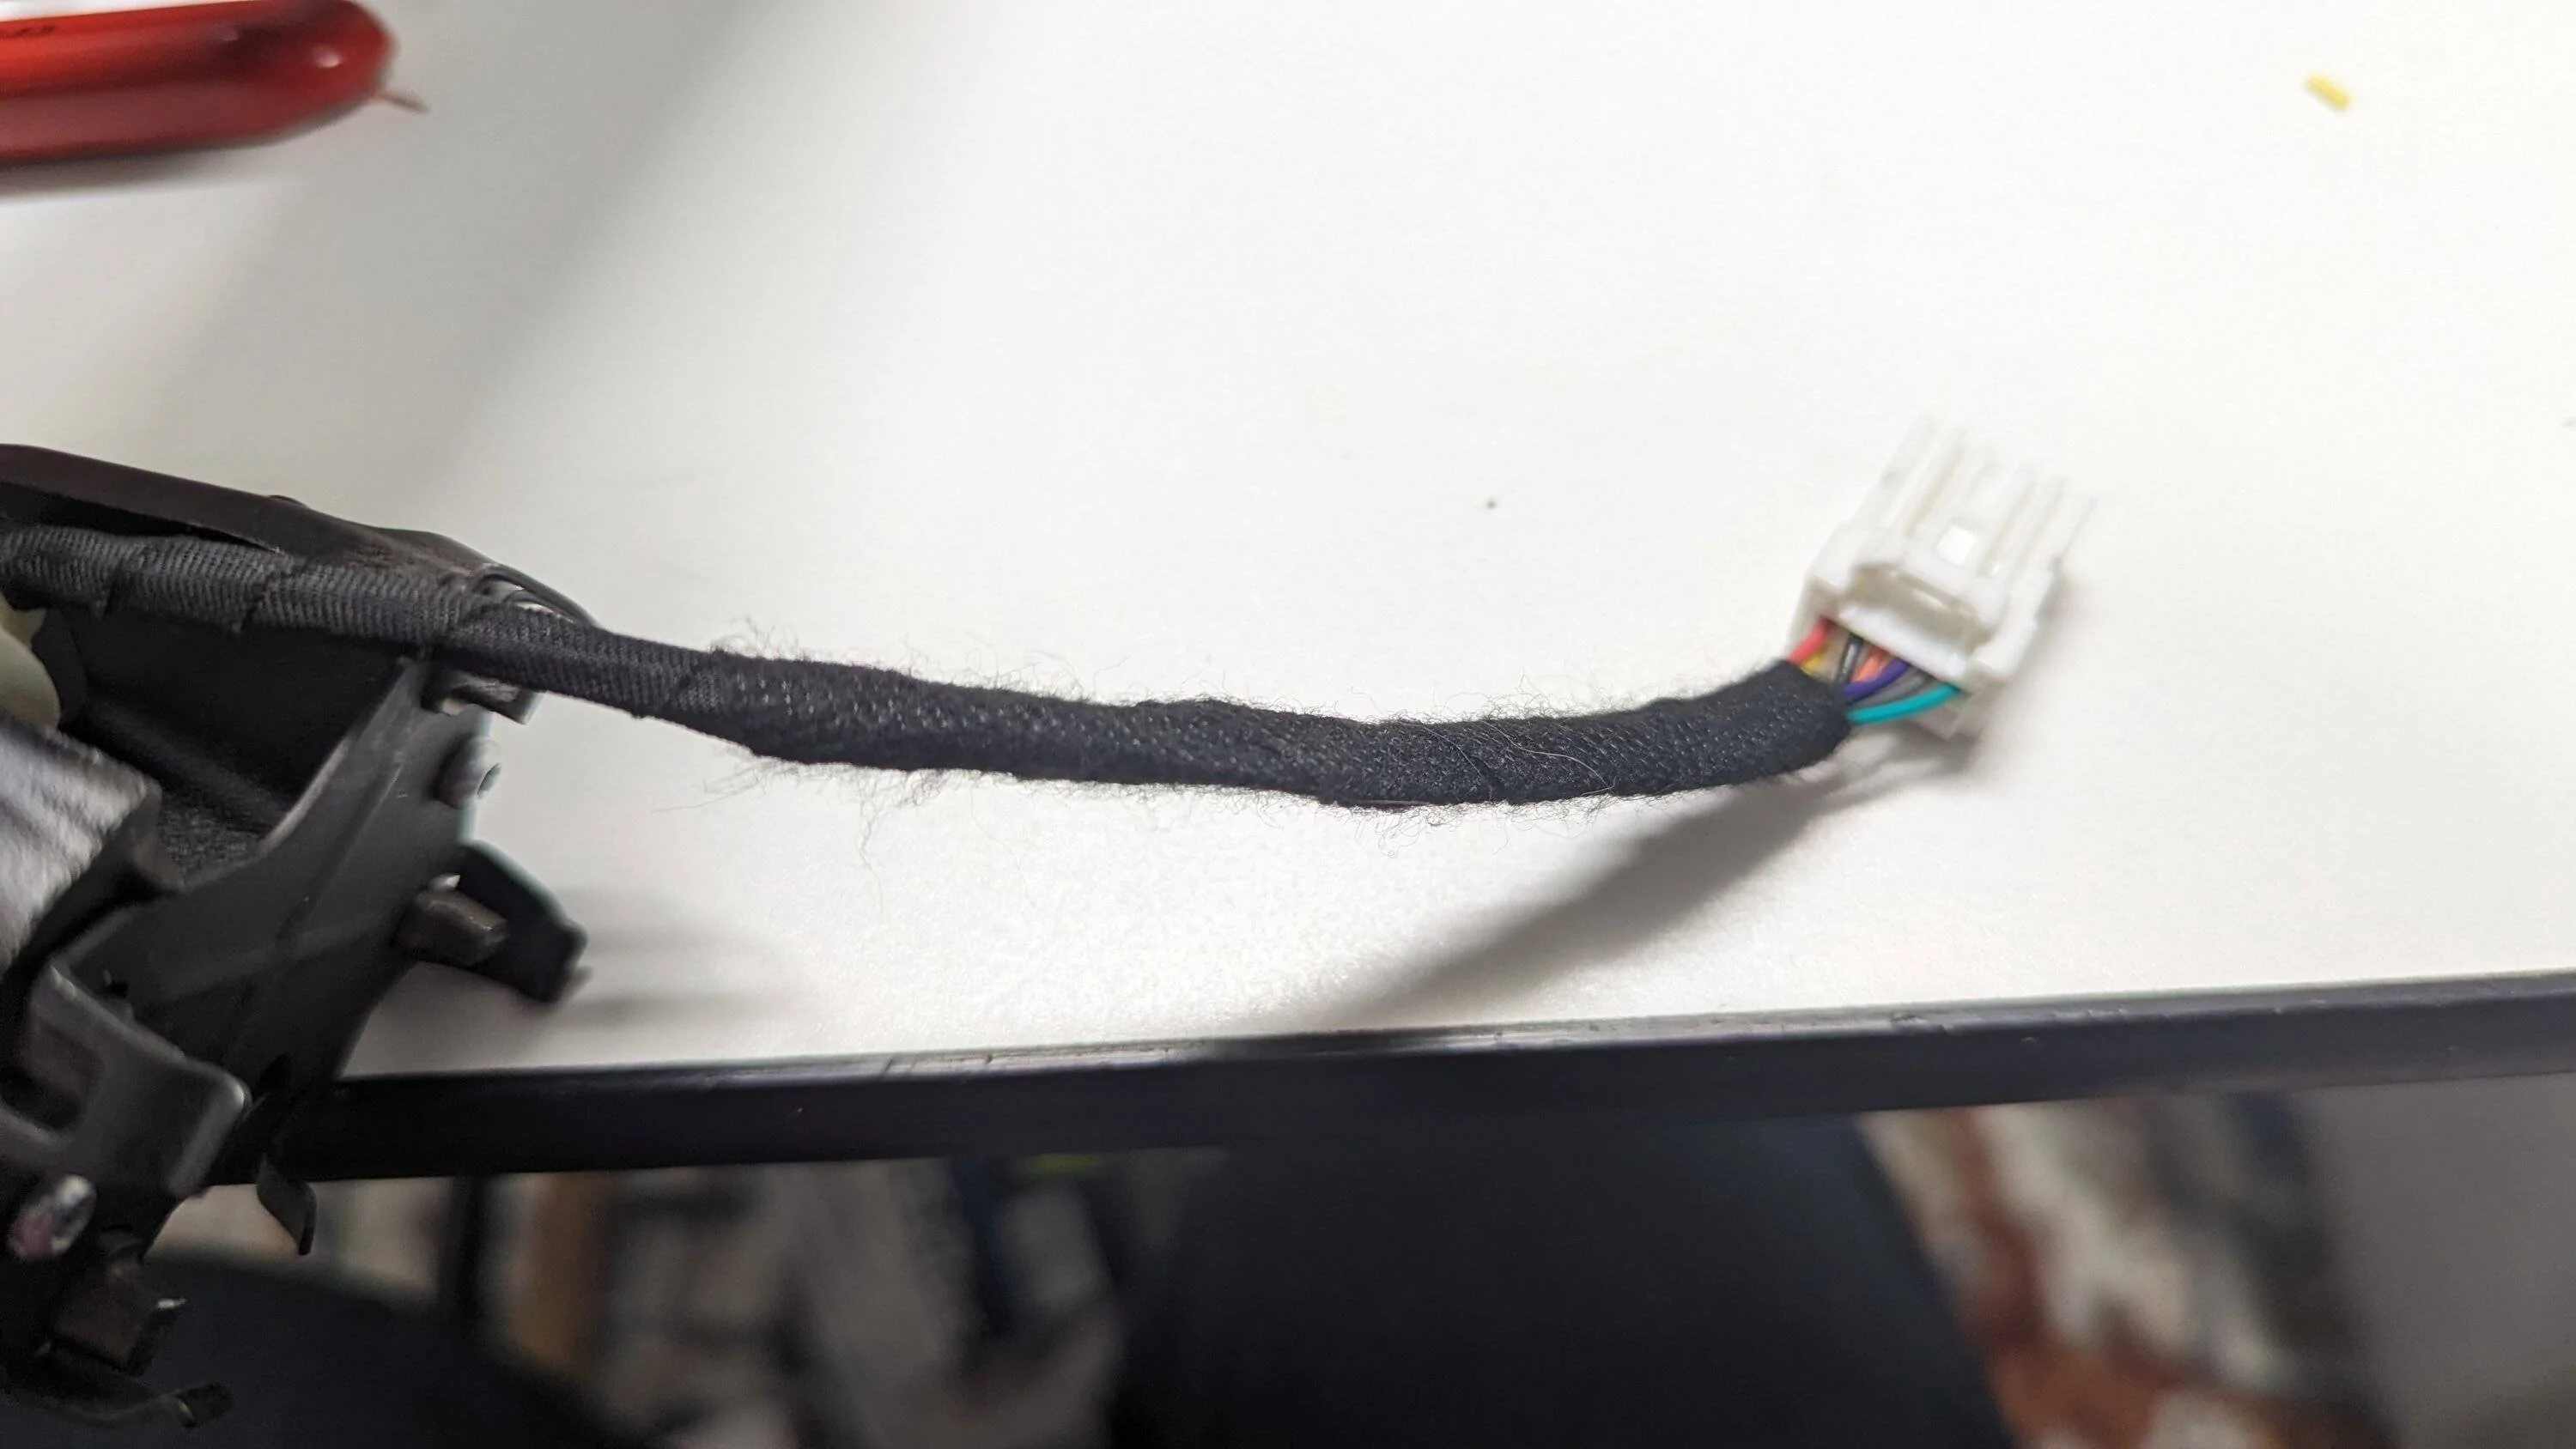
7) Important: While your mirrors are apart and internal mirror harness is exposed you need to cut back or unravel the tape it is wrapped with, use an exacto knife to strip the insulation from the yellow and red wires somewhere in the middle, solder these wires together, then add some electrical tape to insulate. Rewrap the internal mirror harness in harness tape or electrical tape. I imagine you could also do this with some tap connectors instead of soldering and leave the tap connectors inside the mirror's clamshell. This red/yellow fuse is neccessary because the factory mirror connector on the Integra doesnt provide a power feed to the yellow wire which powers the homelink. Splicing these together internally means when your mirror gets power your homelink will to, which when spliced to the red means only when the ignition is on.
Back in the car:
8) Reinstall the mirror and plug the factory connector back in. The fitting where the mirror stem attaches to the windshield has 5 prongs, 4 in a square and then one extra, for alignment I found that extra needs to be facing down near the dash.
9) Reinstall the mirror trim plastics, like most other things it all just snaps back together when lined up.
To me this method is better than using the accessory harness because it means you dont have to run the harness past the airbag and use an accessory position up in your fusebox. it's little cheaper as you only need the mirror but does mean you have to be brave enough to pry apart your brand new homelink mirror, but then again you're prying apart your brand new Integra too so how much extra risk is it really? Like the car it doesnt really have any screws holding the part together so it's just a matter of finding the right trim tool or credit card to pry it apart.
This approach also means if for any reason you wanted to return to stock (can't see why you would) the whole mod is contained within the mirror and can be swapped back to a stock one in no time and doesn't involve pulling apart the a pillar trim or adding wiring to the fusebox.
Nice! Did you take any pics of the process by chance? That is very clever to just swap internals and give it a more seamless approach.
Sponsored