ITS_320
Senior Member
I've seen some listed in the Acura inventory tracker that have their VINs in the 1200s. Is this car lower than that?It was built in June and has a low VIN which makes it one of the first batch of LCM/Reds produced.
Sponsored
I've seen some listed in the Acura inventory tracker that have their VINs in the 1200s. Is this car lower than that?It was built in June and has a low VIN which makes it one of the first batch of LCM/Reds produced.
My VIN is below 600 with a June 2023 build date so it's definitely of the first batch.I've seen some listed in the Acura inventory tracker that have their VINs in the 1200s. Is this car lower than that?
In that case, no it couldn't have been the LCM we recently sold here...?????? ?
Thanks!
I don’t *think* it’s the same car but this ITS definitely has a story to tell.
It was built in June and has a low VIN which makes it one of the first batch of LCM/Reds produced. To the best of my knowledge (online tracker and window sticker) it shipped from Marysville, was delivered to Ellicott City on 9/18 and I took delivery the next day.
I assume it was one of the LCMs with the supposed wheel paint chips that were delayed at the factory but why and where did it sit during July and August? It almost seems like it was held until the second batch of LCM/Reds were produced and shipped this September.
Radley had one sitting on the lot for a while? Could it possibly be the same car? If you can share any insight, I'd like to know just to satisfy my curiosity.
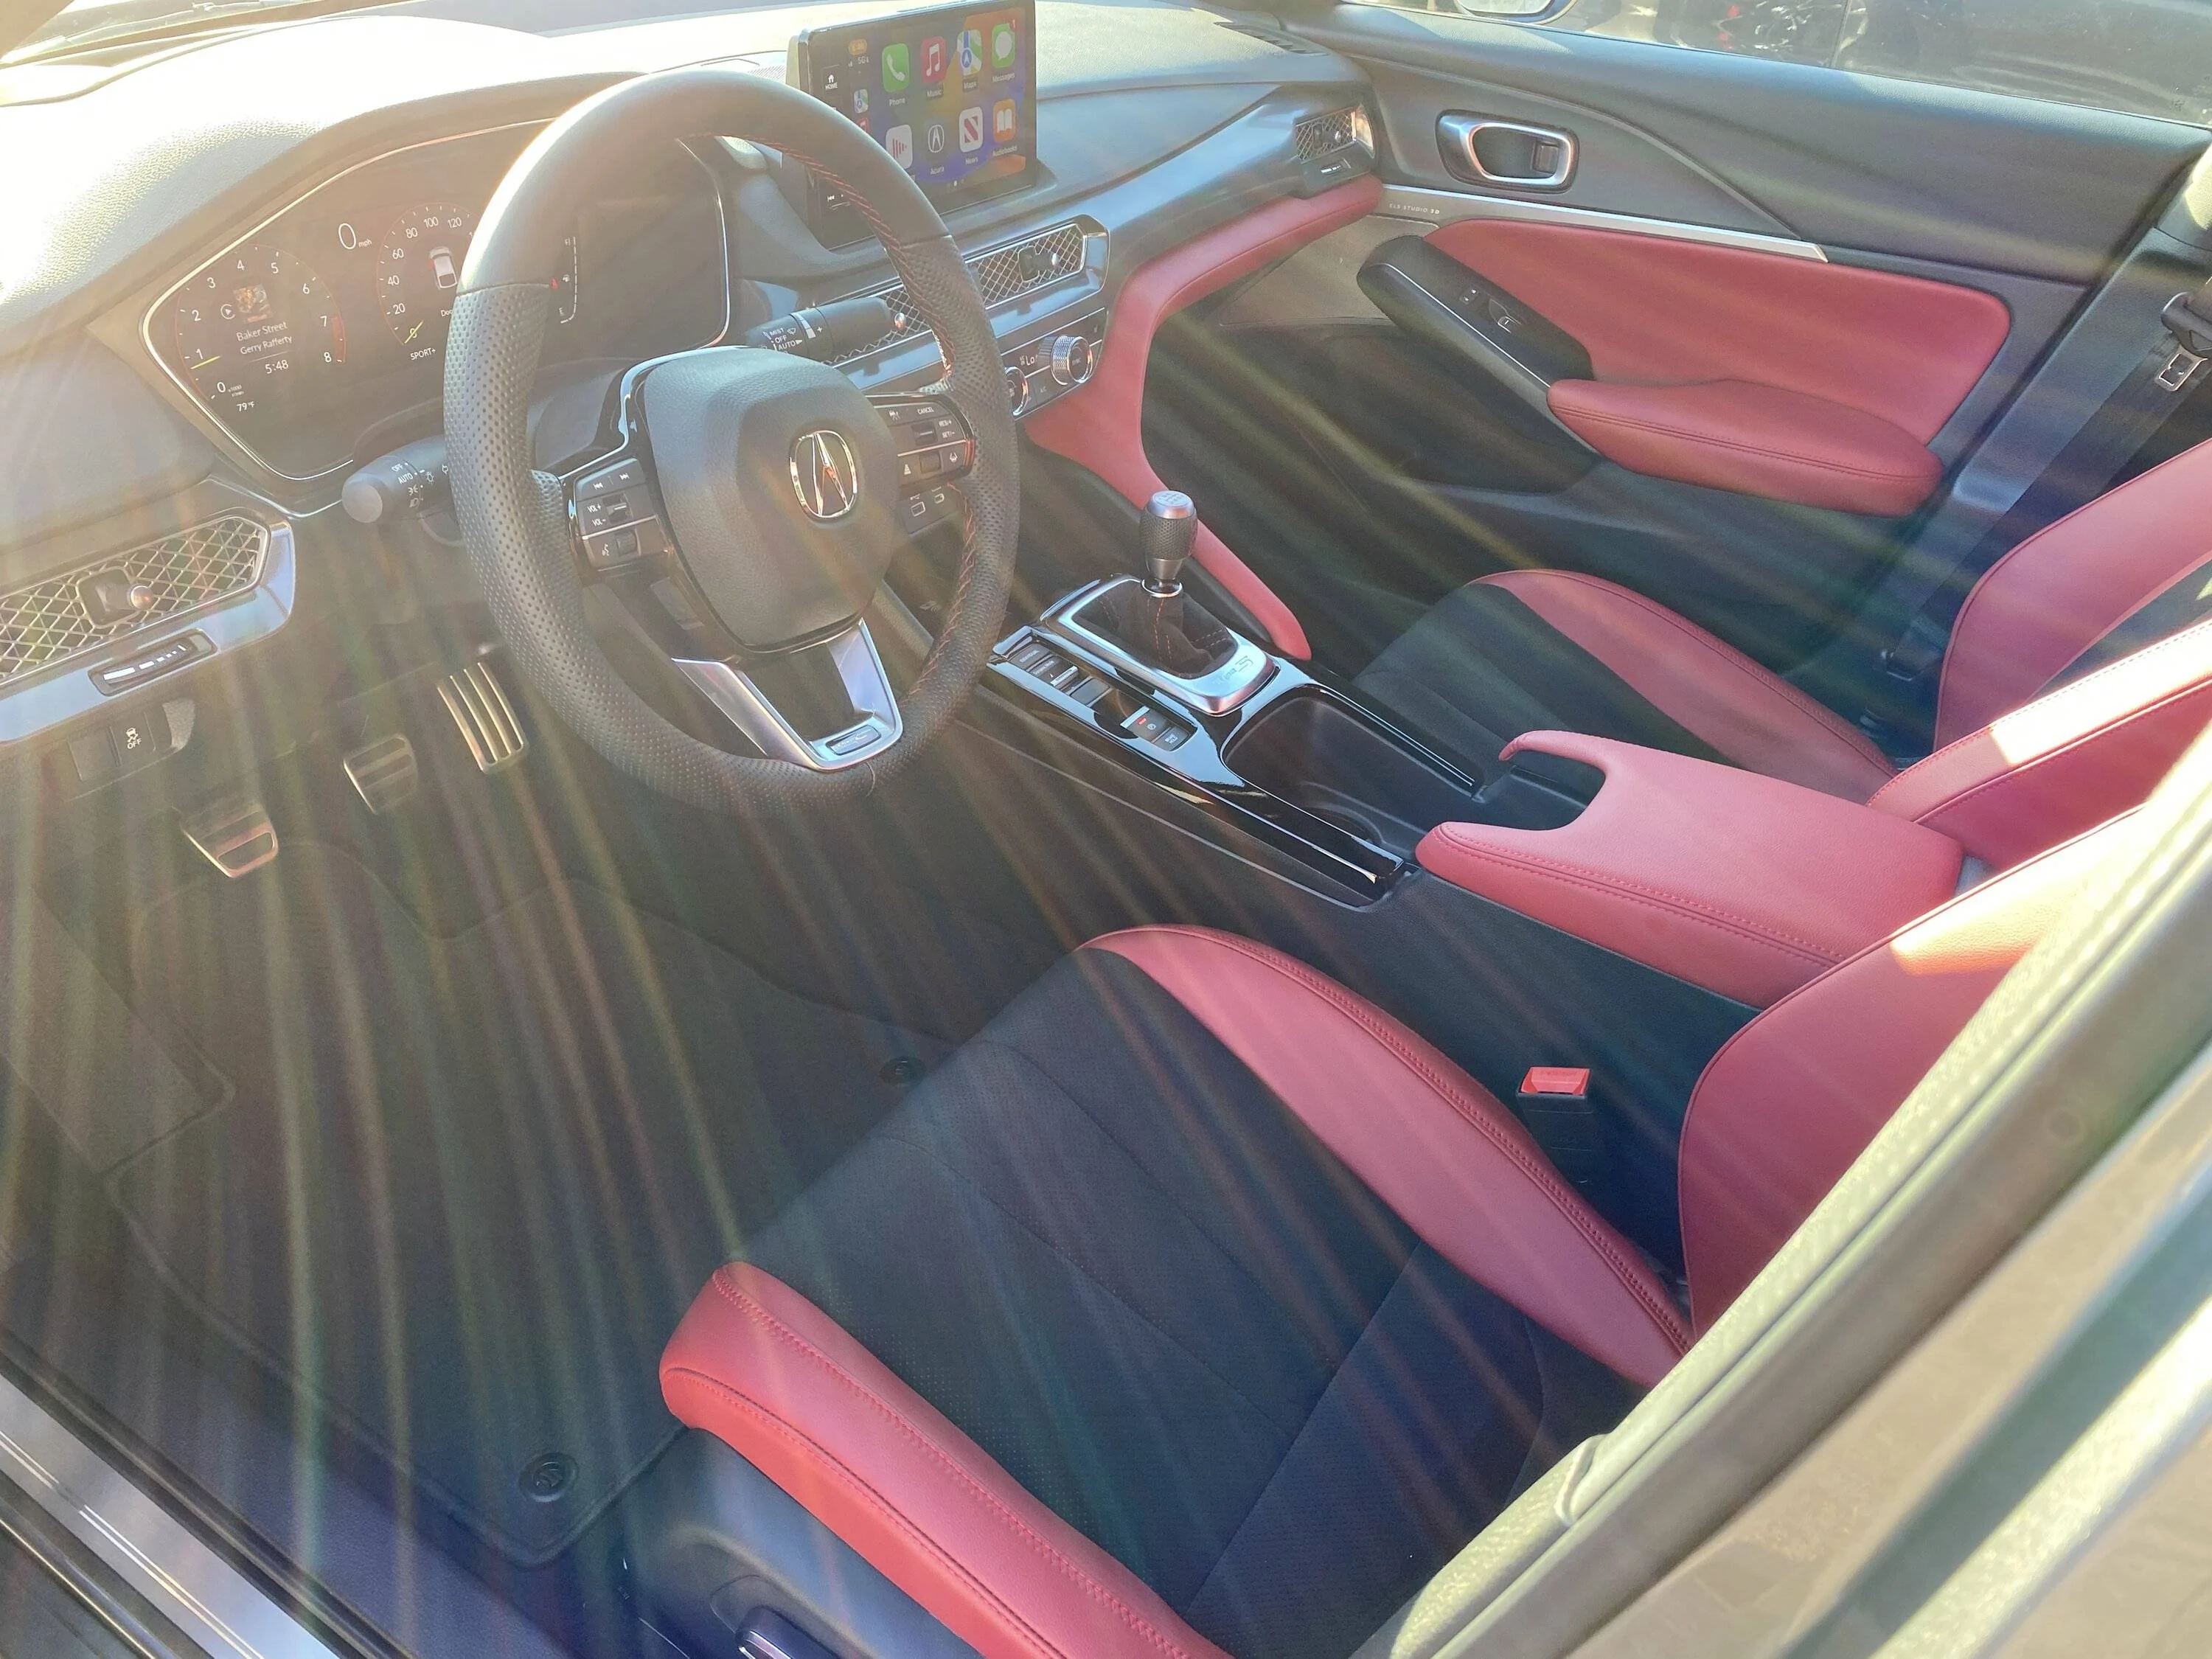
Either way, I feel very fortunate that this beautiful car made its way to me?
It is FANTASTIC!Very interesting. How do you like the car so far? Any quality issues or other items?
No problem at all, sir!In that case, no it couldn't have been the LCM we recently sold here...
You must've purchased from Acura of Ellicott City in Maryland. We had the same spec ITS here for a very short time that was picked up last week by the client, with your location being in northern VA, I figured it was you. Sorry for jumping the gun! Enjoy it regardless and again, if you need anything parts wise or otherwise with the new DE5, please don't hesitate to reach out to me.
-G

See, we all have stories to tell with this car ?That's amazing and great to see so many owners having good experiences.
I originally had a deposit and an "order" for a PRP/Black ITS. However from my understanding Acura isn't doing customer orders with these cars at this point, and is just doing straight allocation to dealerships. The dealerships don't get to choose what colors/combos they get. At most they may be able to trade around for one a customer might want.
My dealer actually called me back to refund my deposit and I asked if they could keep it and just give me first right of refusal to any allocation they may get (I was their first customer order for an ITS). My 2nd option was LCM and they were allocated an LCM/red car recently. I'm scheduled to pick it up this Saturday and I can't wait. It's been over 90 days since I placed the deposit.
Care to share info on ambient lighting swap? Are they from the FL5? Just doors/handles or also the roof ambient lighting near the map lights as well? ThanksNo problem at all, sir!
The guys at Ellicott City really took great care of me.
Next time I'm in Woodbridge, I'll stop by. Buying parts and accessories is addictive?
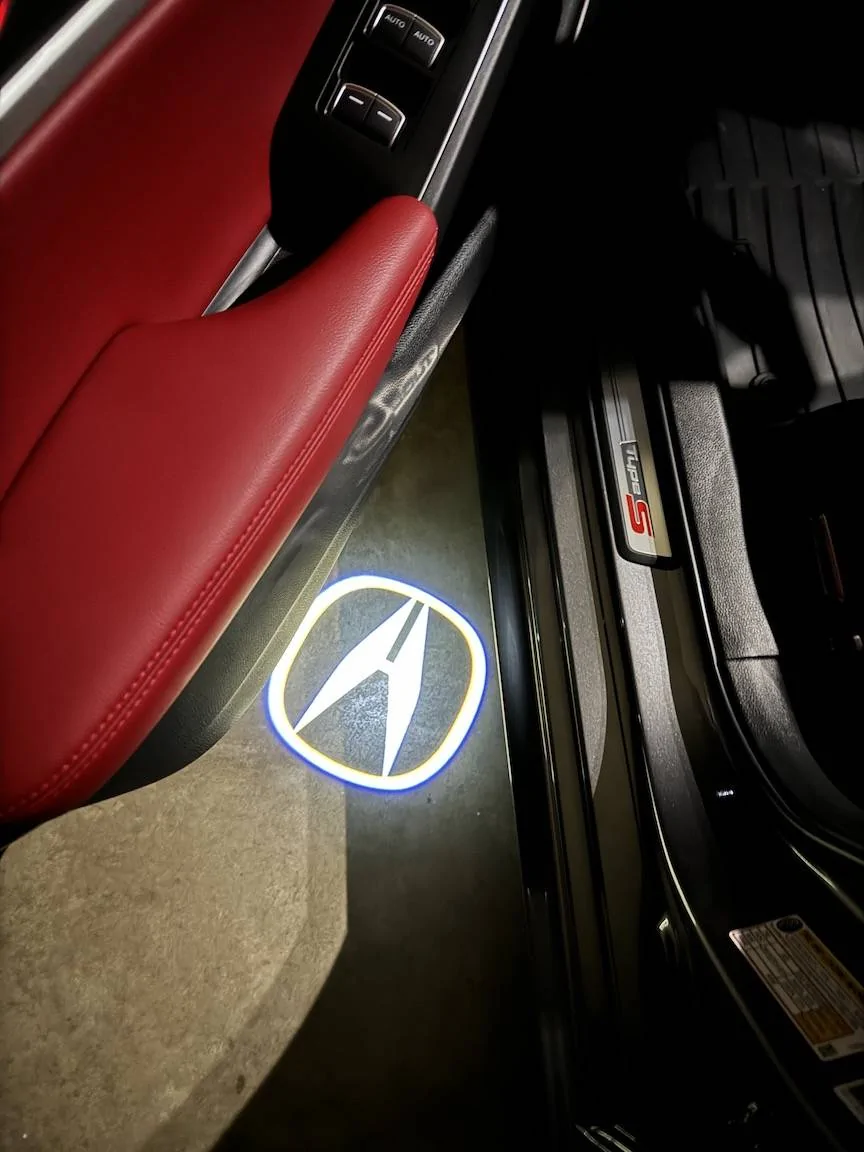
This week I installed the splash guards, projector/puddle lights and switched out the white ambient lights for red.
Next up is a Homelink mirror then hopefully some new rims?


Absolutely!Care to share info on ambient lighting swap? Are they from the FL5? Just doors/handles or also the roof ambient lighting near the map lights as well? Thanks

Awesome write up!!! Thanks for the wealth of information here! Should be it’s own thread for others to see IMOAbsolutely!
So far I've only replaced the LEDs in the doors but plan to look at the map lights later when I install the Homelink mirror.
The only tools needed to replace the LEDs are a Philips screwdriver and some plastic trim tools to make it easier. Installing the pattern projectors will require 1/4 and 3/8 drill bits for the holes. Everything else is included in the kit.
The guys at AHC Garage have a great video showing how to remove the door panels and install the projector lights here.
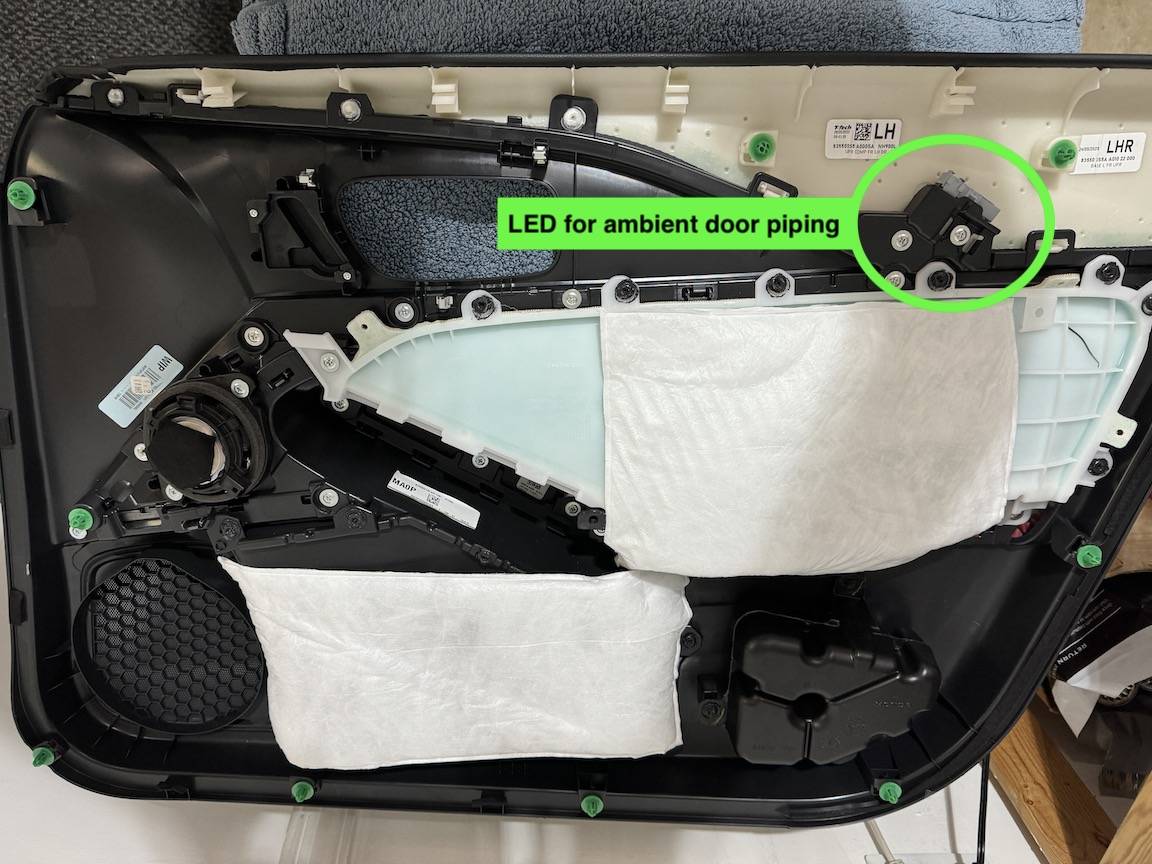
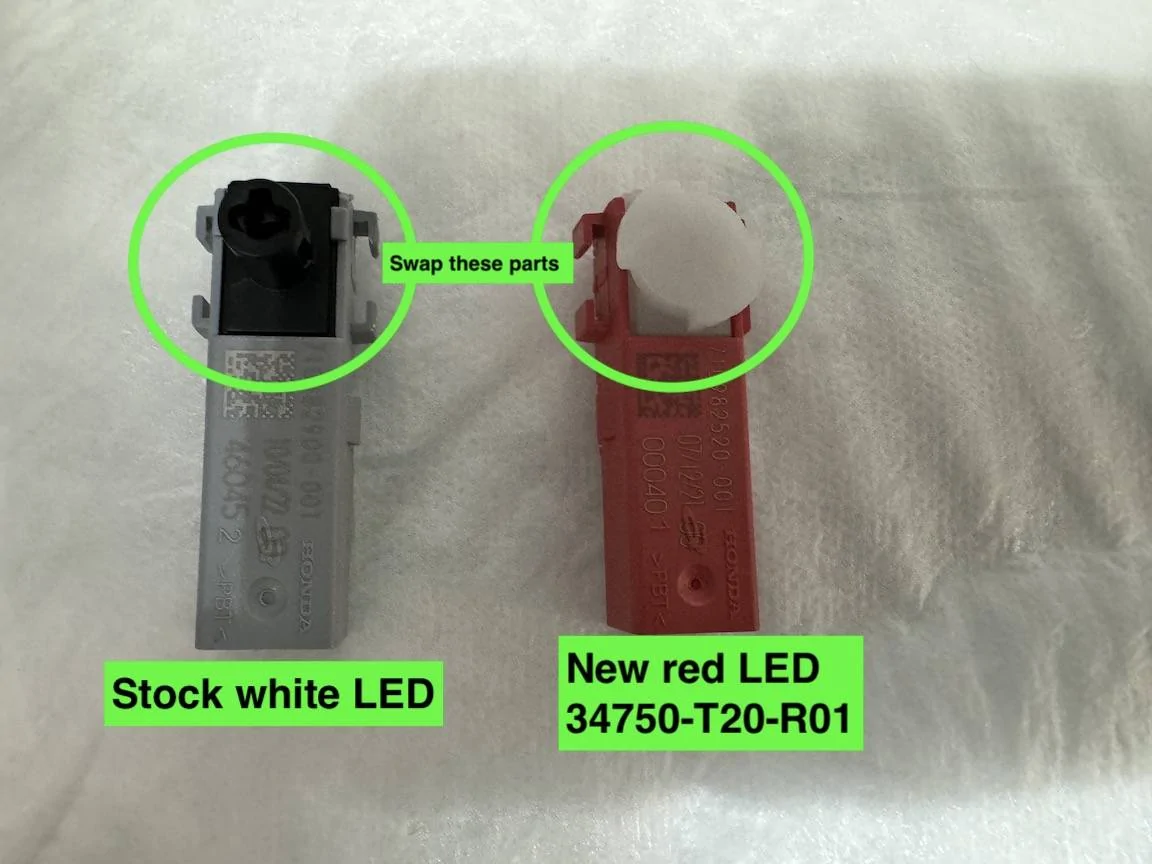
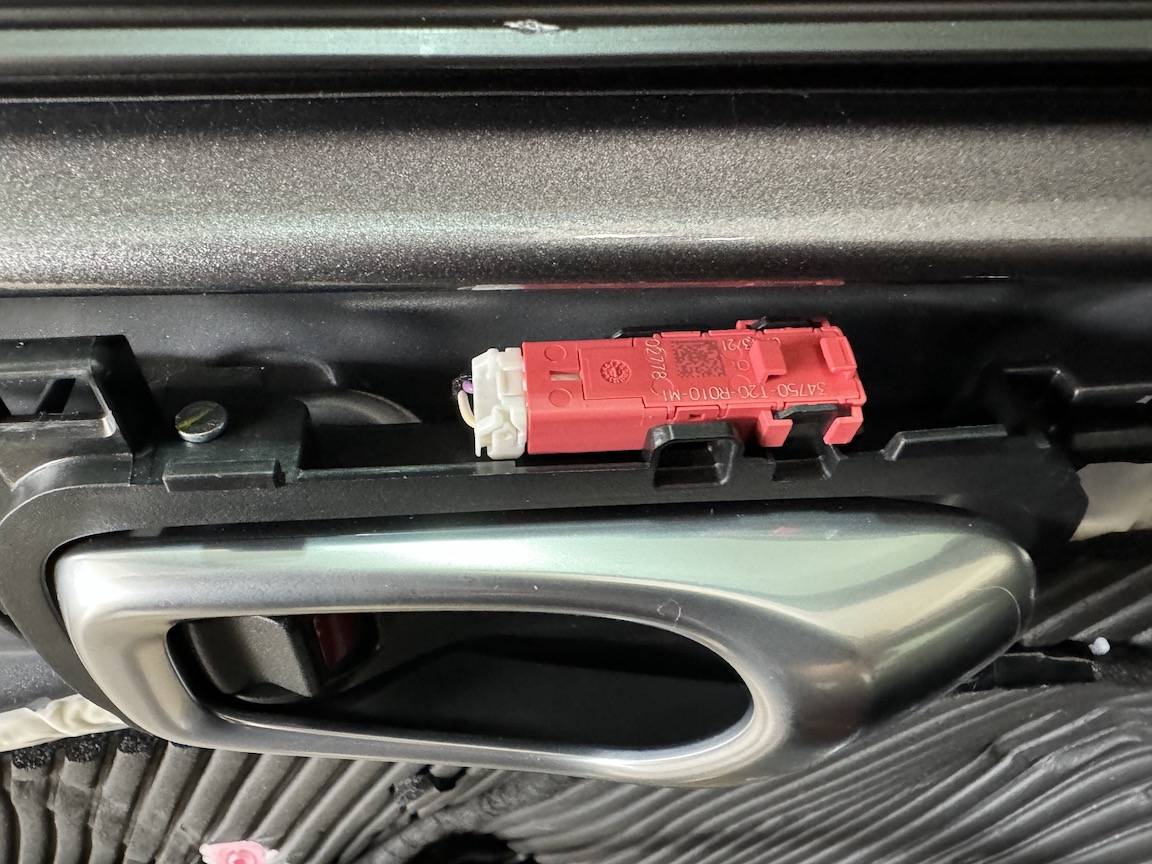
There are two LED modules in each front door that can be changed. One for the piping on the door panel and the other lights up the interior door handle. The red LED module is the same for both: "Light foot-well" part number 34750-T20-R01.
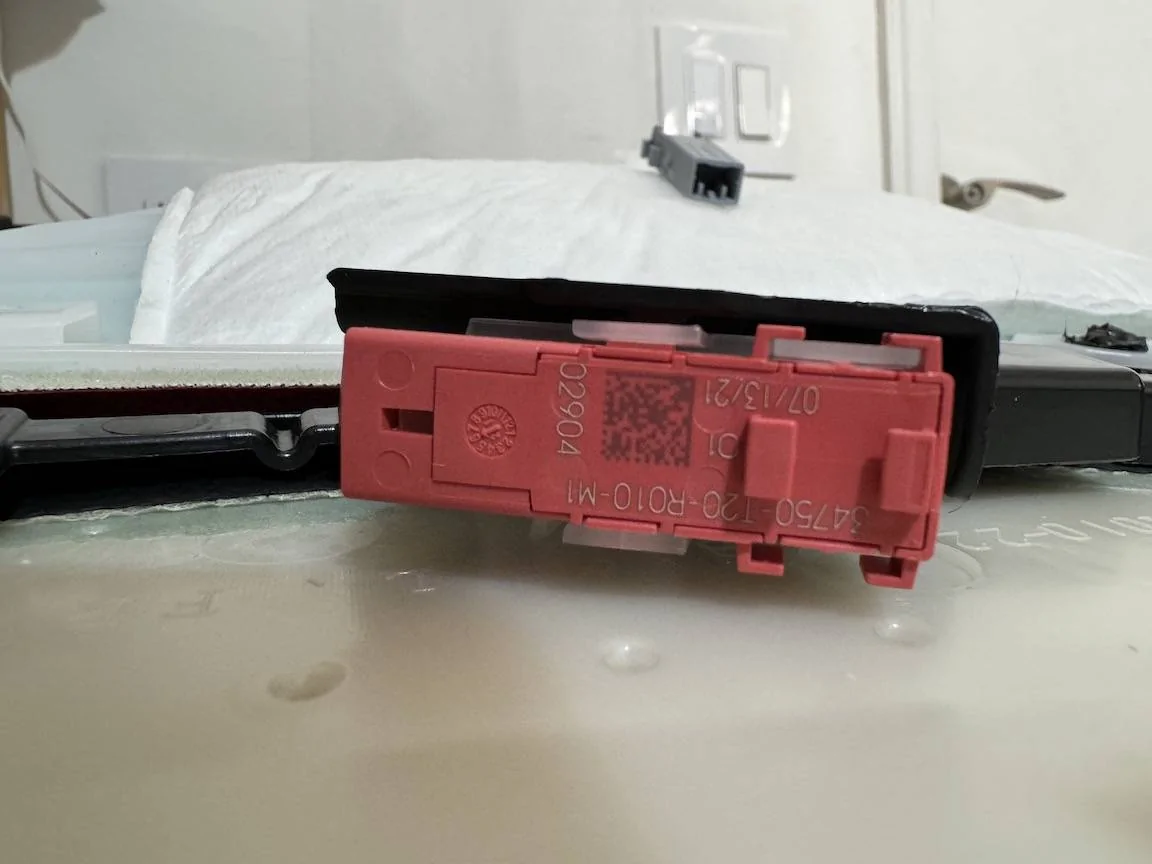
The LED for the door piping is on the top rear of the door panel. It's clipped in place and pops out easily with a trim tool.
Once removed, you need to swap the two connectors on the LED modules by sliding them up to remove then just slide them back in.
Then simply plug the new red LED module into the receptacle.
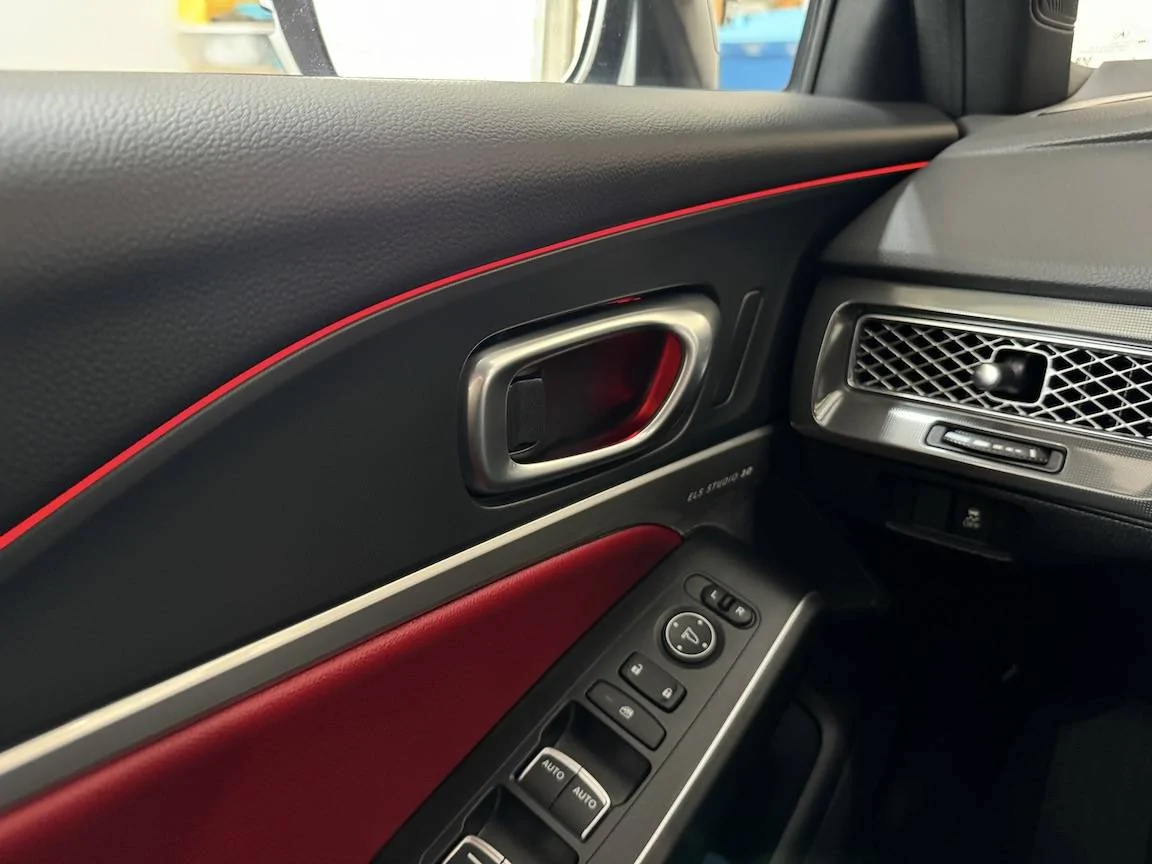
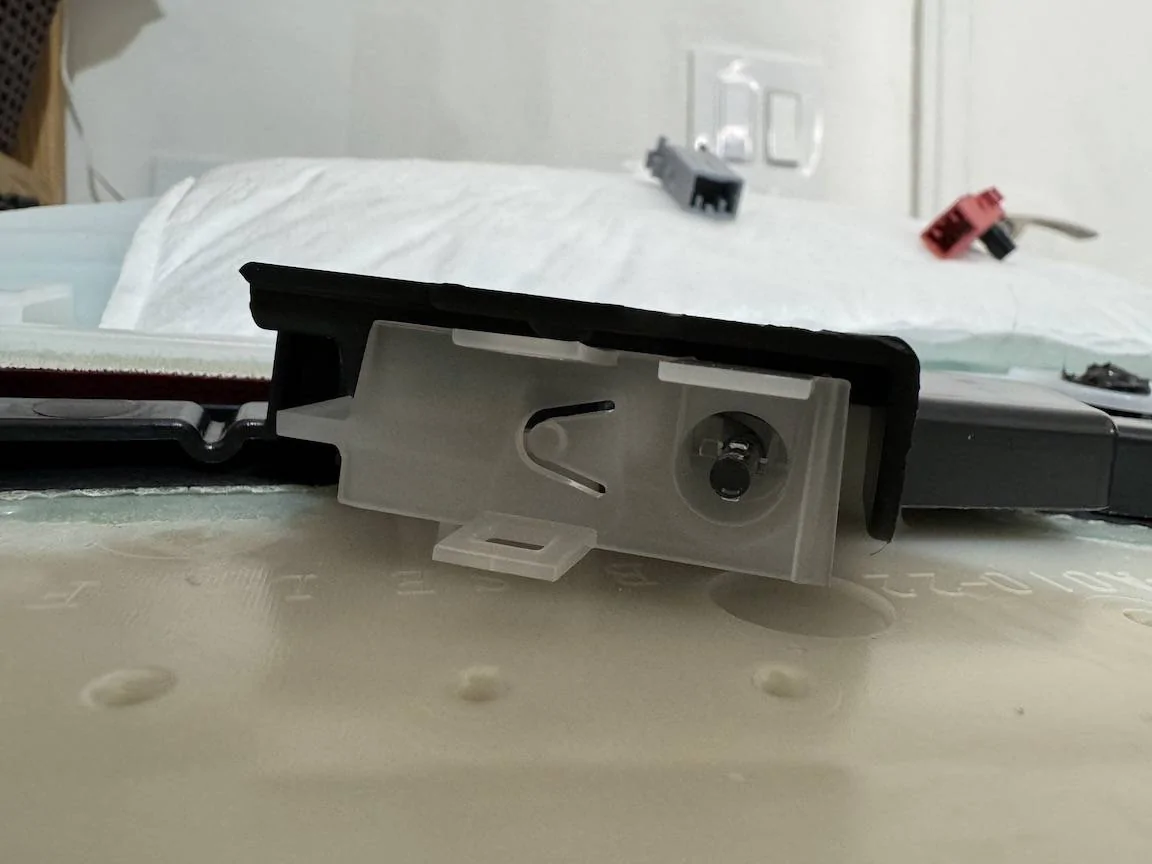
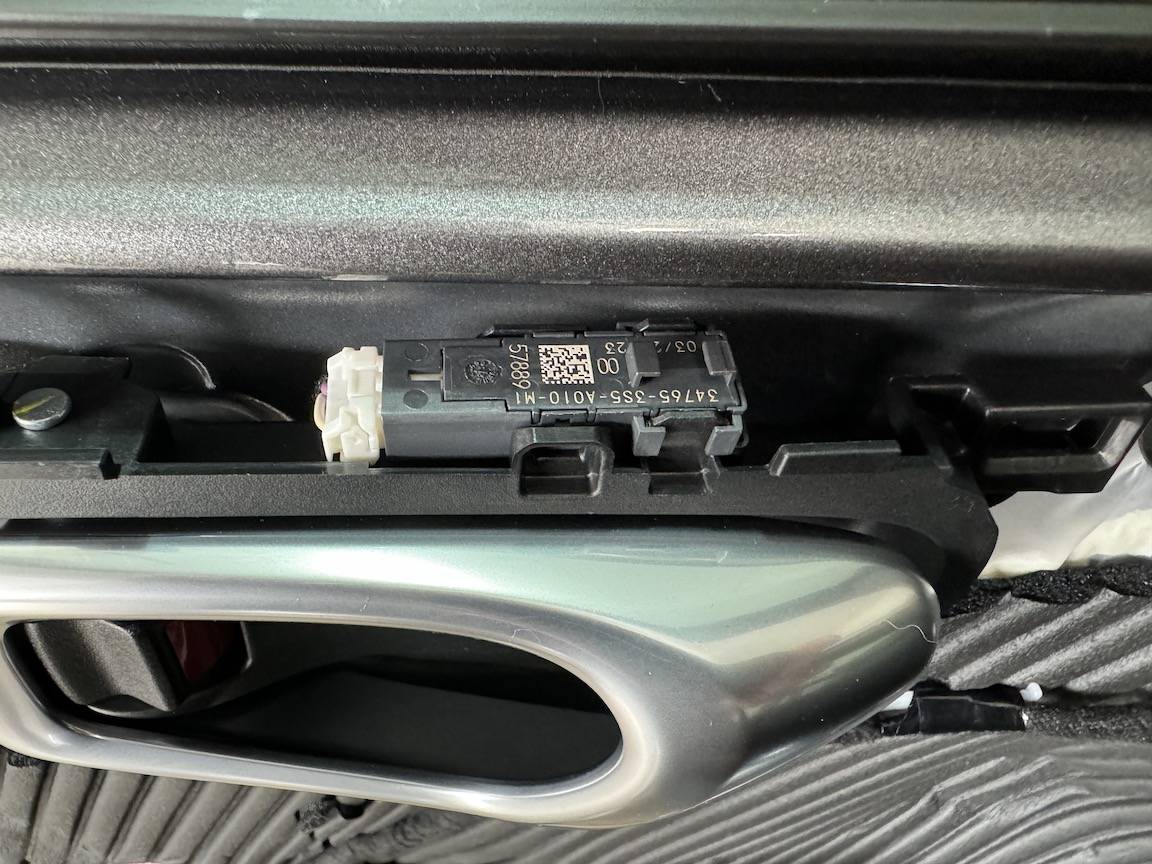
The LED module for the door handle is located above the handle itself.
Swap the connectors by sliding them up and out, same as before.
Then plug it back into the receptacle.
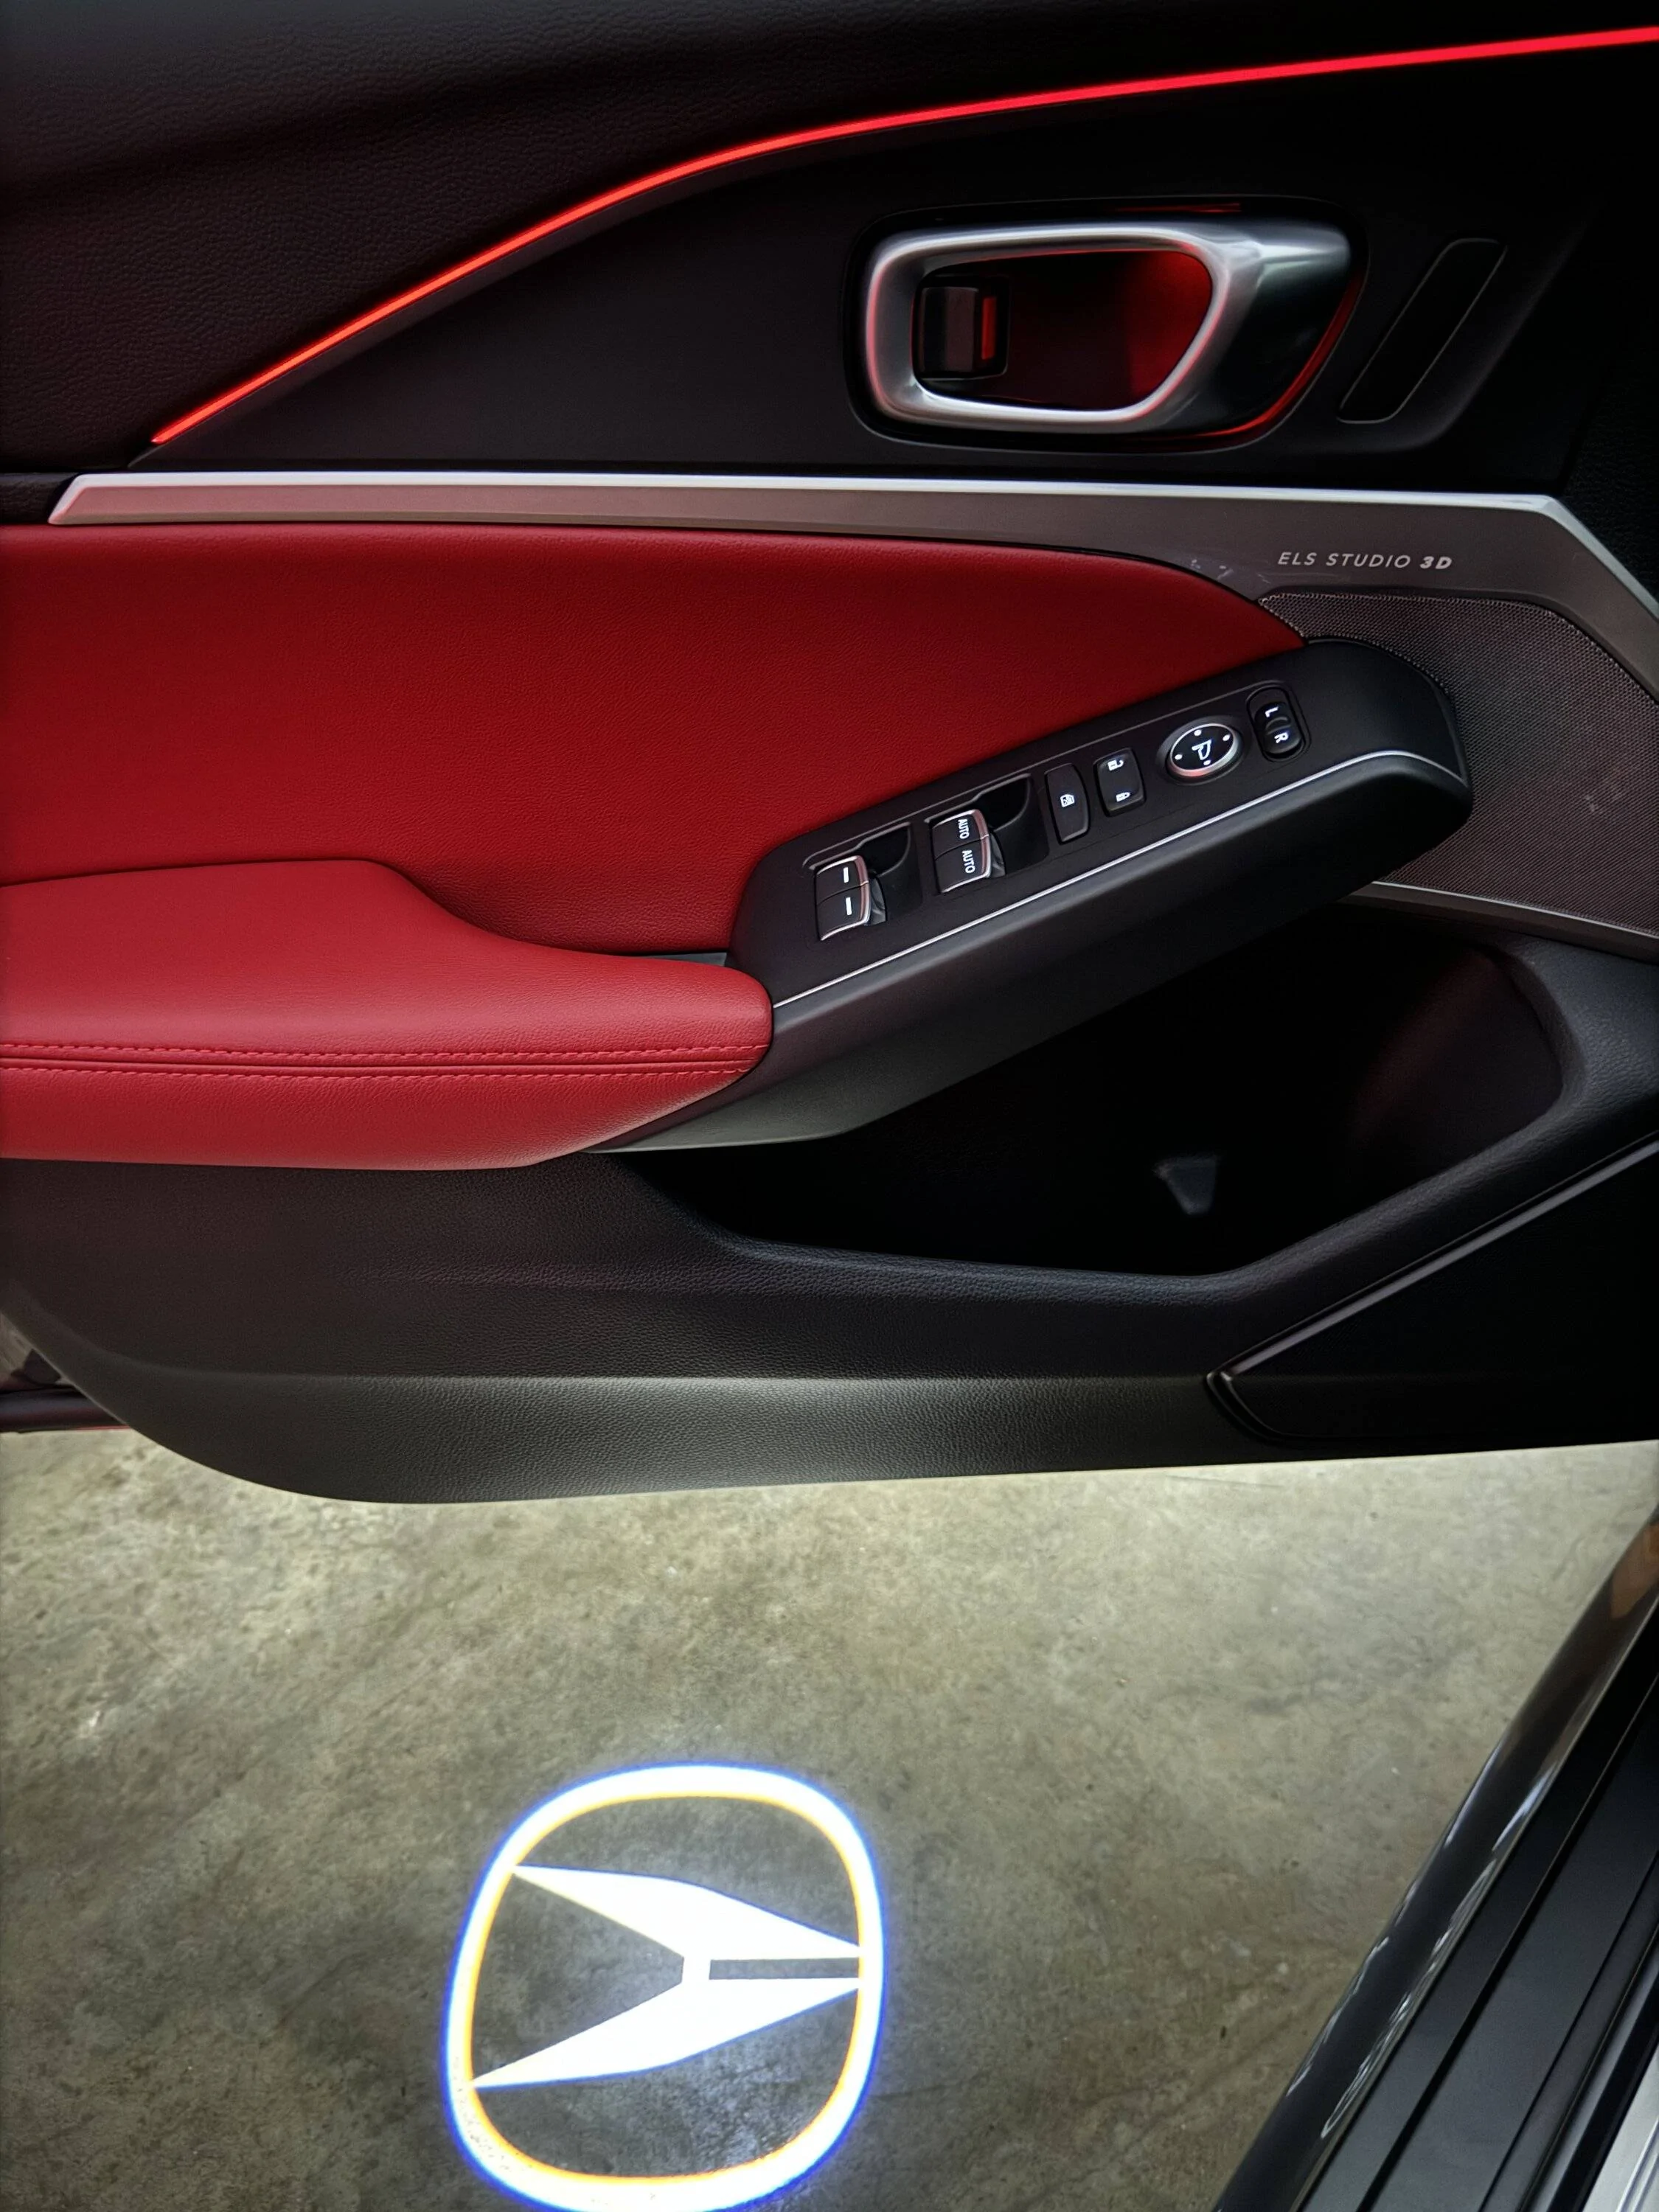
You now have some nice red ambient lights?

Follow the AHC Garage video to install the "Logo Pattern Projector" part number 08V27-3S5-200.
I took my time and got both doors done in a couple of hours. I think the end result is quite nice.
Thank you for this! I’m going to have to put this in my to-do list.Absolutely!
So far I've only replaced the LEDs in the doors but plan to look at the map lights later when I install the Homelink mirror.
The only tools needed to replace the LEDs are a Philips screwdriver and some plastic trim tools to make it easier. Installing the pattern projectors will require 1/4 and 3/8 drill bits for the holes. Everything else is included in the kit.
The guys at AHC Garage have a great video showing how to remove the door panels and install the projector lights here.
There are two LED modules in each front door that can be changed. One for the piping on the door panel and the other lights up the interior door handle. The red LED module is the same for both: "Light foot-well" part number 34750-T20-R01.
The LED for the door piping is on the top rear of the door panel. It's clipped in place and pops out easily with a trim tool.
Once removed, you need to swap the two connectors on the LED modules by sliding them up to remove then just slide them back in.
Then simply plug the new red LED module into the receptacle.
The LED module for the door handle is located above the handle itself.
Swap the connectors by sliding them up and out, same as before.
Then plug it back into the receptacle.
You now have some nice red ambient lights?
Follow the AHC Garage video to install the "Logo Pattern Projector" part number 08V27-3S5-200.
I took my time and got both doors done in a couple of hours. I think the end result is quite nice.
Edit: attached the PDF instructions for the Logo Pattern Projector.
View attachment bii19600-25-Pattern Projector.pdf
")