Sponsored


Rear Dashcam Install on 23+ Integra (DE4/DE5)

Joined
Aug 23, 2024
Threads
1
Messages
16
Reaction score
9
Location
California
Car(s)
2023 Integra A-spec w/ Tech
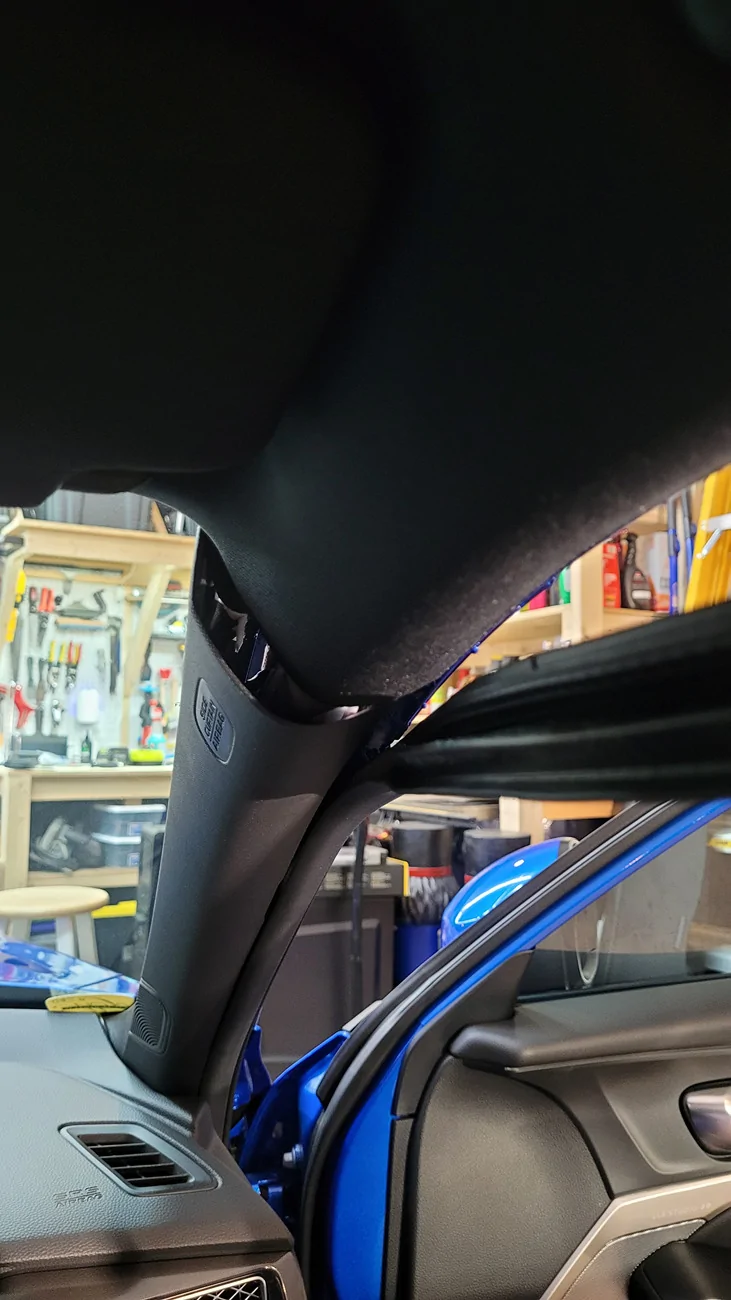
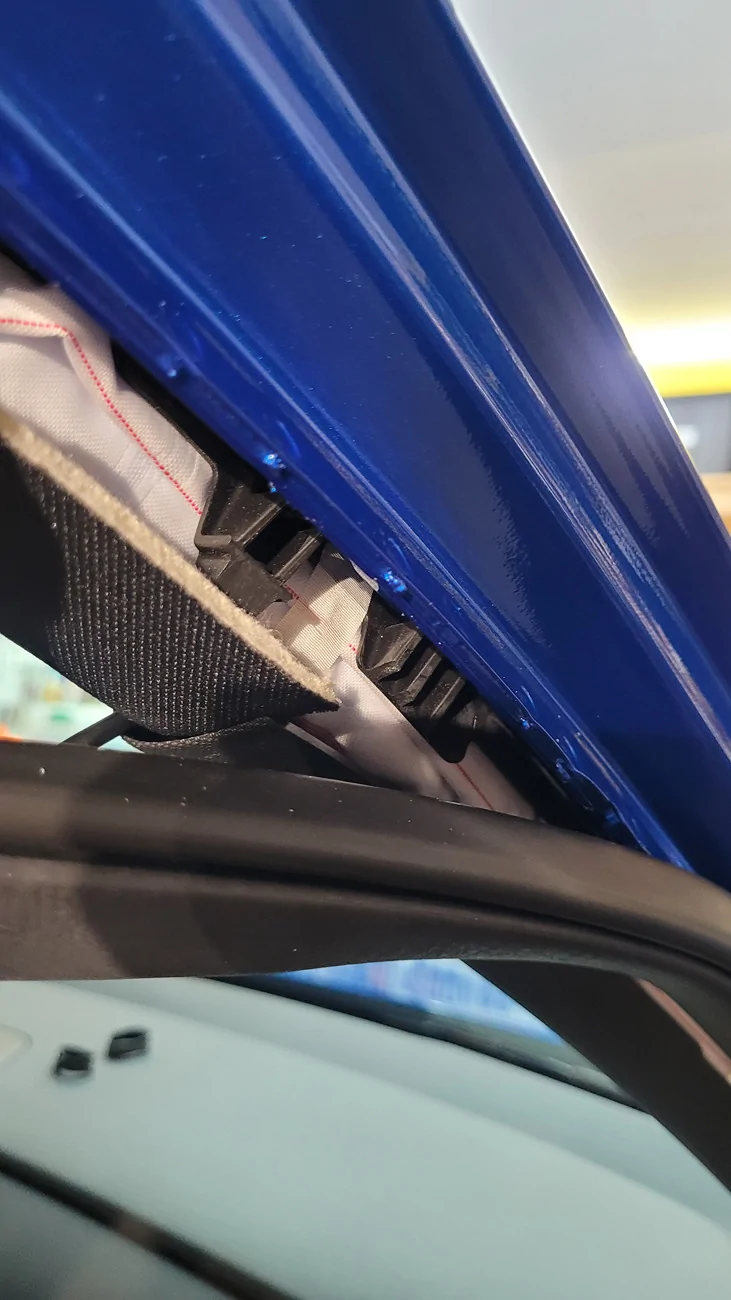
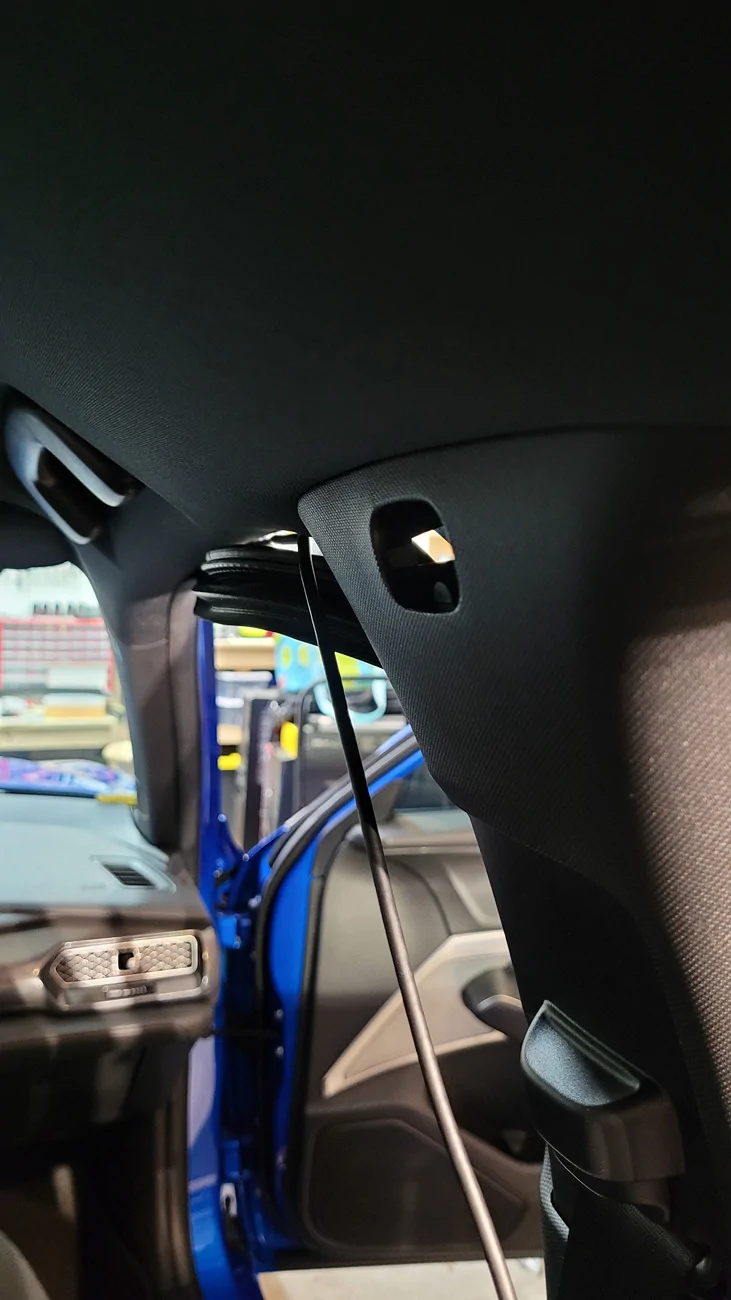
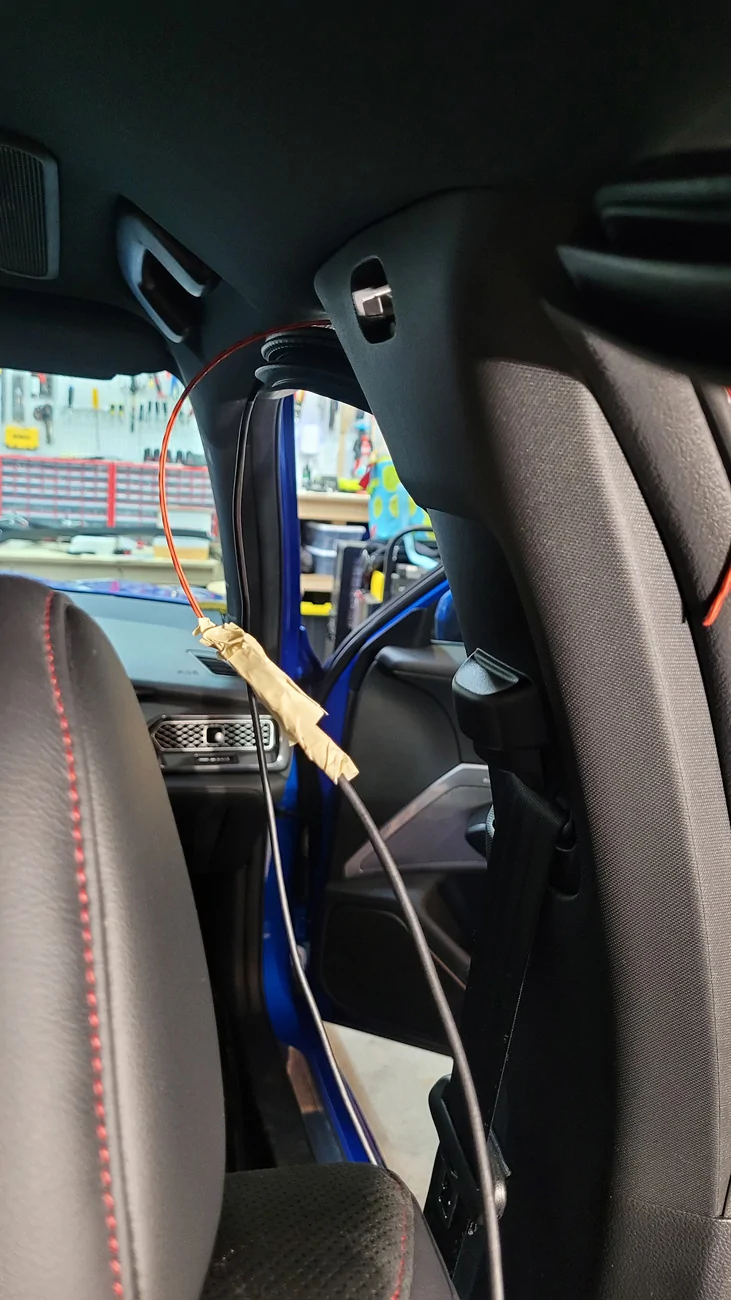
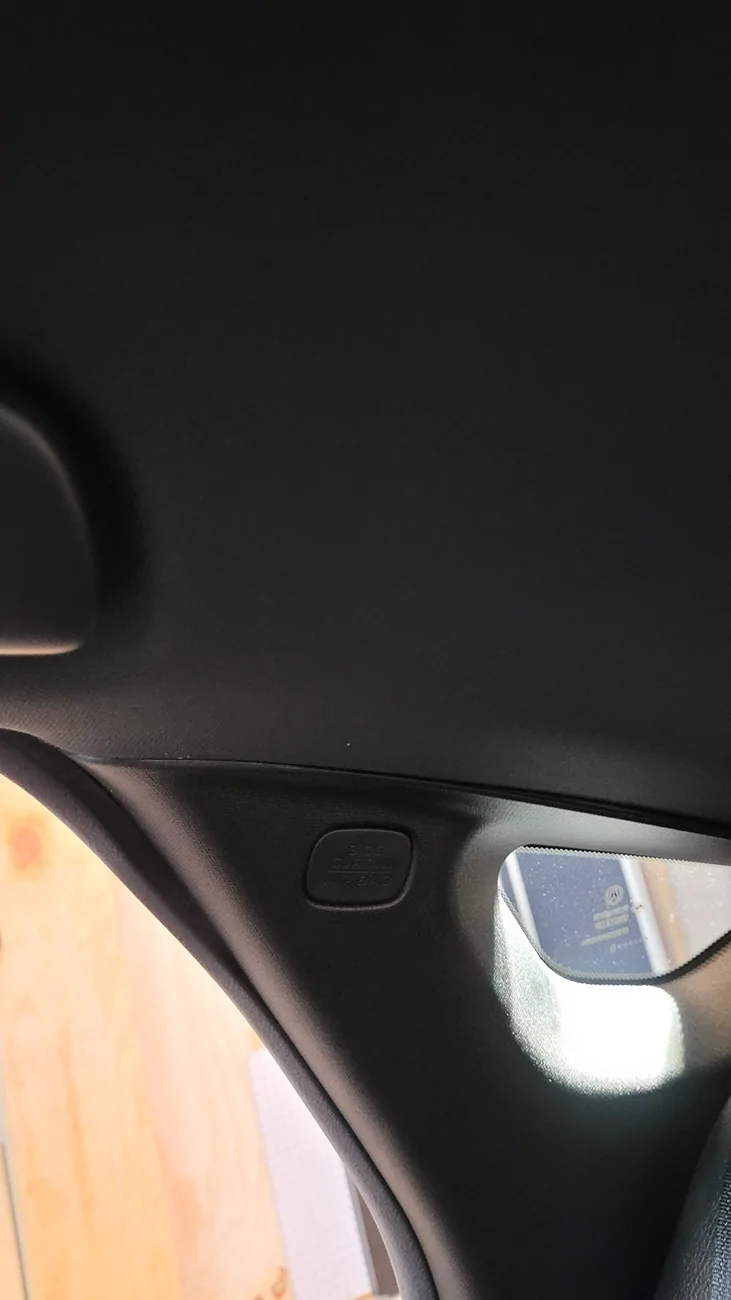
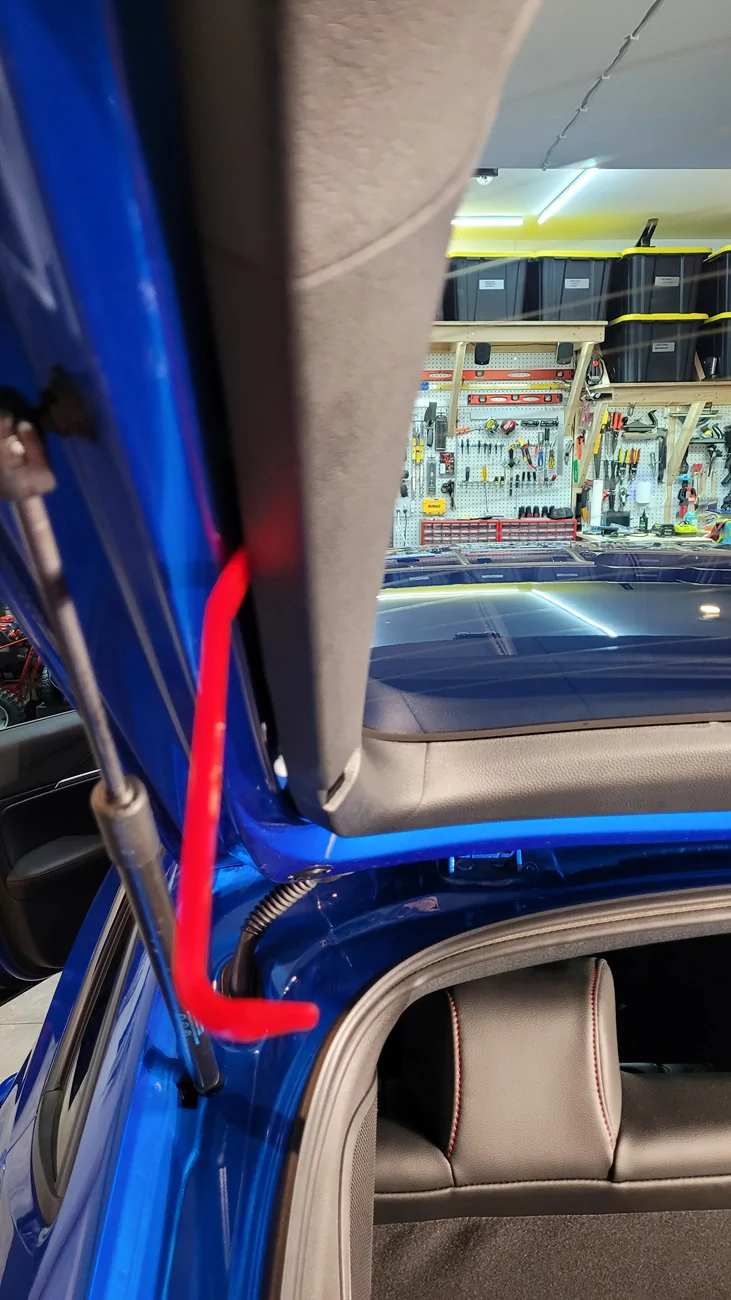
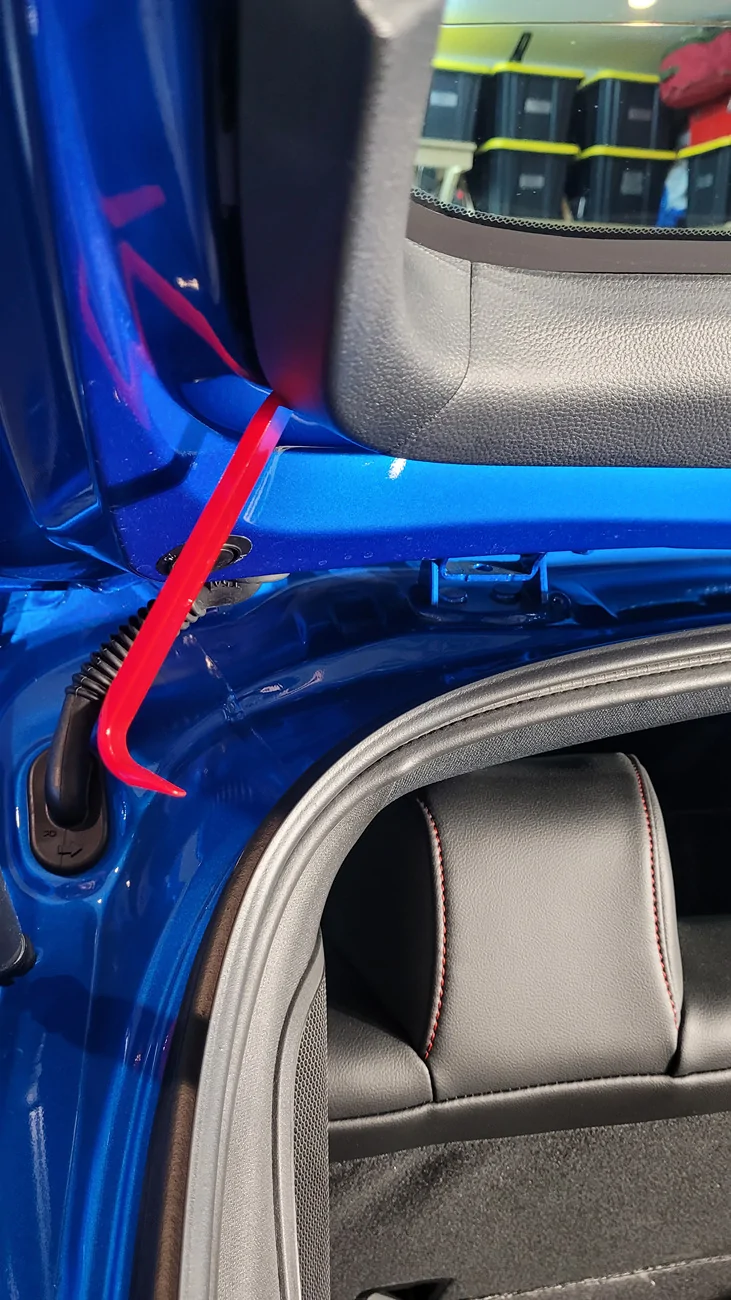
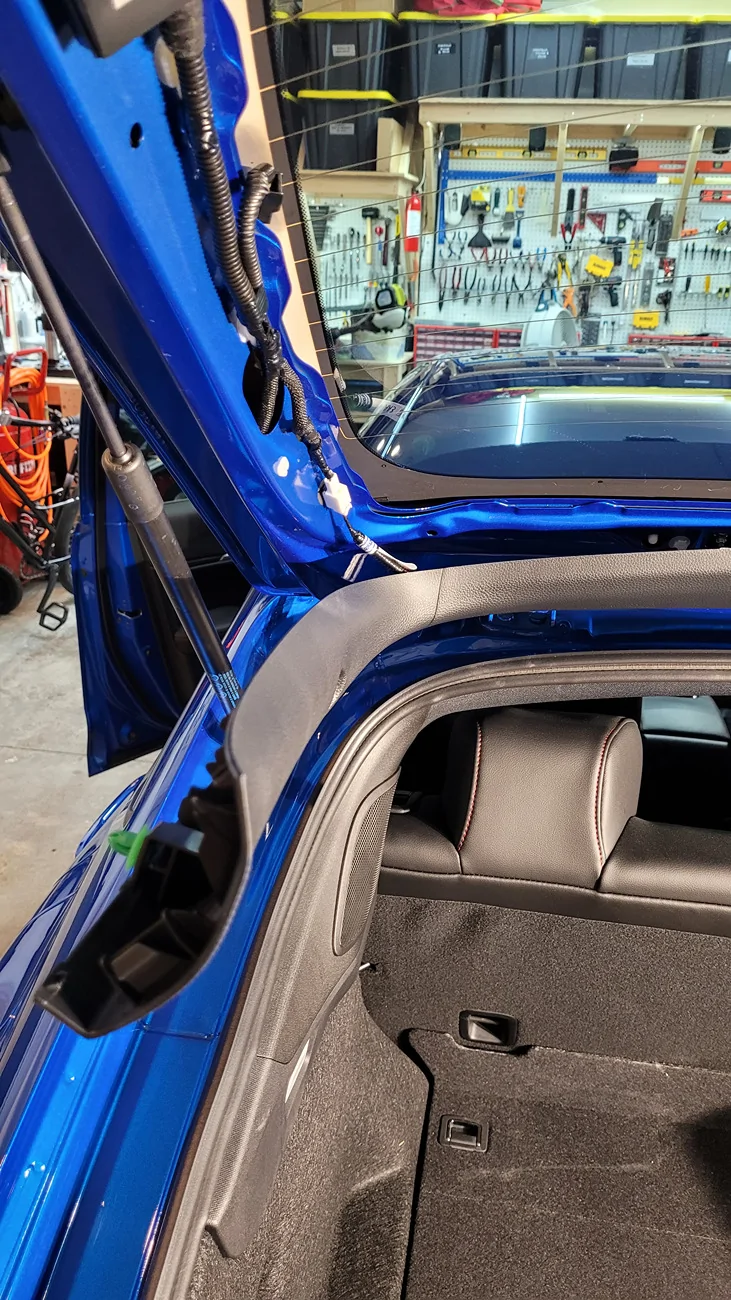
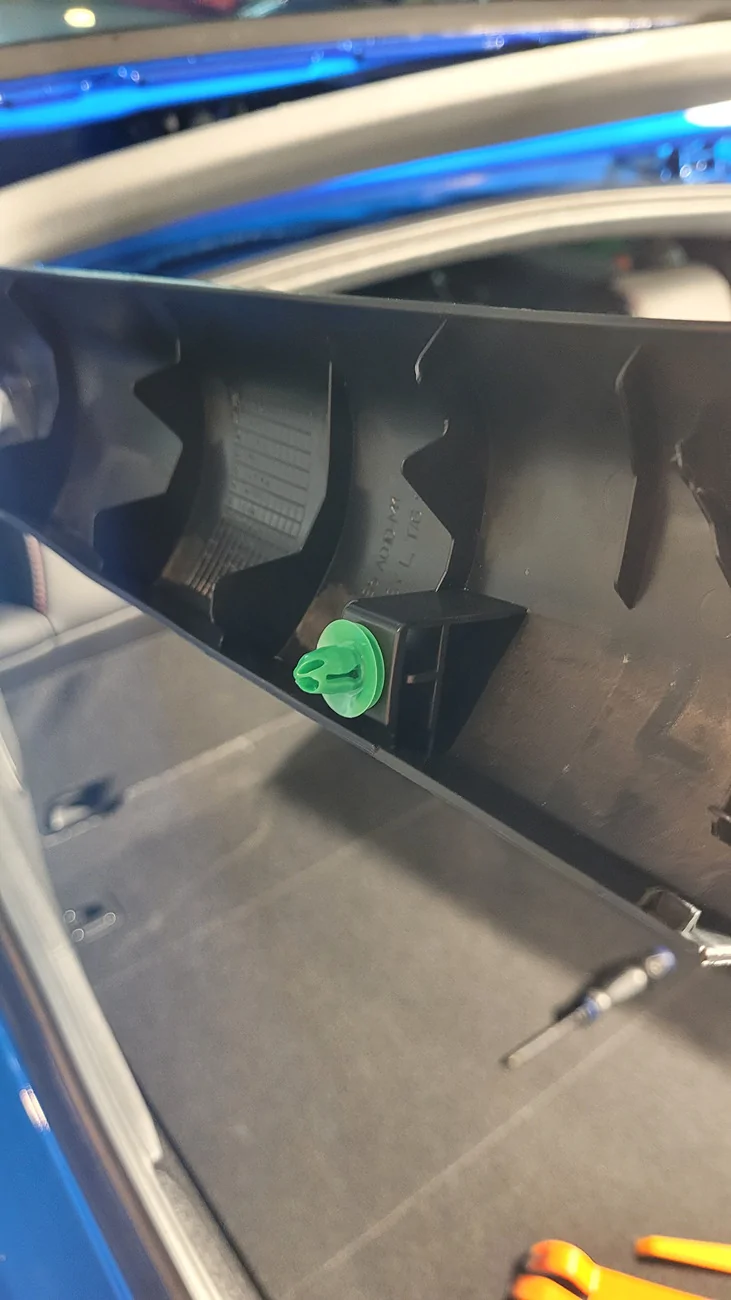
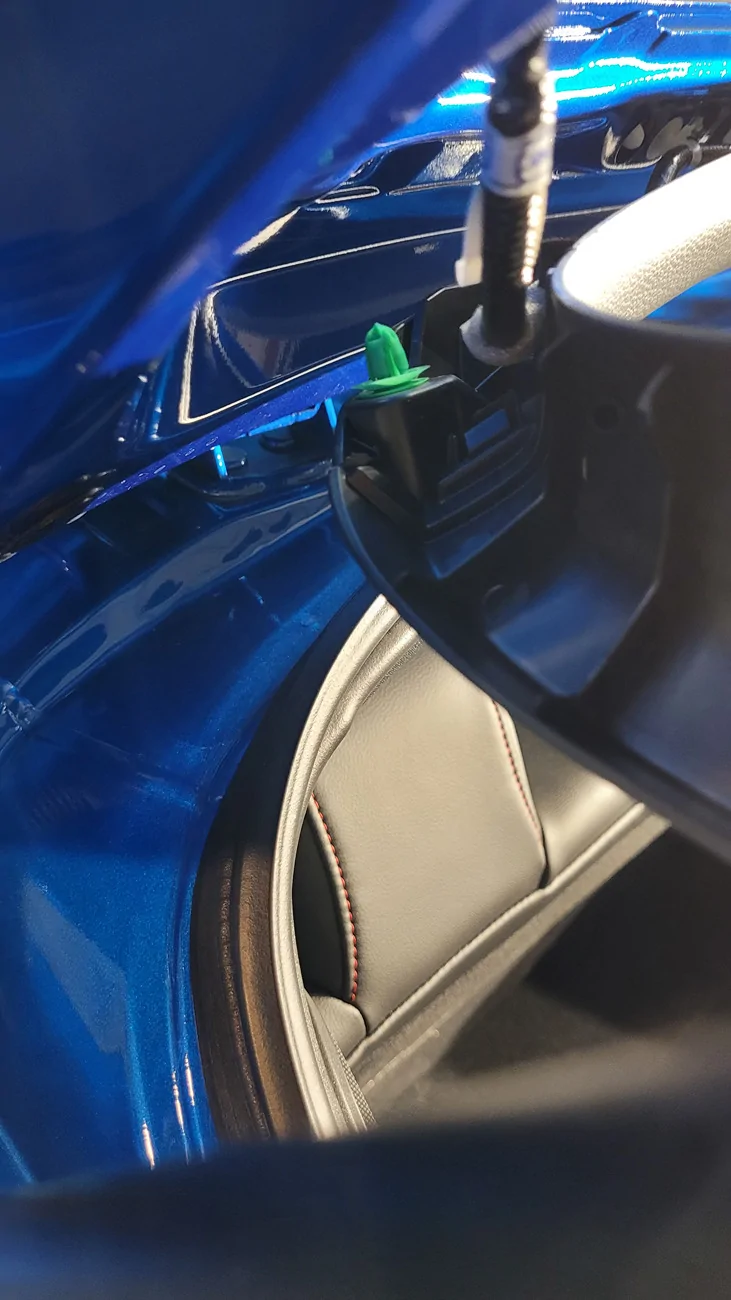
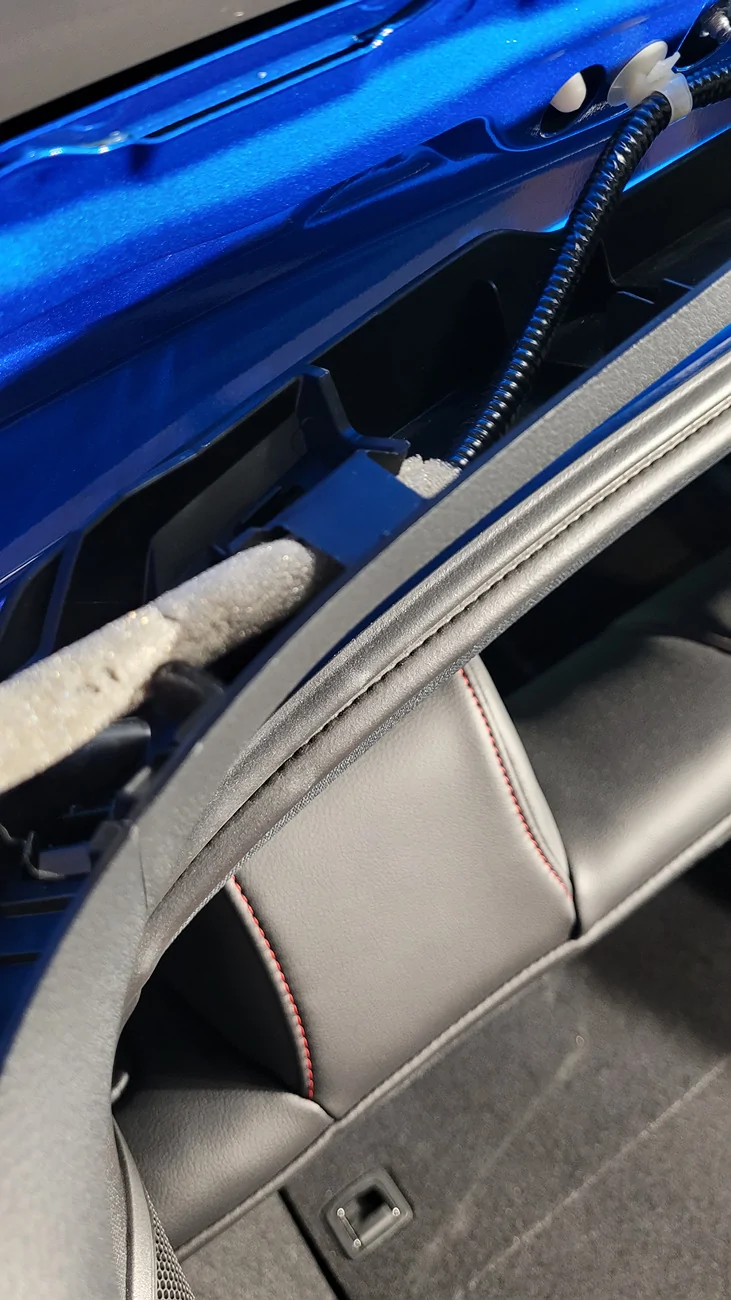
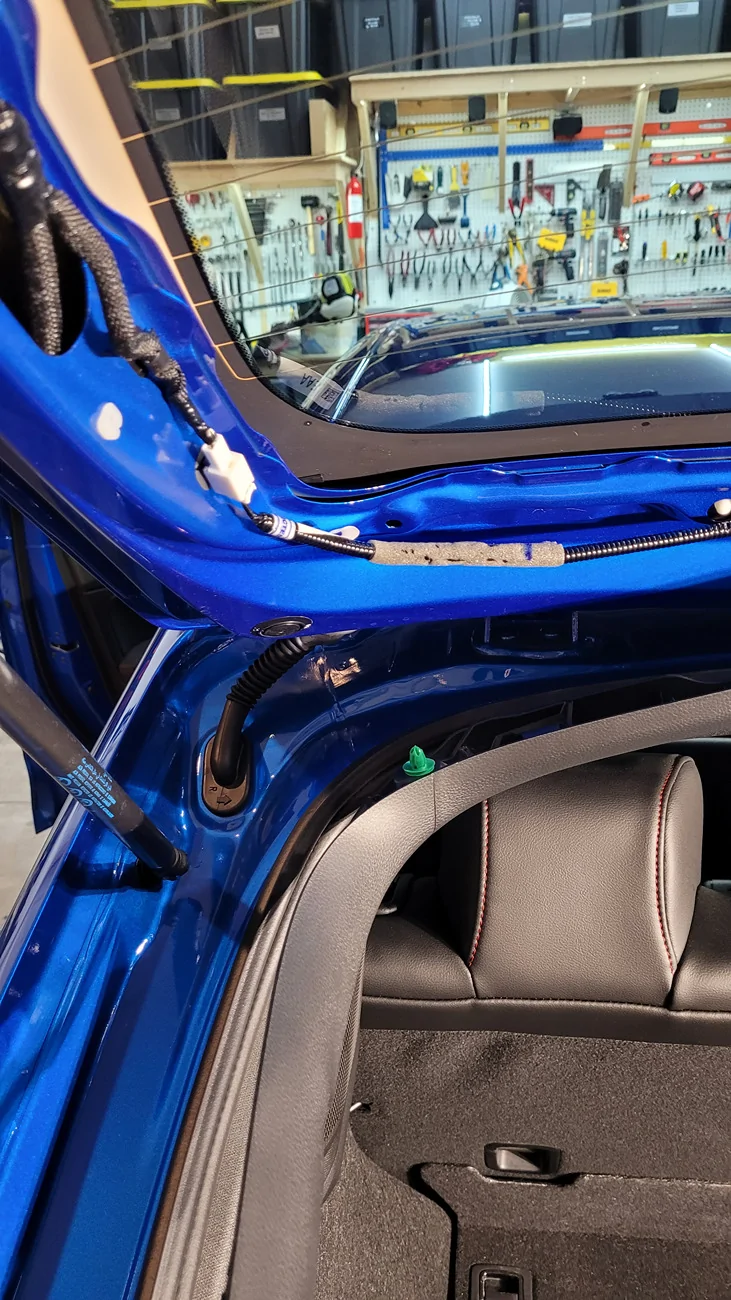
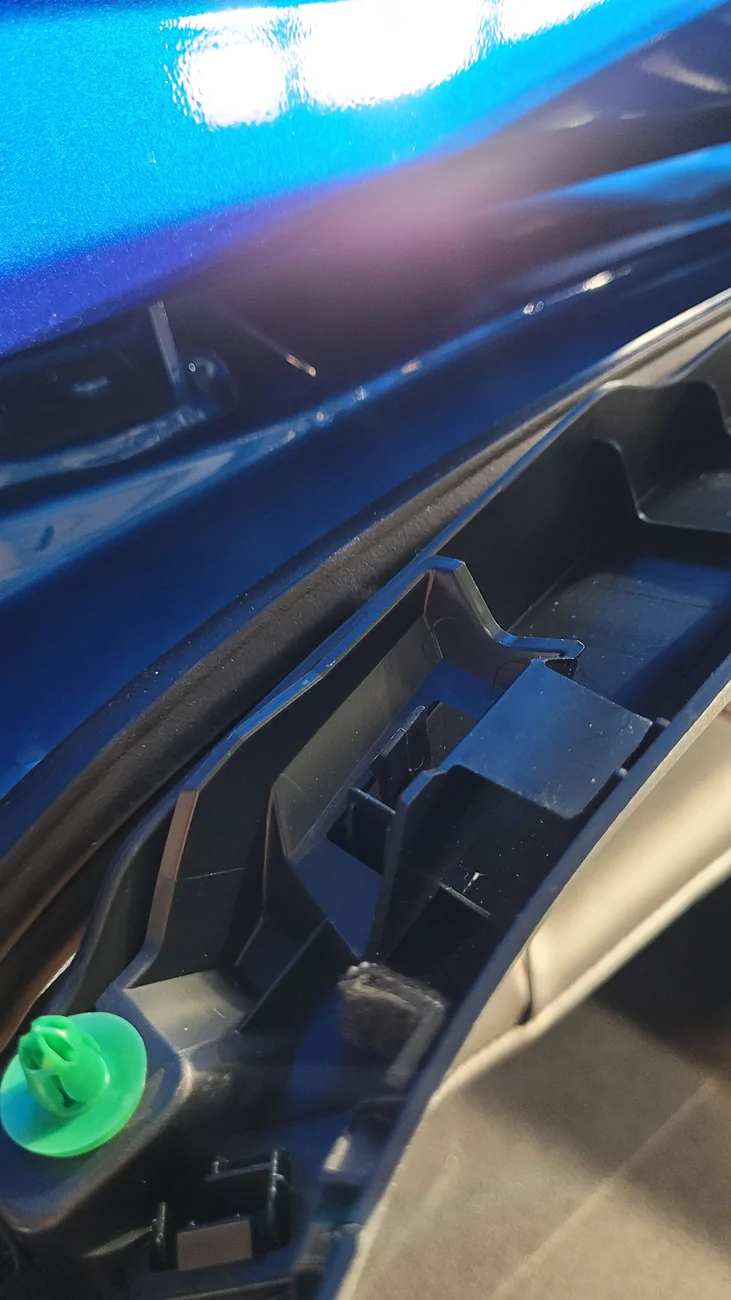
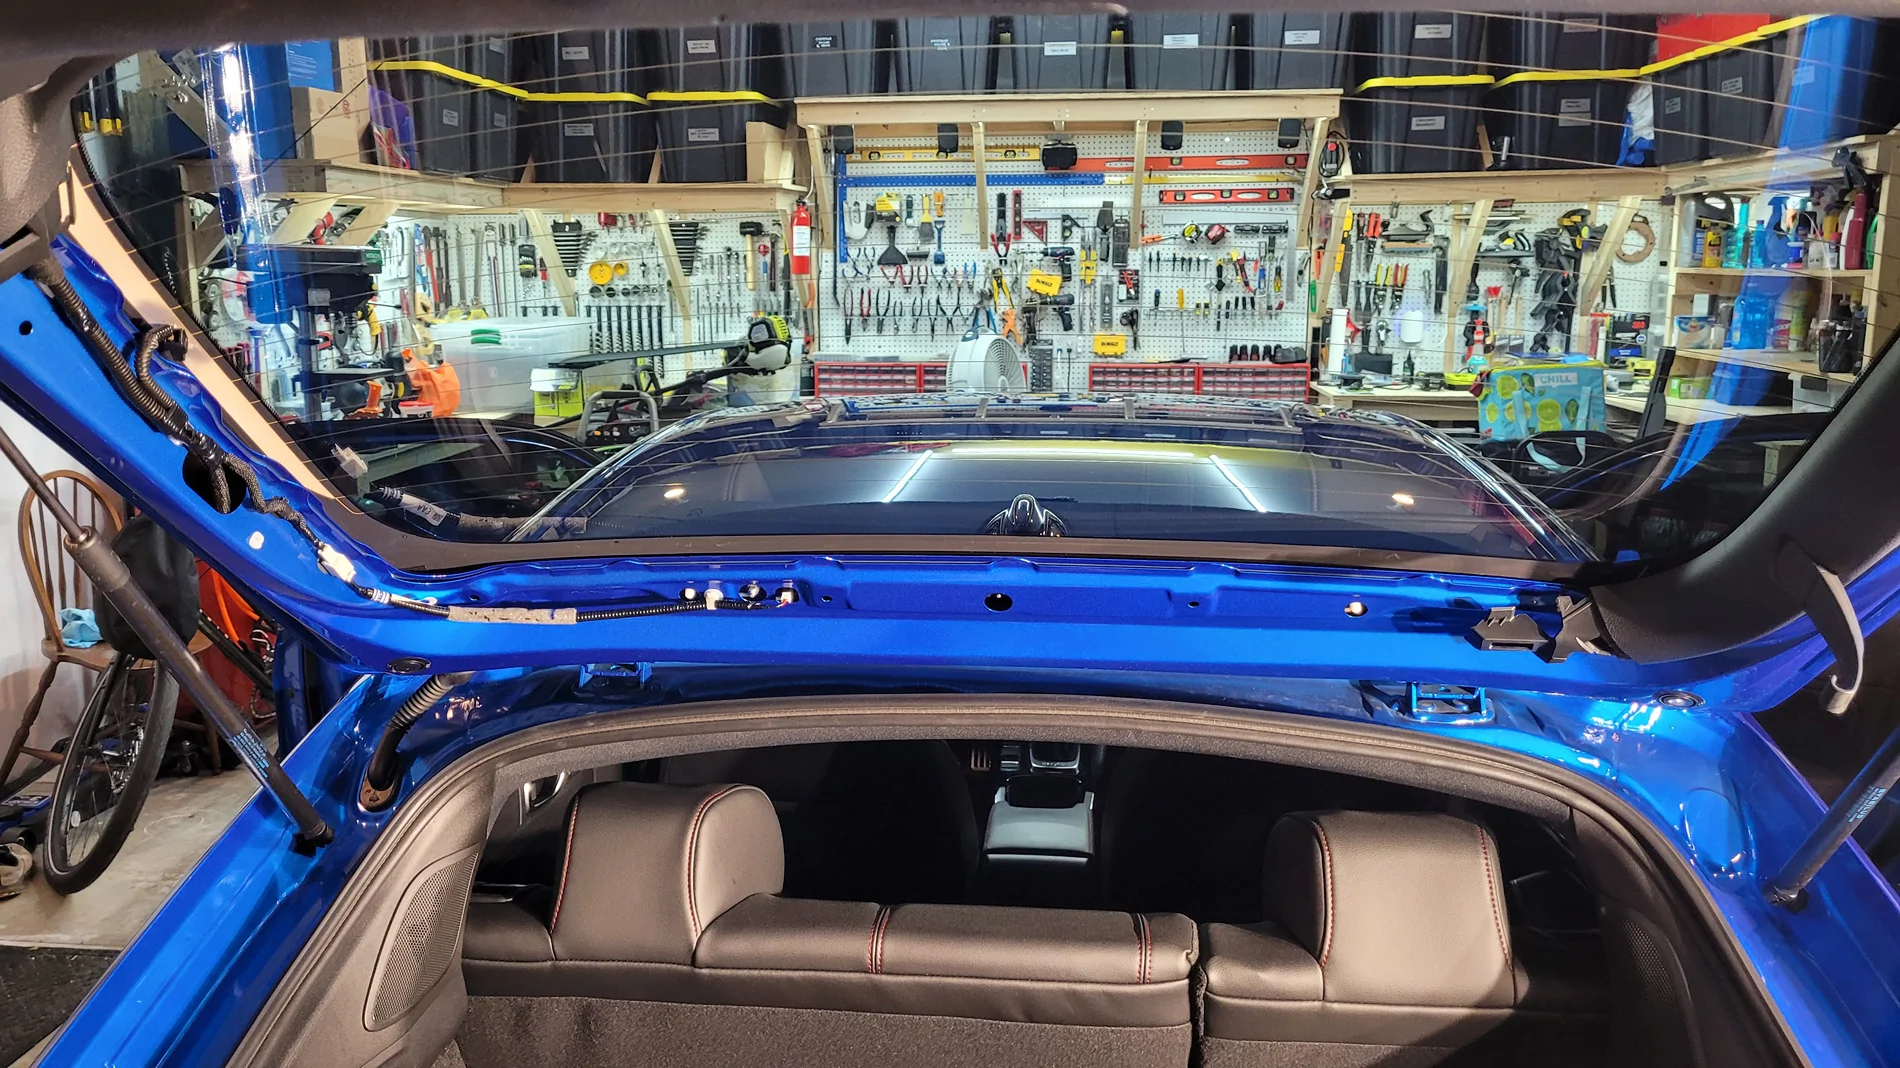
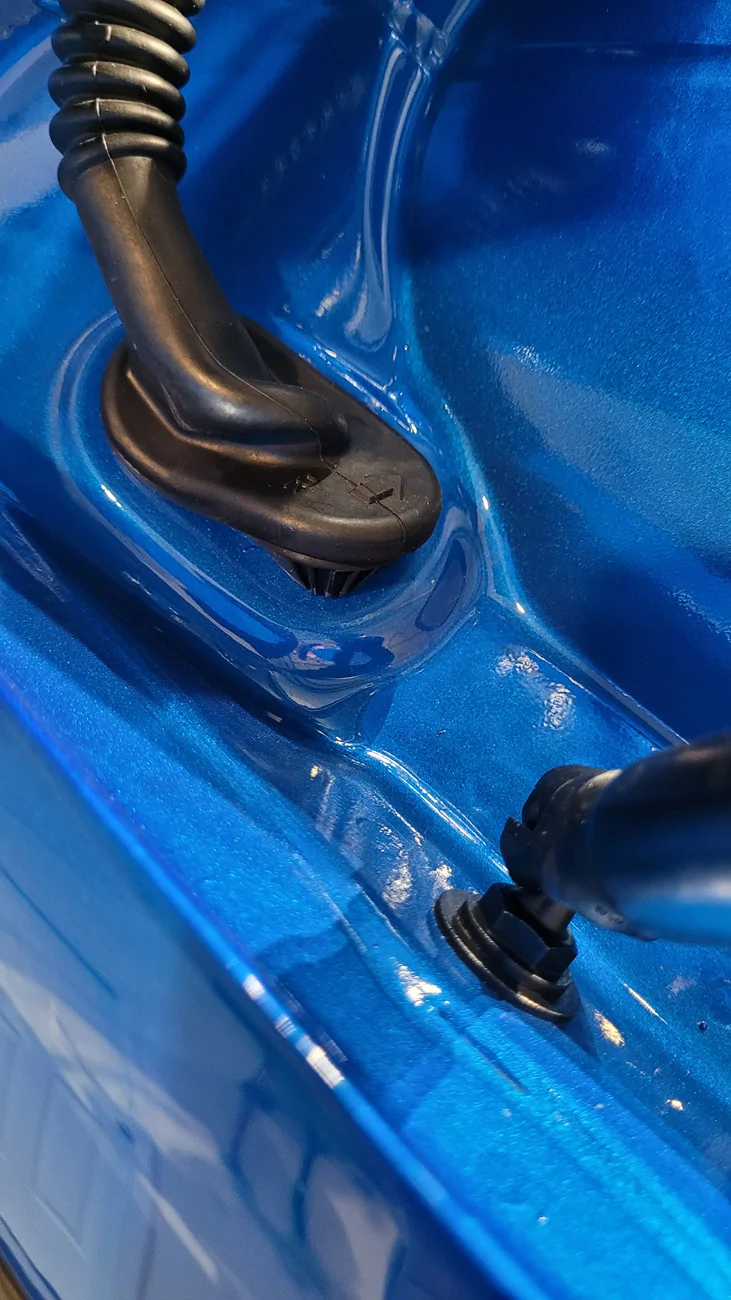
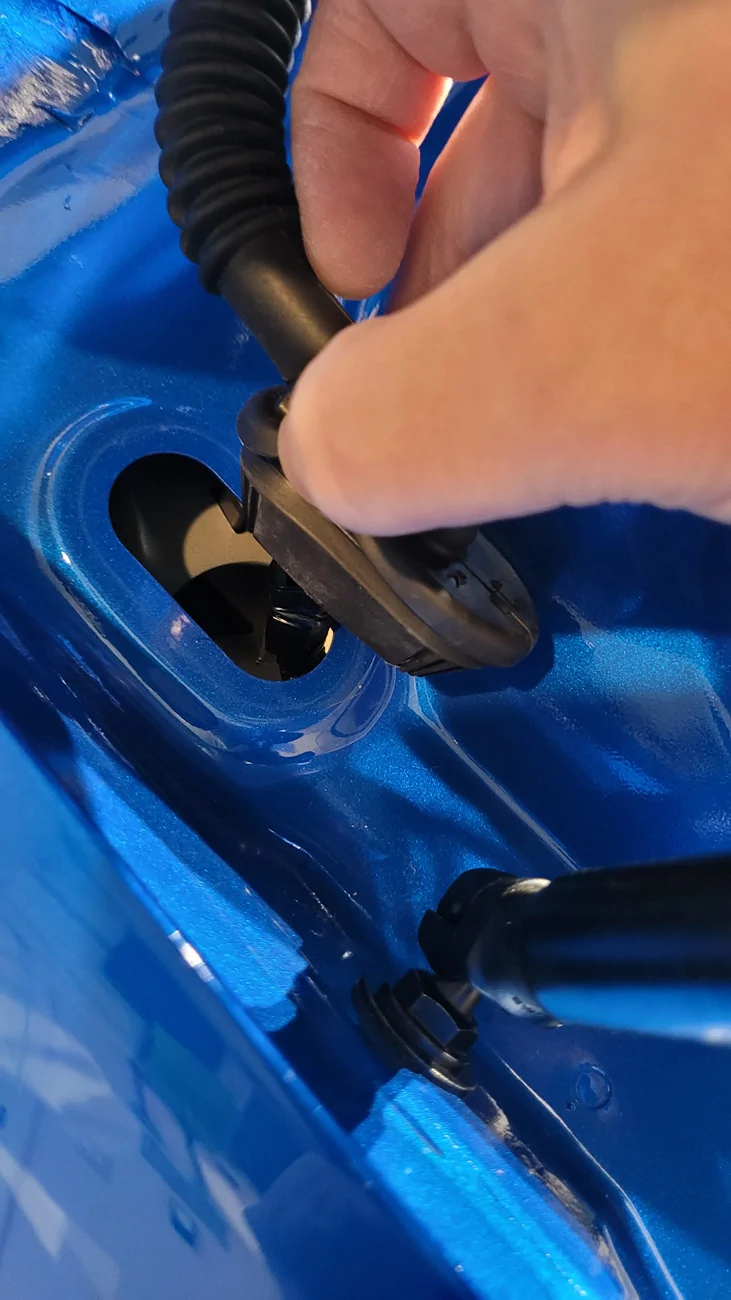
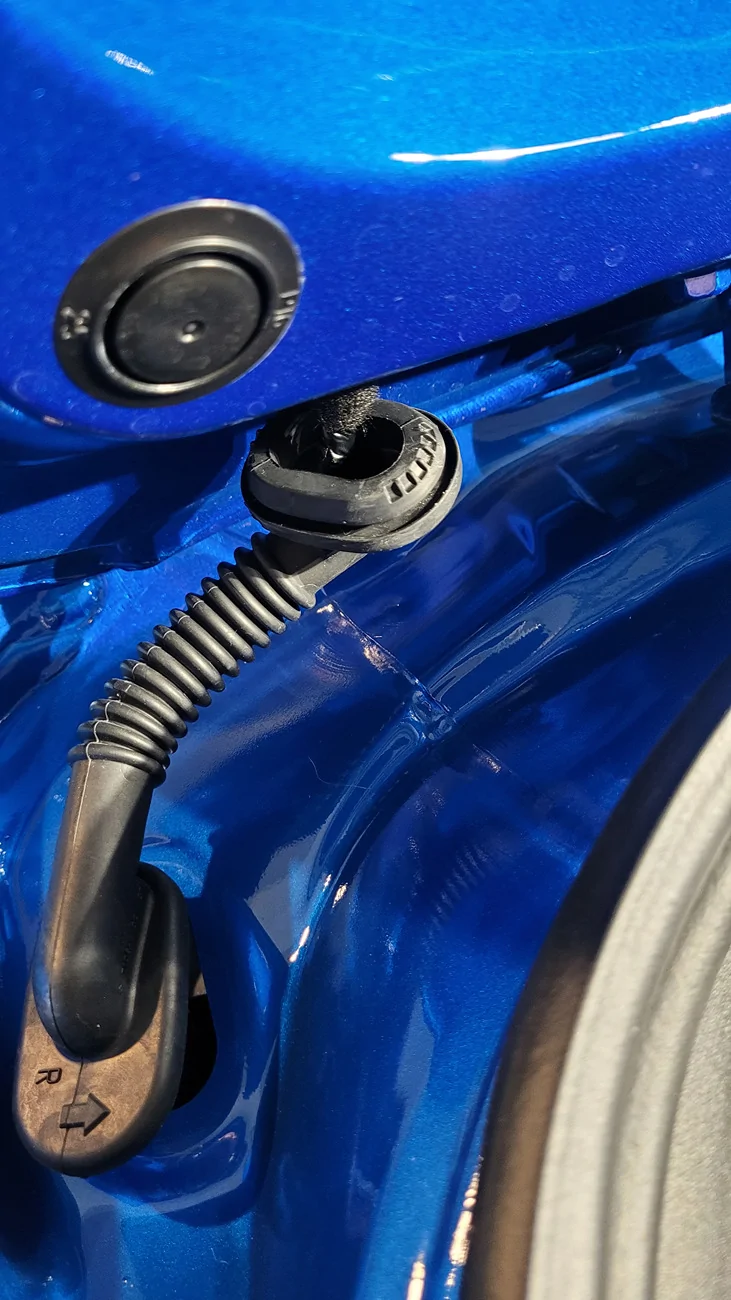
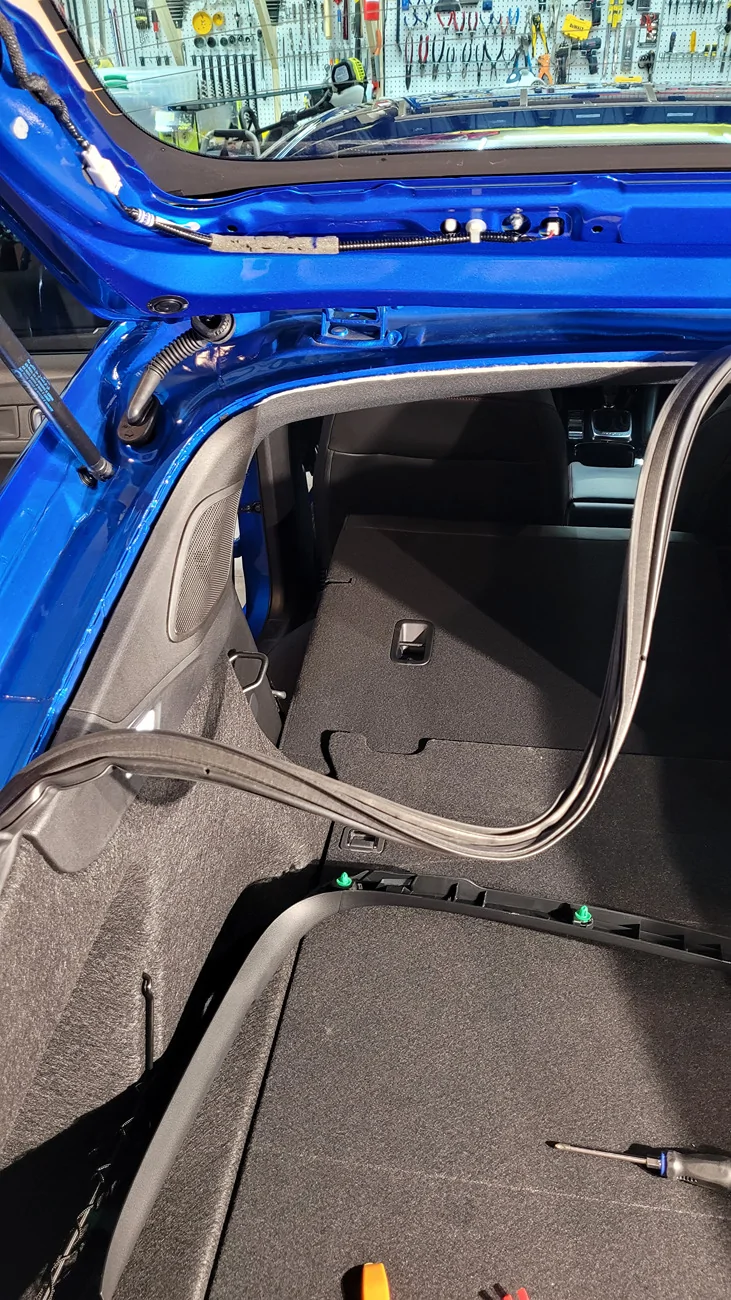
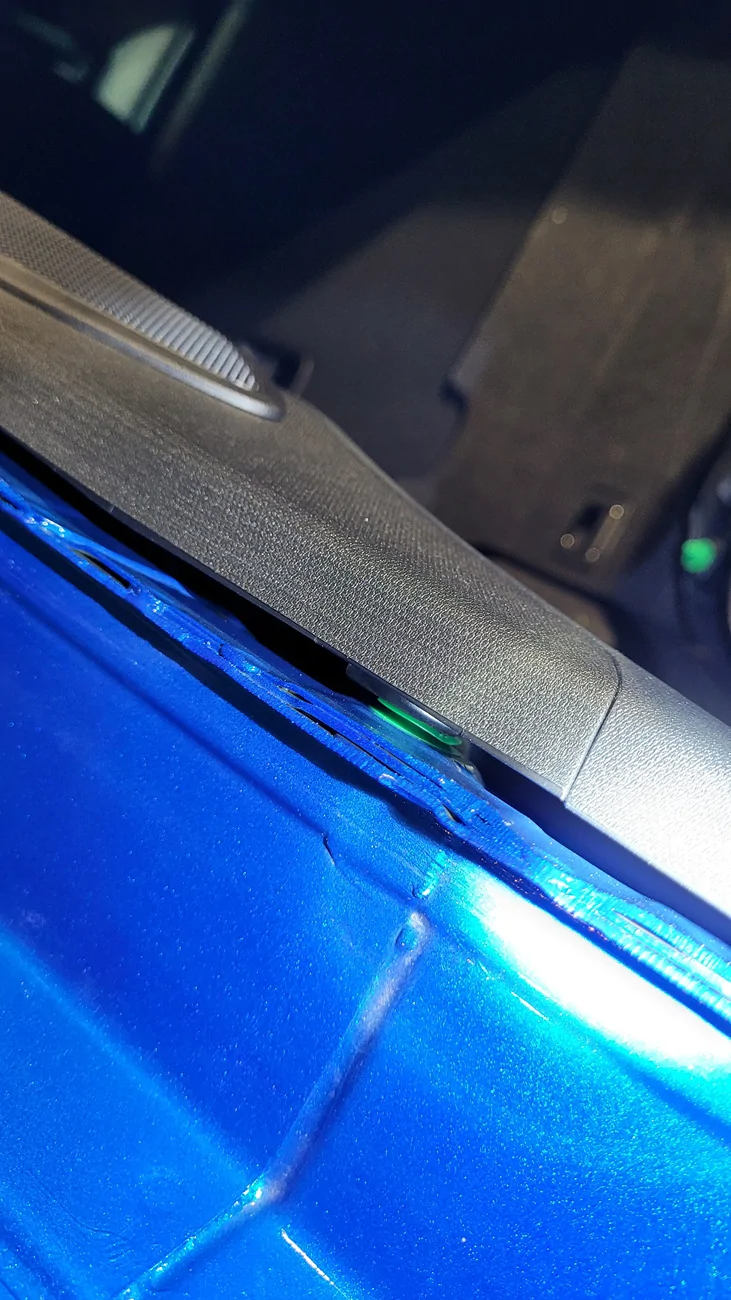
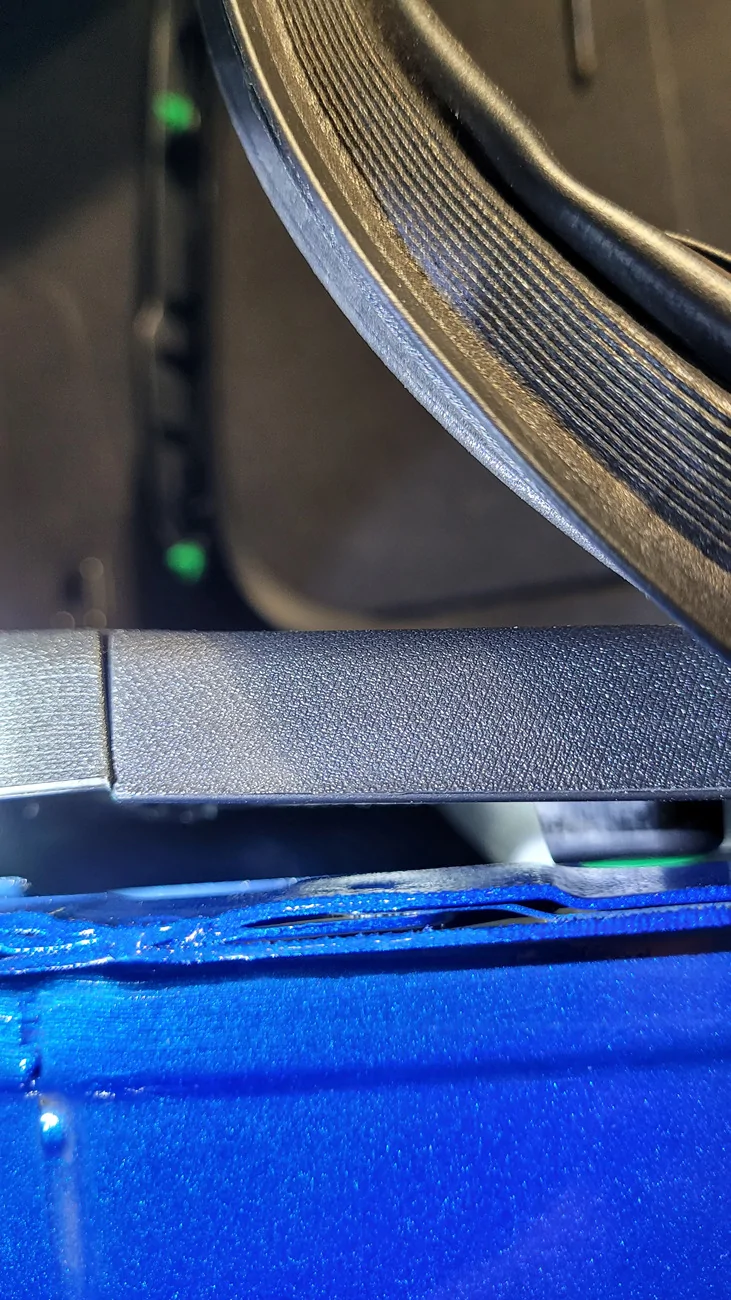
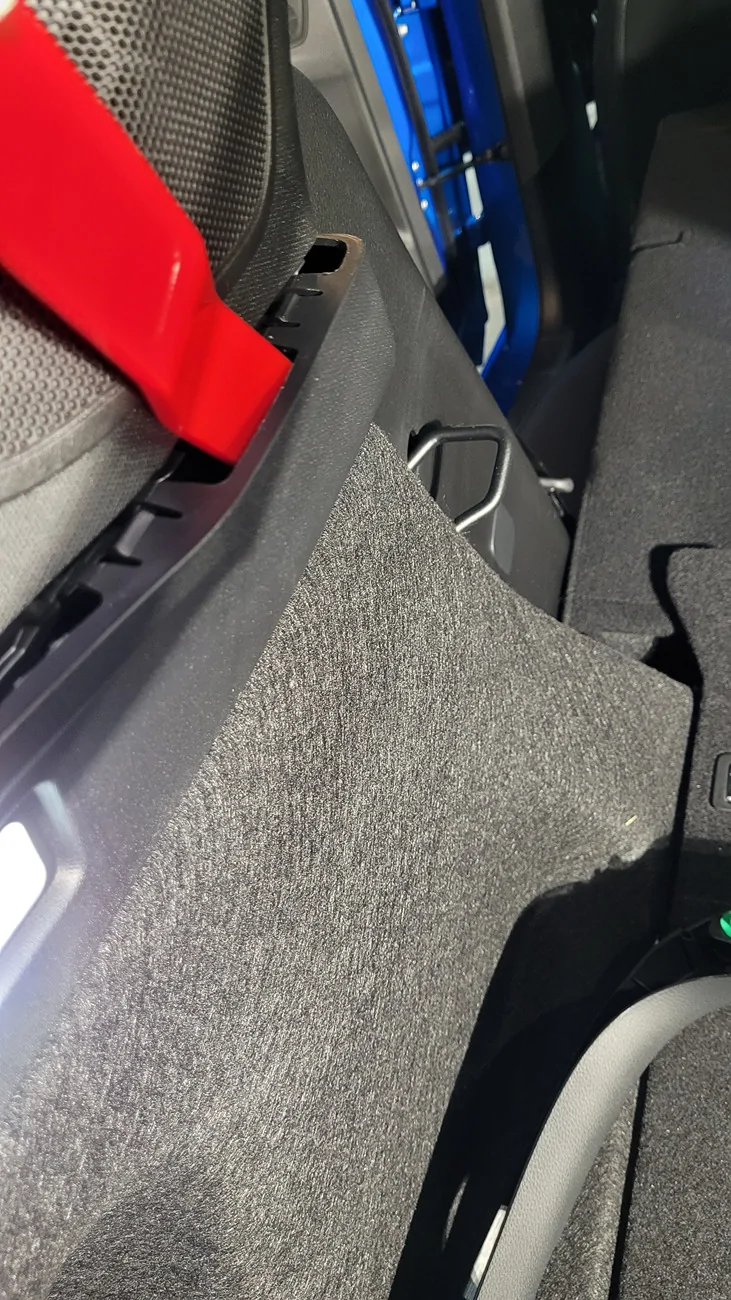
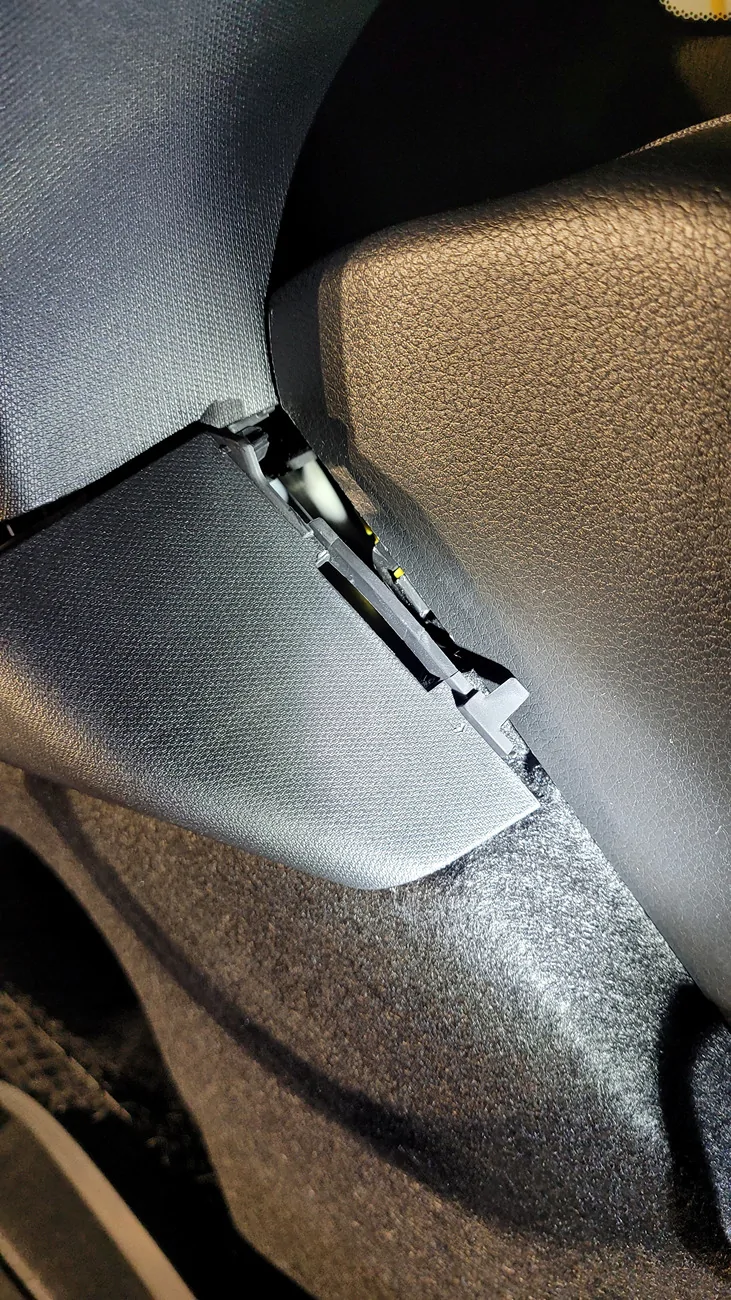
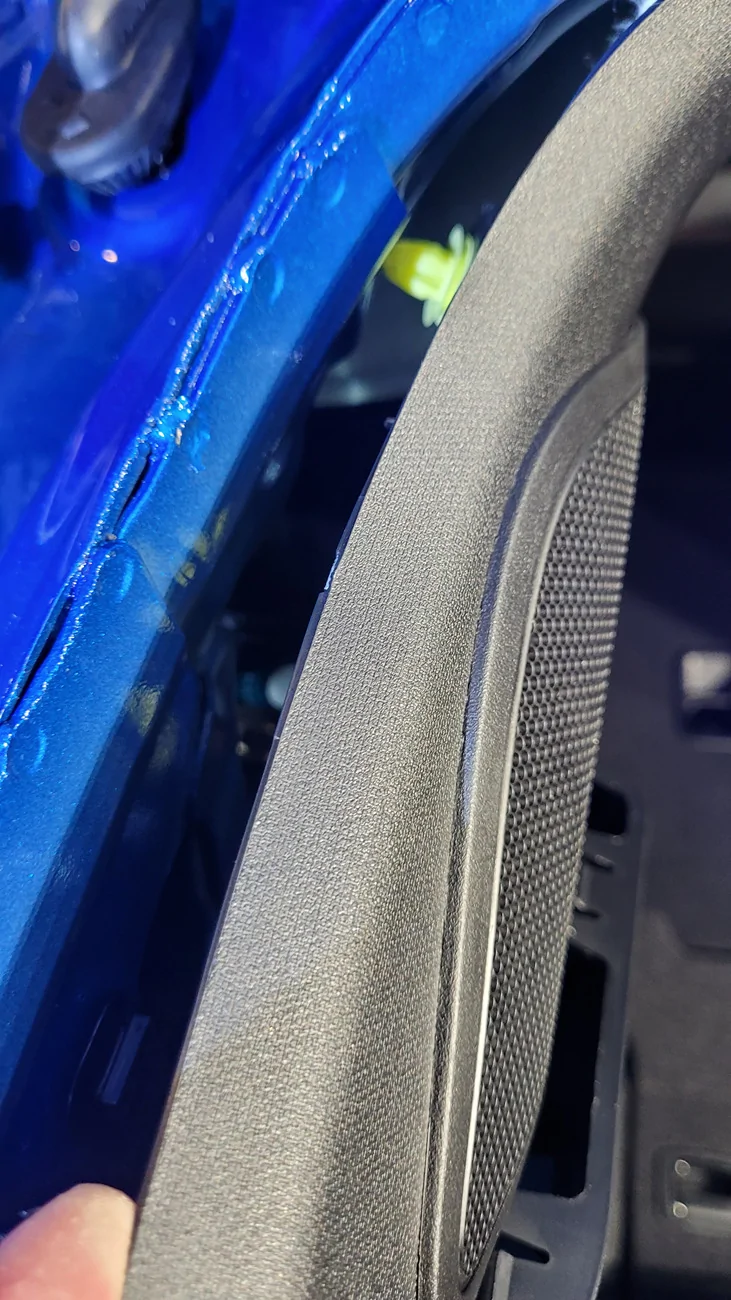
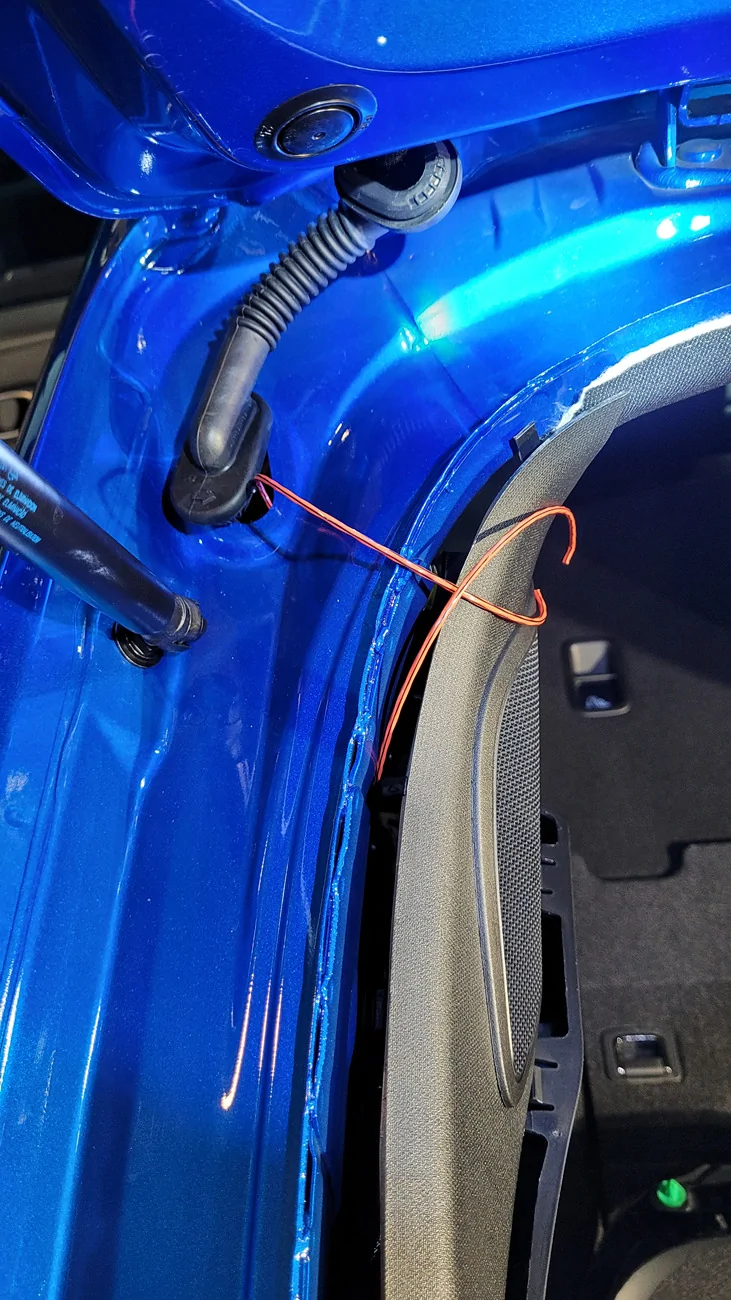
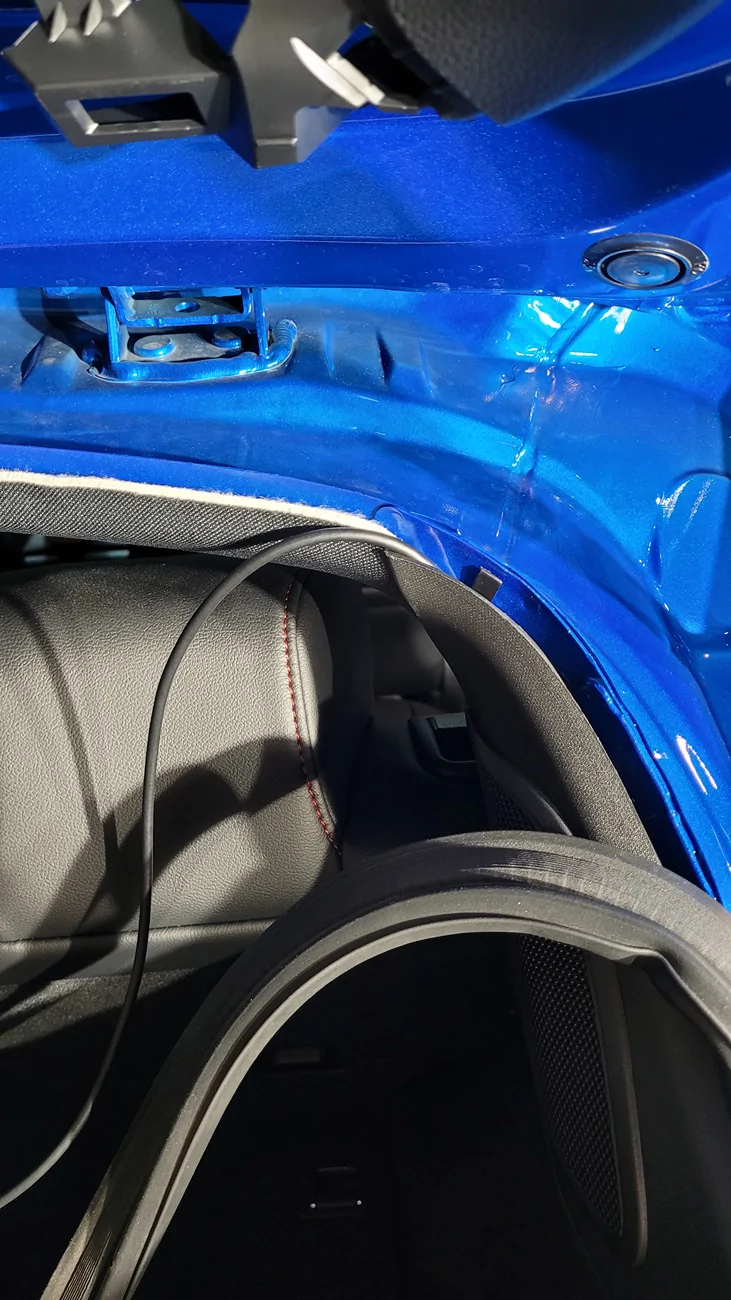
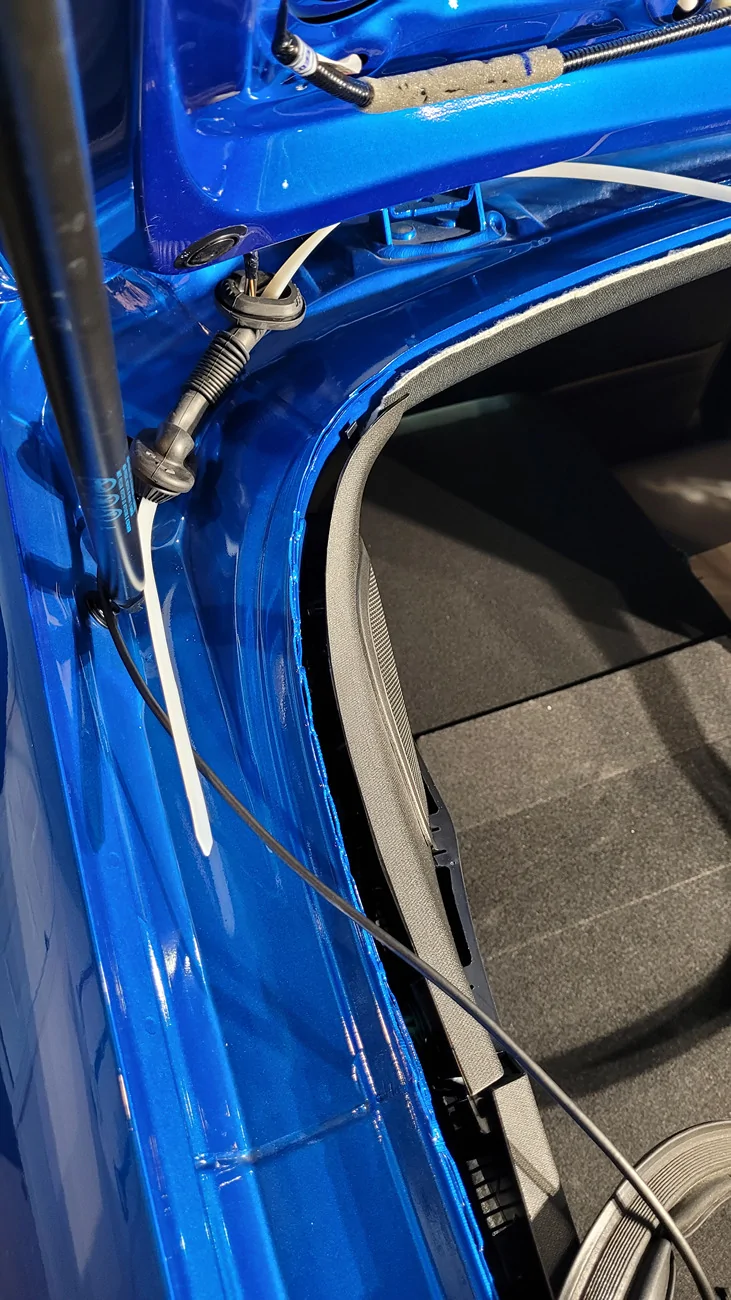
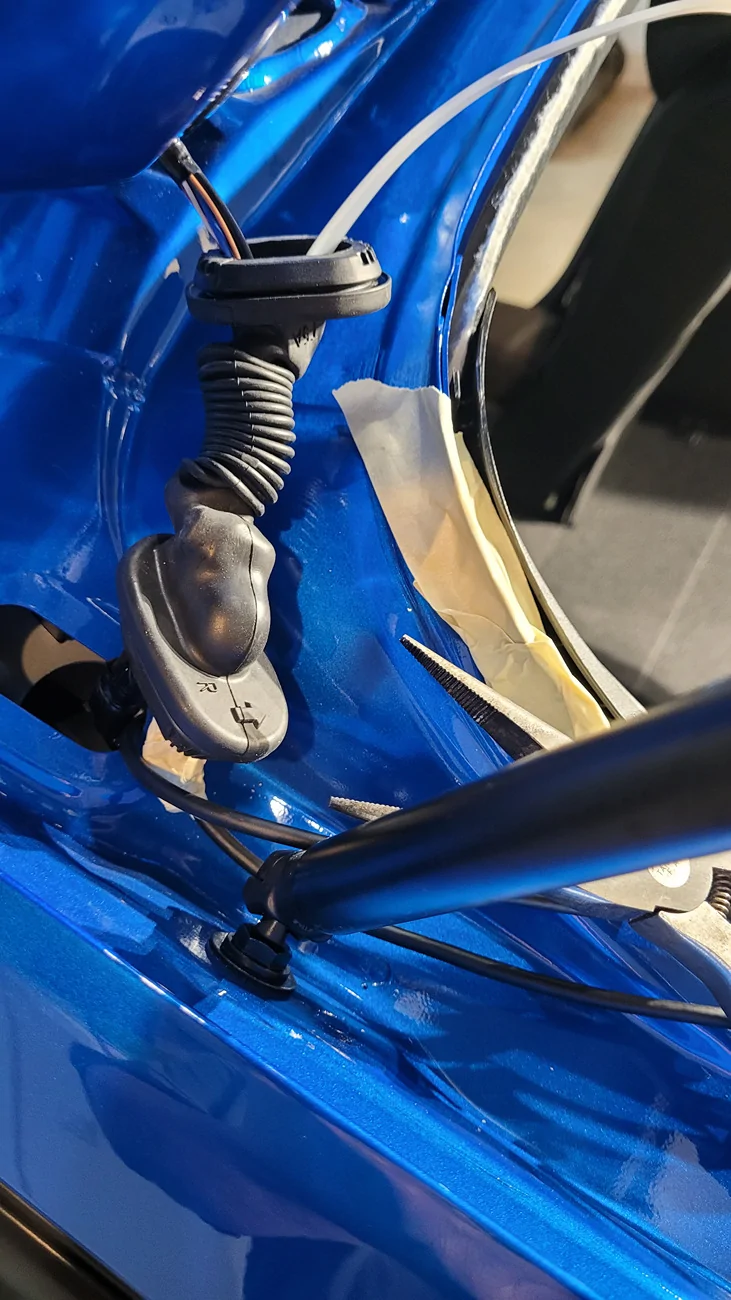
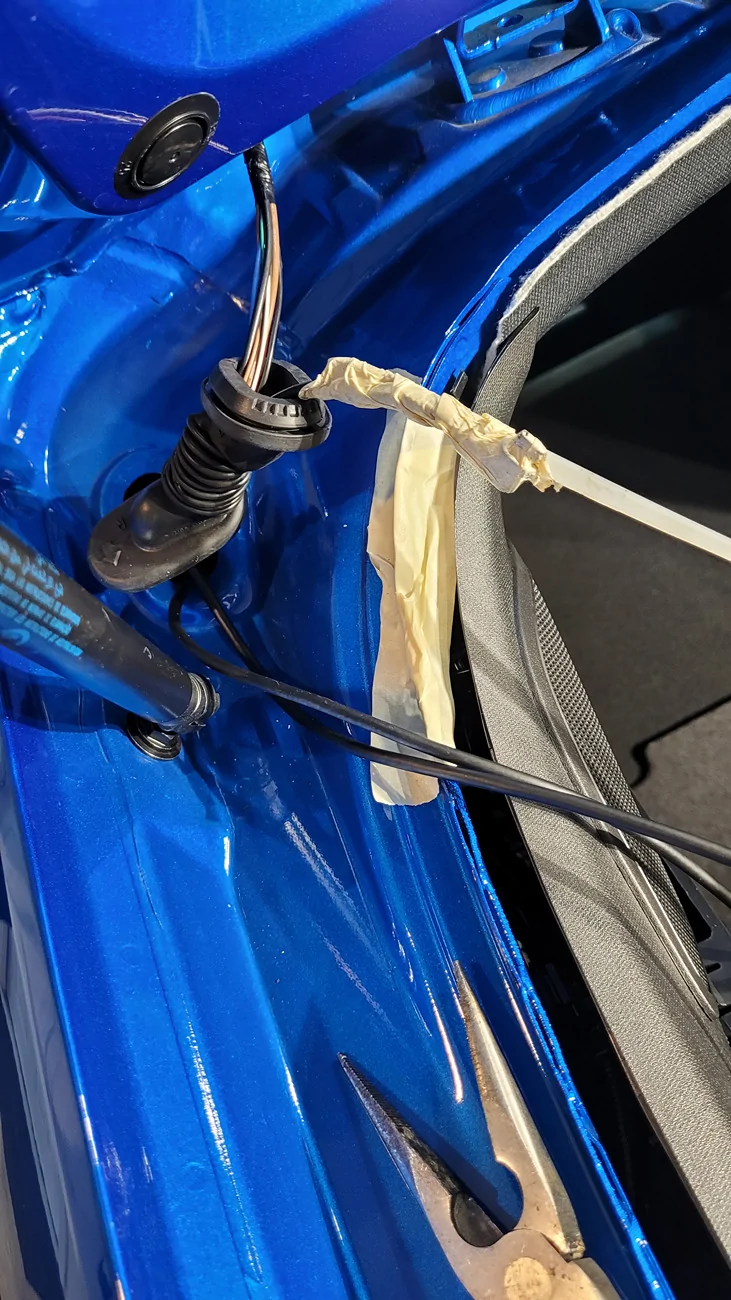
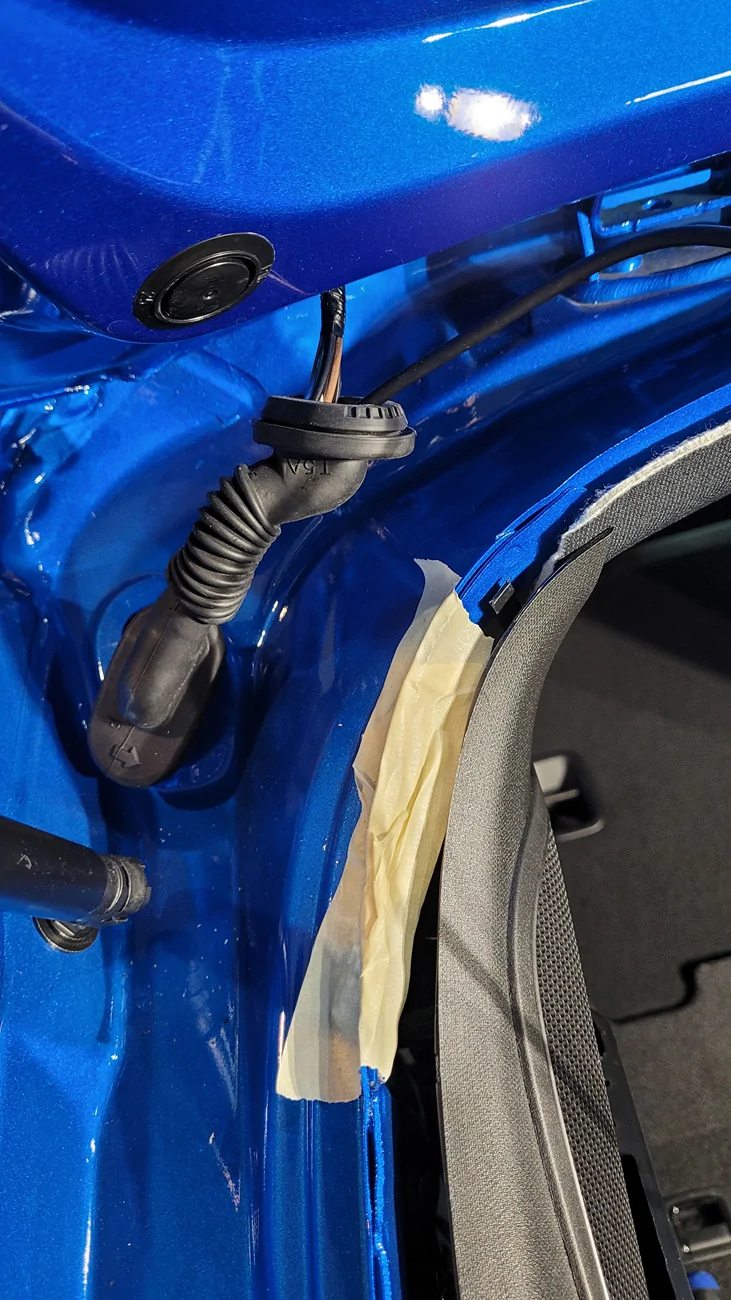
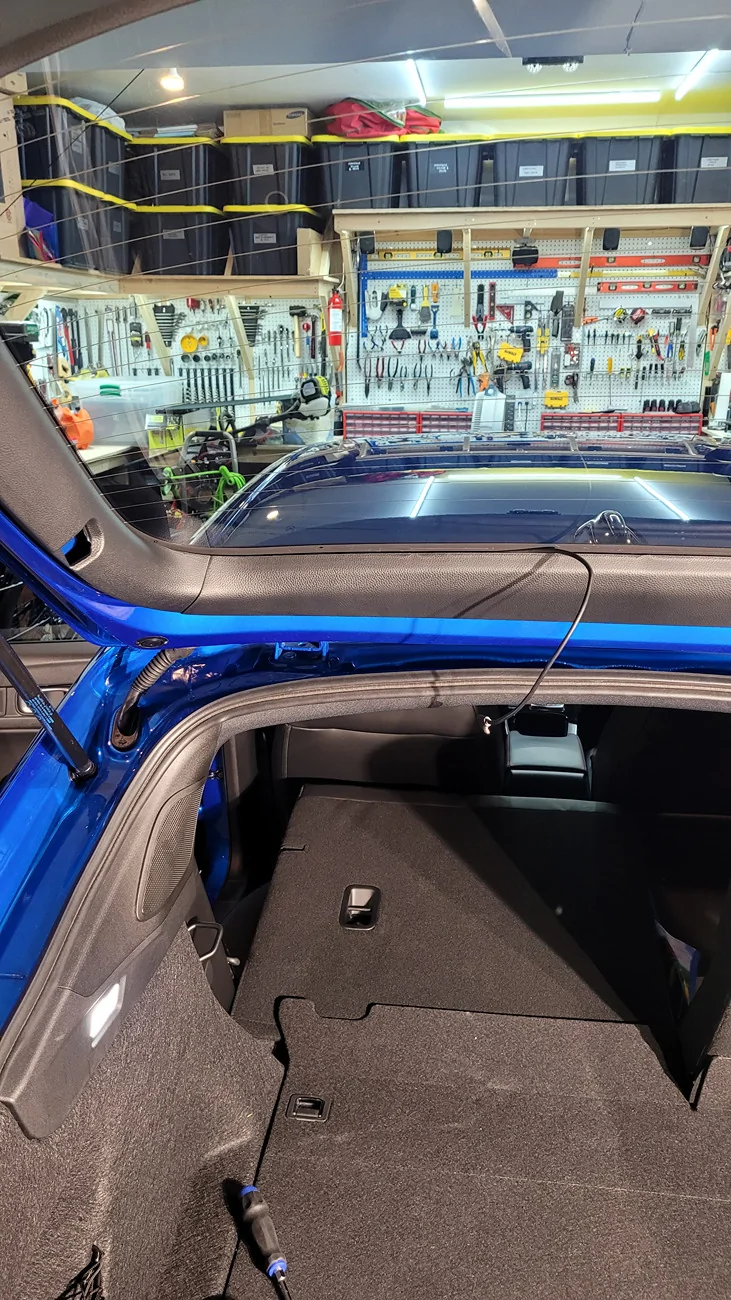
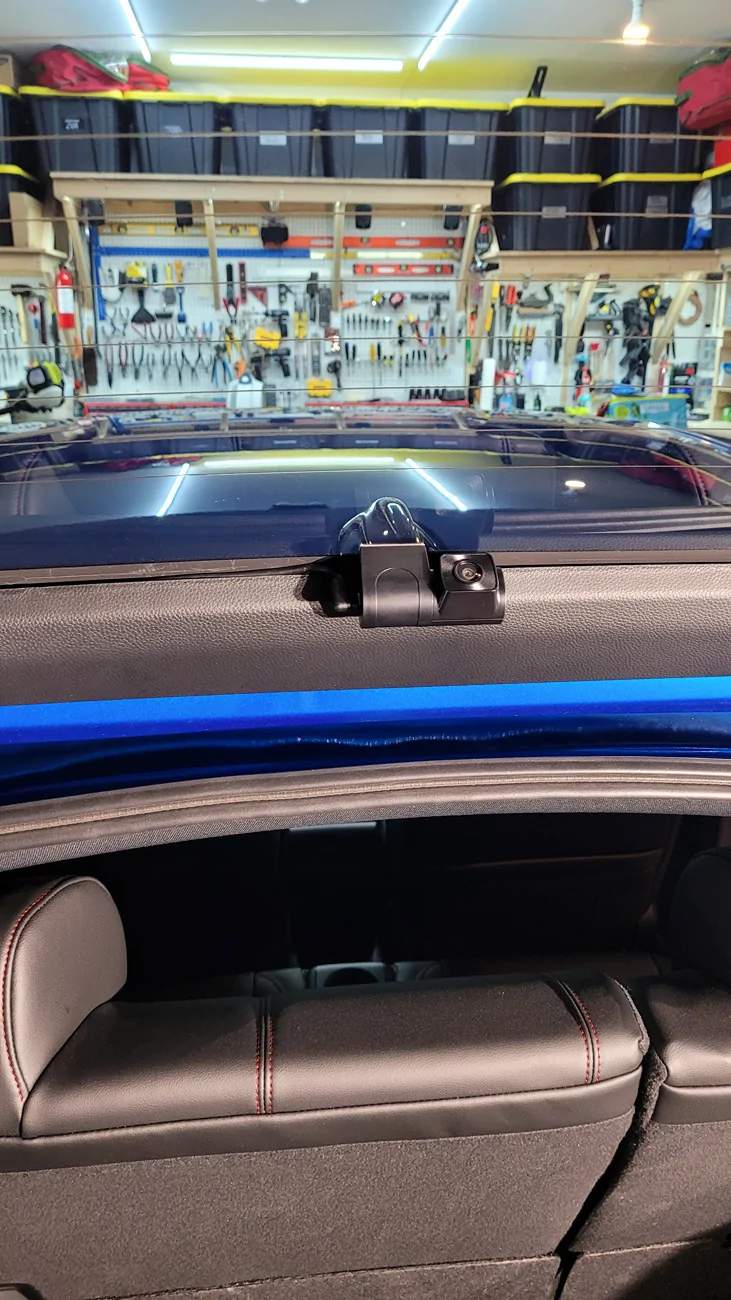
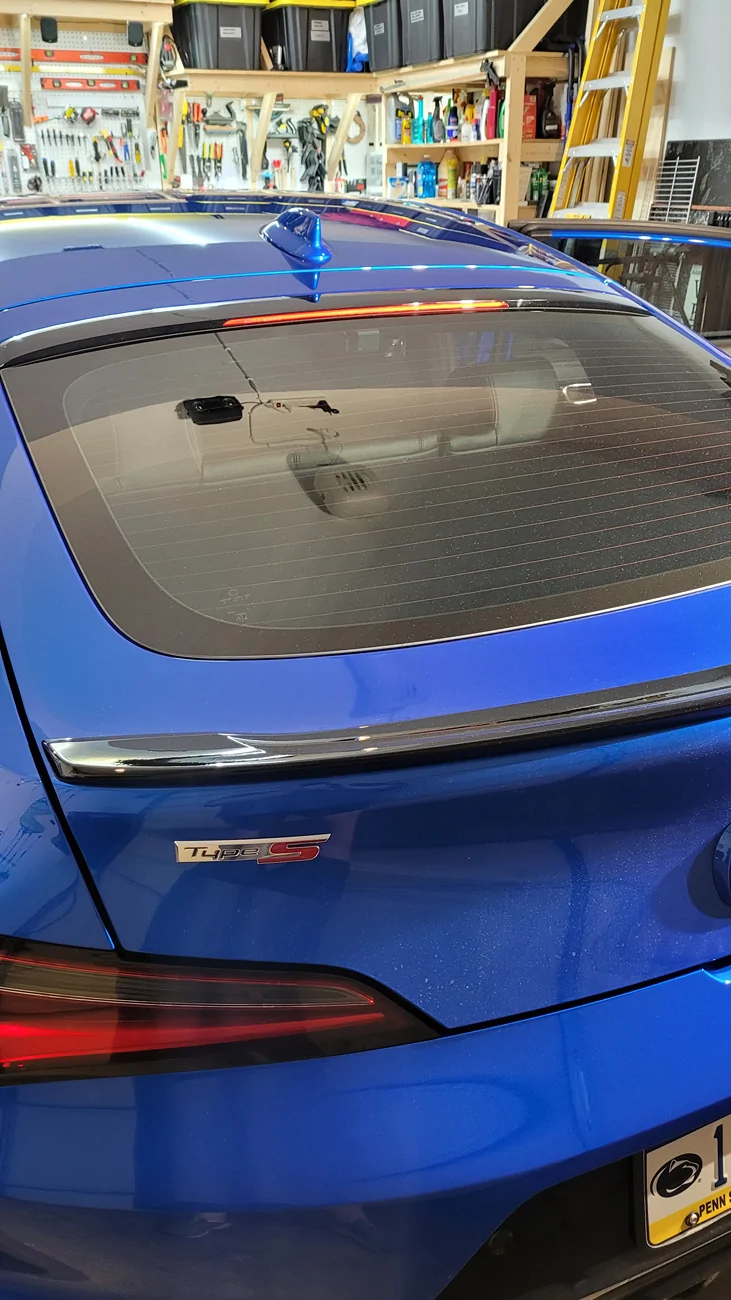
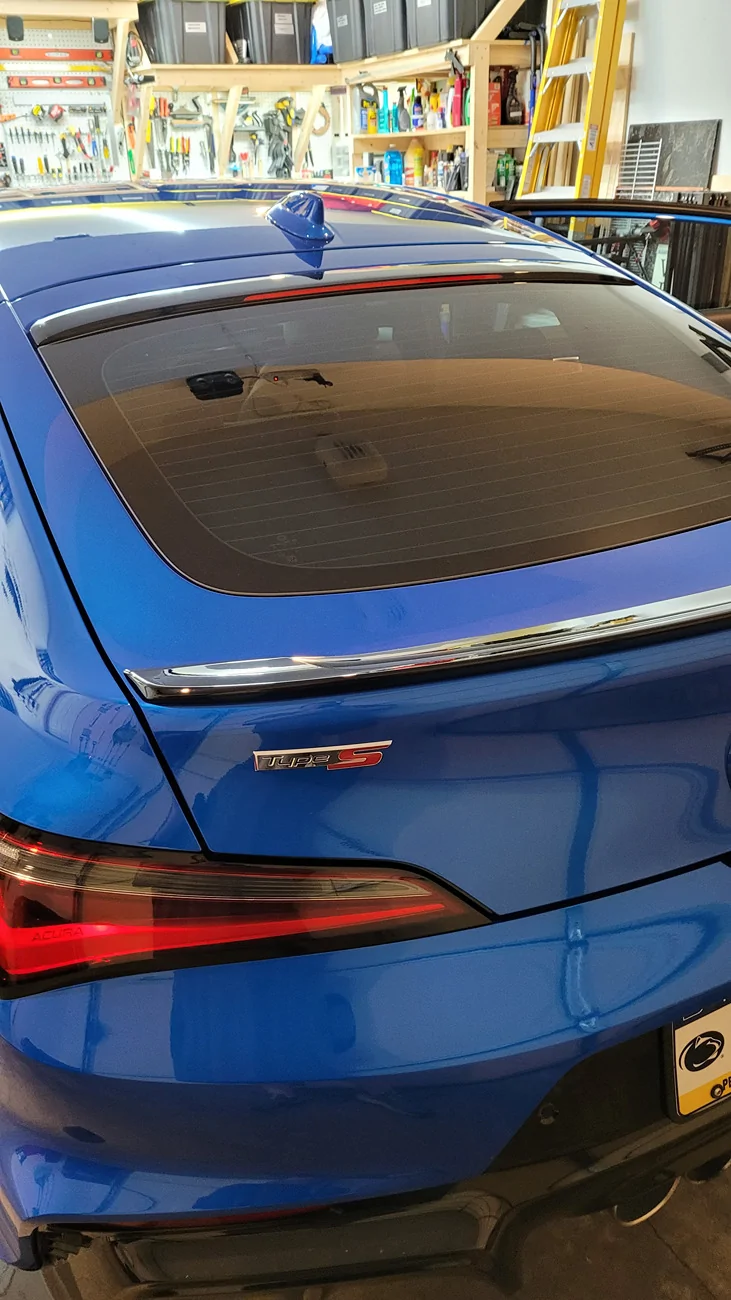
Been holding off on the install as well because I didnt want to mess with the trims/routing the wires but will give this a try this weekend. Thanks for the detailed guide!
Sponsored


cipher

Member
Joined
Mar 1, 2026
Threads
1
Messages
25
Reaction score
7
Location
PA, USA
Car(s)
'26 Acura ITS
Thank you for this guide! Even if it was a couple years ago, it's still very helpful.

I was dreading running the cable for my rear dashcam so much that I haven't bothered yet. I have a Rove R2-4K. I was just using the front dash cam right now, but after seeing your guide, I'm going to get the rear installed one of these weekends. I have tint on the rear window, so I'll most likely use the electrostatic film between the 3M molding tape and the tint.
 

cipher

Member
Joined
Mar 1, 2026
Threads
1
Messages
25
Reaction score
7
Location
PA, USA
Car(s)
'26 Acura ITS
I finally got around to installing of the rear camera for my ROVE R2-4K Dual PRO dash cam in my '26 ITS over Memorial Day weekend. This guide helped identify the best route for the rear hatch. Thanks!

I'm sharing photos of my install to help anyone else doing this. Start with the USB cable running from your dash cam on your front window, tuck it under the headliner along the top of the window. Then...

A-pillar trim pops out with trim tools, and weatherstripping easily pulls down:
Acura Integra Rear Dashcam Install on 23+ Integra (DE4/DE5) 20260524_141006


For safety, running the USB cable above the side curtain air bags, then out along the exterior edge of those air bags:
Acura Integra Rear Dashcam Install on 23+ Integra (DE4/DE5) 20260524_142100

Acura Integra Rear Dashcam Install on 23+ Integra (DE4/DE5) 20260524_142302


B-pillar has a small cover that pops out at the top. Remove it to get some visibility on where you want to run your cable. Pop out the B-pillar trim and run it along the top. As an alternative, I ran it through that plastic trim housing to avoid popping off the trim, which is fine if you never need to remove this piece of trim:
Acura Integra Rear Dashcam Install on 23+ Integra (DE4/DE5) 20260524_142858

Acura Integra Rear Dashcam Install on 23+ Integra (DE4/DE5) 20260524_142913(0)


For the alternate route, I used trimmer string to fish the cable through this location:
Acura Integra Rear Dashcam Install on 23+ Integra (DE4/DE5) 20260524_143422


Pull down the weatherstripping for the rear door and route it along here similar to the front doors. I didn't really see the airbags here, so I kept them close to where the weatherstripping is as a precaution. Airbags should pop off trim or pop open the headliner when they deploy, not weatherstripping.

For the C-pillar it's easiest to just tuck the USB cable into the trim at the top where it meets the headliner. You can barely see my USB cable sticking on the right side of that trim:
Acura Integra Rear Dashcam Install on 23+ Integra (DE4/DE5) 20260524_145608


Once you're at this point, stop and prepare the trunk area.

Remove the left hook for the trunk privacy screen by popping off its cover and unscrewing the one Phillips screw. The OP has a photo of this (first photo in the thread).

Then remove the weatherstripping and pop open the trim in the trunk. Top left and top center pieces of trim just be removed completely. Popping them out:
Acura Integra Rear Dashcam Install on 23+ Integra (DE4/DE5) 20260524_130536

Acura Integra Rear Dashcam Install on 23+ Integra (DE4/DE5) 20260524_130612

Acura Integra Rear Dashcam Install on 23+ Integra (DE4/DE5) 20260524_130809


Left trim completely removed:
Acura Integra Rear Dashcam Install on 23+ Integra (DE4/DE5) 20260524_130837


All of the push pins/retainers are easy to spot as they're neon green:
Acura Integra Rear Dashcam Install on 23+ Integra (DE4/DE5) 20260524_130842

Acura Integra Rear Dashcam Install on 23+ Integra (DE4/DE5) 20260524_130851


Where the left side trim meets the center, there's a clip that holds the existing wiring harness. You'll need to remove that cable from the side closest to you. Alternatively you can separate the left and center trim panels and it will be easier to remove.
Acura Integra Rear Dashcam Install on 23+ Integra (DE4/DE5) 20260524_130928


Removed:
Acura Integra Rear Dashcam Install on 23+ Integra (DE4/DE5) 20260524_130955

Acura Integra Rear Dashcam Install on 23+ Integra (DE4/DE5) 20260524_131001


Acura Integra Rear Dashcam Install on 23+ Integra (DE4/DE5) 20260524_130955
 
Last edited:

cipher

Member
Joined
Mar 1, 2026
Threads
1
Messages
25
Reaction score
7
Location
PA, USA
Car(s)
'26 Acura ITS
Left and right trim removed at top of hatch:
Acura Integra Rear Dashcam Install on 23+ Integra (DE4/DE5) 20260524_131056


Pull both ends of the rubber wiring harness boot/grommet from the metal frames:
Acura Integra Rear Dashcam Install on 23+ Integra (DE4/DE5) 20260524_131146

Acura Integra Rear Dashcam Install on 23+ Integra (DE4/DE5) 20260524_131222

Acura Integra Rear Dashcam Install on 23+ Integra (DE4/DE5) 20260524_131246


Pull off the weatherstripping from the top, left side (to be able to get to the trim below it with the speaker mount), and a little on the top-right side:
Acura Integra Rear Dashcam Install on 23+ Integra (DE4/DE5) 20260524_132136


Pop out the top of the trim around the speaker mount. We don't need to remove the entire trim piece, just the top:
Acura Integra Rear Dashcam Install on 23+ Integra (DE4/DE5) 20260524_132553

Acura Integra Rear Dashcam Install on 23+ Integra (DE4/DE5) 20260524_132627


You can remove the trim with the a trunk light from the trim with the speaker mount to help give a little more room to work:
Acura Integra Rear Dashcam Install on 23+ Integra (DE4/DE5) 20260524_132833


From the rear seat area, pull down the driver's side section of the 60/40 split rear seats to get easier access. Then pop apart this portion of the trim: in the corner to make things easier to work on:
Acura Integra Rear Dashcam Install on 23+ Integra (DE4/DE5) 20260524_133145


Top of trim with speaker mount that I popped out:
Acura Integra Rear Dashcam Install on 23+ Integra (DE4/DE5) 20260524_133318


You can use a wire fish tape, trimmer string, zip tie, or just about anything to help you route your USB cable. Use masking tape to hold the USB cable to one end. I like to fold over the last edge of masking tape so that it's easier to remove later. Trimmer string to fish the cable from the edge of the trim to the rubber boot/grommet hole:
Acura Integra Rear Dashcam Install on 23+ Integra (DE4/DE5) 20260524_133749


Picking up from where we left off with the C-pillar routing of the USB cable:
Acura Integra Rear Dashcam Install on 23+ Integra (DE4/DE5) 20260524_145824


We'll eventually run the USB cable under the weatherstripping along the top of the trunk opening. For now, we can start running the end of it through the rubber wiring harness boot/grommet. I used a large zip tie. I had several that are 2' long and quite thick so that they handle a lot of abuse. Getting a USB cable through this boot isn't so bad if your cable end is straight, but the one included with my Rove rear camera was 90 degree.

It was a brutal task that probably took the most time to complete. I had to use a pair of pliers to help pull the rubber boot over the end of my USB cable. Not fun, but still doable since this boot is very soft and pliable. Just make sure you don't tear any holes in it. Mine survived.

Acura Integra Rear Dashcam Install on 23+ Integra (DE4/DE5) 20260524_151444


You might want to tape up the exposed, rough metal edges of the body with a couple layers of masking tape (duct tape works, but can pull up older paint) to prevent accidentally cutting your cable or your hands in this area:
Acura Integra Rear Dashcam Install on 23+ Integra (DE4/DE5) 20260524_152336

Acura Integra Rear Dashcam Install on 23+ Integra (DE4/DE5) 20260524_154715

Acura Integra Rear Dashcam Install on 23+ Integra (DE4/DE5) 20260524_154829


Fish your USB cable up from the rubber boot through the opening in the hatch frame:
Acura Integra Rear Dashcam Install on 23+ Integra (DE4/DE5) 20260524_155632


I used this area in the hatch frame to store the excess length of my USB cable. Approximate how much you'll need to reach the center-top of the rear window with a little extra slack, then wrap up the rest of the cable to store in the frame here. I wrapped it in rubber foam weatherstripping to keep it from moving around or rattling:
Acura Integra Rear Dashcam Install on 23+ Integra (DE4/DE5) 20260524_162818(0)


I then used rubber tape to wrap the area of the cable that contacts this hole in the hatch frame since it's a metal edge. I then zip-tied over top of the rubber tape to keep it in place. You could use electrical tape or anything else wrapped around the cable to protect the cable from rubbing against the metal edge.
Acura Integra Rear Dashcam Install on 23+ Integra (DE4/DE5) 20260524_163341(0)


Route the existing wiring harness back through the clip of the trim, then route your USB cable along the top of the trim and re-attach the trim. You should have a little extra slack for your cable to mount the rear camera at the top-center of your rear window.
Acura Integra Rear Dashcam Install on 23+ Integra (DE4/DE5) 20260524_163615


Mount you rear camera. I tried using the clear static sheet and then mounting the camera on top of that with 3M molding tape, but I didn't like the results. So I just used 3M molding tape directly against my tint. It seems to work well:
Acura Integra Rear Dashcam Install on 23+ Integra (DE4/DE5) 20260524_165305


I use 35% tint for rear and side windows. With a very bright shop lamp shining right at it, you can see the rear camera, but just barely:
Acura Integra Rear Dashcam Install on 23+ Integra (DE4/DE5) 20260524_165437


Without the shop lamp, you can't see it at all:
Acura Integra Rear Dashcam Install on 23+ Integra (DE4/DE5) 20260524_165452(0)

Acura Integra Rear Dashcam Install on 23+ Integra (DE4/DE5) 20260524_165458(0)


It doesn't take up much room when looking out the rear view mirror:
Acura Integra Rear Dashcam Install on 23+ Integra (DE4/DE5) 20260524_170746(0)


I used a Phillips screwdriver, pliers, zip ties, masking tape, trimmer string, and most importantly some trim tools:
Acura Integra Rear Dashcam Install on 23+ Integra (DE4/DE5) 20260524_130253


Also, I disabled the trunk compartment LEDs by manually moving the hatch lock on top with a standard screw driver. No need to put additional drain on your battery while you work. It's a shame the Integra doesn't have switches at the LEDs to toggle them on/off.

Just make sure you put something soft over the latch on the bottom so that you don't forget to reset it before you close the hatch.
Acura Integra Rear Dashcam Install on 23+ Integra (DE4/DE5) 20260524_131306

Acura Integra Rear Dashcam Install on 23+ Integra (DE4/DE5) 20260524_131356


Just press the button on the hatch to reset it afterwards.

Acura Integra Rear Dashcam Install on 23+ Integra (DE4/DE5) 20260524_131416
 
Last edited:

wdrx02

Batman
Joined
Nov 27, 2018
Threads
12
Messages
170
Reaction score
12
Location
USA
Car(s)
Integra Aspec w/Tech CVT
This is a great write up. However, I did it another way, I routed the wires in the door seals and the rear by just simply pushing the wired into the pillar/foam - It may not as be as effort or sleek like this but it had the same result for me and took me up to 15-20 mins.

Haven't had any issues and wires are not seen or at risk of damage.
Also, I been using double sided tape but depending how hot it gets... it can unglue - this is my struggle here. When it goes unglued, I had to get some more to reapply.
It is a simply fix but it can be annoying esp if you have rear camera view only on.

I ended up making my own clip so it reinforces it from falling if too hot.
 
Last edited:

cipher

Member
Joined
Mar 1, 2026
Threads
1
Messages
25
Reaction score
7
Location
PA, USA
Car(s)
'26 Acura ITS
Rear dash cam video:

I might move the camera up one notch since the view is just a little low.
Sponsored


Top